Work with Entity Framework CodeFirst migrations
Published 10 February 2016
Experimental feature
Please note that SQL Change Automation's integration with Entity Framework CodeFirst is evolving and may not be suitable for production use. We welcome your feedback on how well, or otherwise, this works for you and your team.
Entity Framework (EF) offers a great way of modelling and deploying database changes that aligns well with a developer's workflow. Migrations can be written in a .NET language such as C#, making for a more natural development experience than initiating changes directly against a database. However, if you need to source control other objects in your database (such as views and stored procedures) and deploy them alongside your schema changes, things can quickly get complicated.
This is where switching to the T-SQL based migration approach of SQL Change Automation can help. This tutorial shows you how to do this, while still allowing you to continue using EF CodeFirst to model your database schema.
Download the sample solution (C#): ContosoUniversity.PlusSQLChangeAutomation.zip
Adapting an existing Entity Framework project to a T-SQL migrations-based one
To bring a T-SQL migrations-based approach with SQL Change Automation to an existing Entity Framework project, let’s look at a quick example. We’ll use Microsoft’s own sample project for Entity Framework Code First (Contoso University), as shown below:

After installing SQL Change Automation and opening the sample solution in Visual Studio, click File… New Project, and within the Templates… Other Languages… SQL Server node, select SQL Change Automation Project.
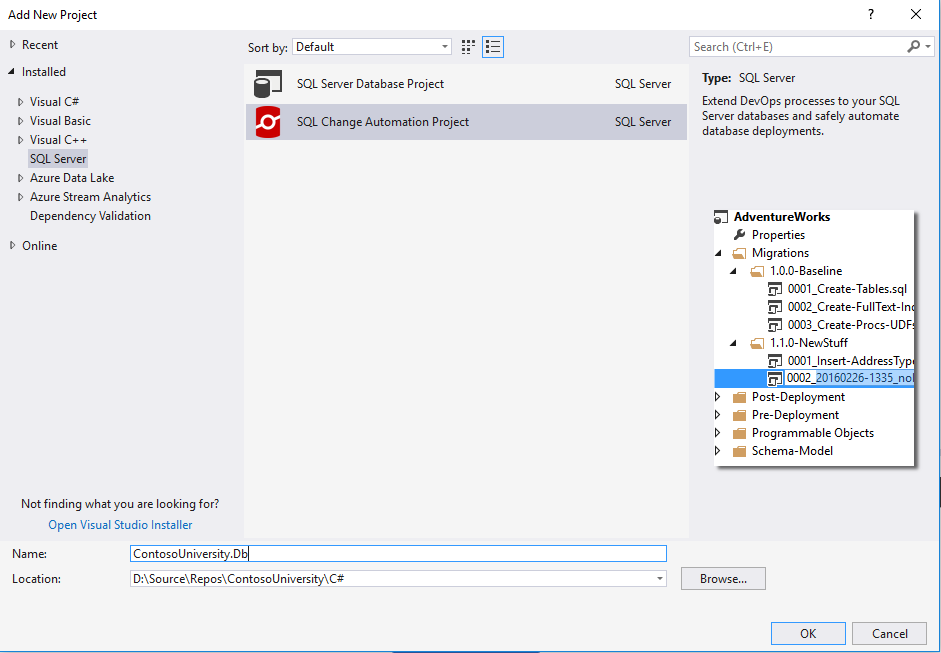
Give the project the name ContosoUniversity.Db. This will create an empty SQL Change Automation project, and bring up the getting started wizard.
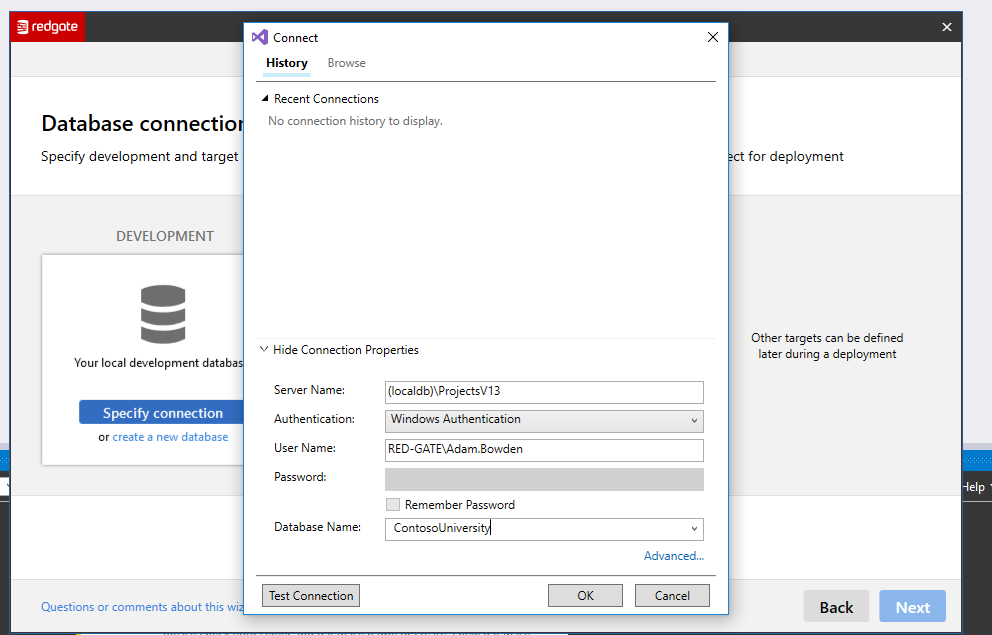
We want to point our new project to the same database as the Entity Framework-enabled project, so set the development database to be "ContosoUniversity" on (localdb)\ProjectsV13.
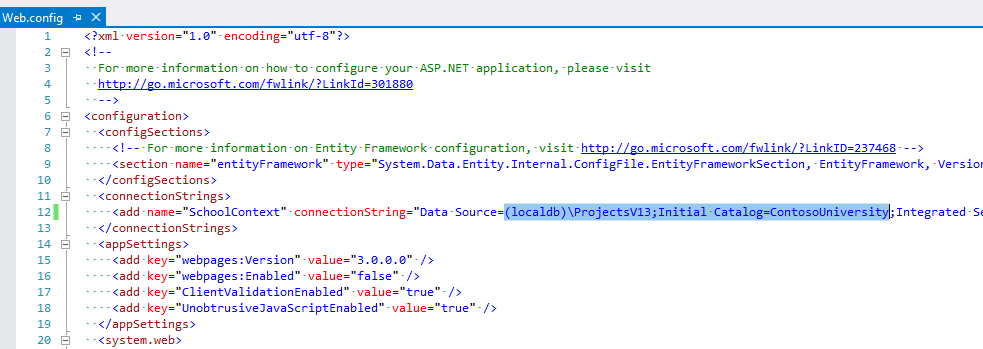
Within the ASP.NET MVC project, adjust the SchoolContext connection string property within the Web.config file to also use this server and database name.
Now lets generate the baseline for the project. The baseline is a script that is generated from the current state of the schema model that sets the starting point for all future migrations. The baseline you create in this step should reflect the state of the schema model in your Production environment.
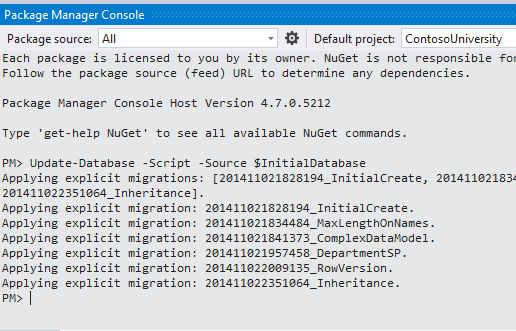
Create the baseline script by opening the Package Manager Console window and executing the following:
Update-Database -Script -Source $InitialDatabase
This causes Entity Framework to generate the T-SQL logic for all existing migrations, and for the script to be automatically added to the Migrations sub-folder of your SQL Change Automation project.
The $InitialDatabase argument causes Entity Framework to generate a script that should be runnable on all target environments, regardless of whether a new database is being created (as in this case), or if a subset or even all migrations have already been deployed to an upstream environment such as Test or Production.
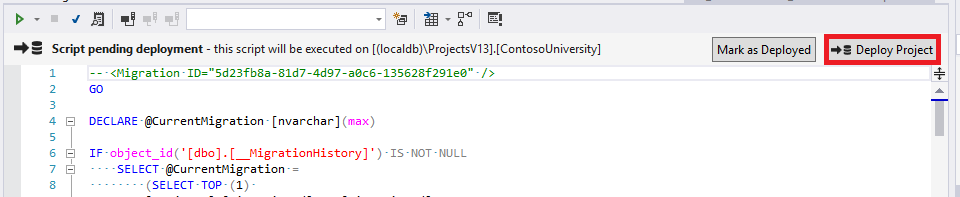
The script status bar above the document window displays the current deployment status of the migration.
Click Deploy Project to execute this script against your local SQL Server instance.
Now that the baseline script has been created, let’s hand over control of deploying the database to SQL Change Automation.
To do this, Automatic Migrations will need to be enabled, but don’t worry. We’ll still be generating migrations, it’s just that they’ll be in T-SQL format, rather than in the .NET language you're used to. Within the Migrations project sub-folder, edit Configuration.cs.
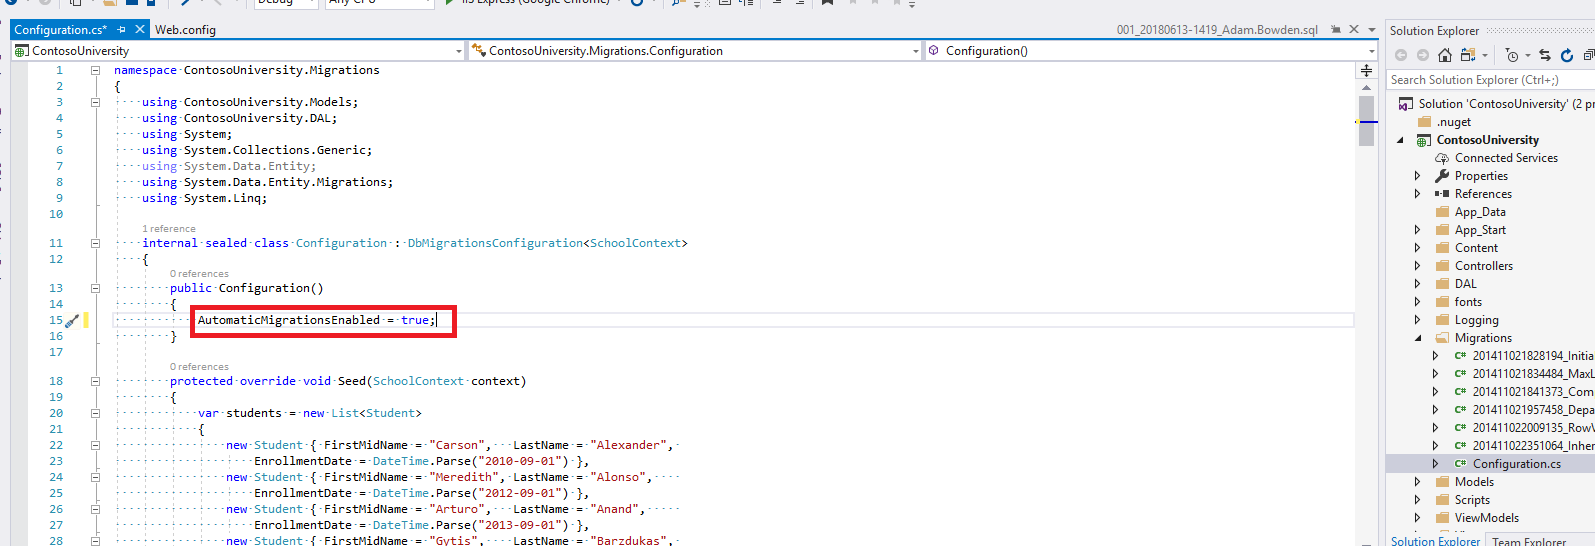
Set AutomaticMigrationsEnabled=True and save.
Alternative approach: AutomaticMigrationsEnabled=False
You can also set AutomaticMigrationsEnabled=false if you would prefer to use the Fluent API to author your changes but use T-SQL to deploy to your Test and Production environments.
Authoring a model change - How to go Up
When you want to make a database model change, you don’t actually have to forego any of the smarts that Code First offers in order to make T-SQL your deployment language of choice. You can author your change as normal and then execute the below command to generate a new T-SQL change script.
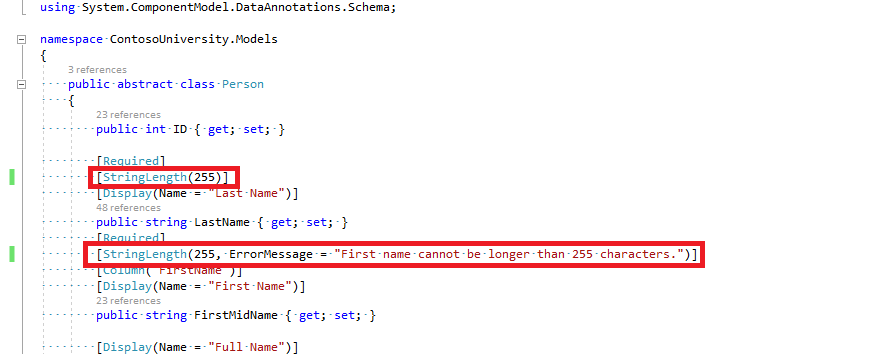
From the Models sub-folder, open the Person.cs class file. Change the length of the LastName and FirstName properties to 255.
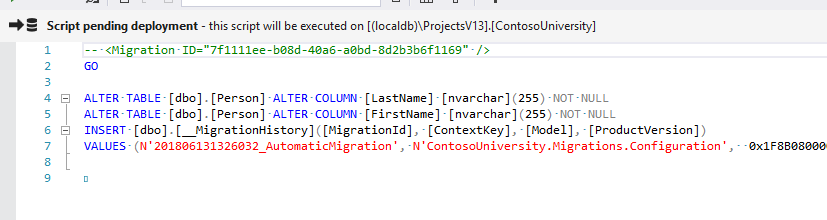
Switch to the Package Manager Console window and execute the following:
Update-Database -Script
This will generate a new script that, unlike the previous script, assumes a certain state is already present in the target database. So it will only contain the most recent change that was made to the model.
At this point, we can choose whether to make further edits to the migration logic in the script before deployment. This may be needed, for example, in the scenario where a column is being renamed, but Entity Framework scripted it as a DROP COLUMN / ADD COLUMN set of statements.
This case of a change to length of properties is straightforward, so we can deploy the change script as it is without more work needed.
Verifying the deployment script
We can also bring further control to our deployment process by choosing whether we want to pass those changes through a verification stage. This means executing our T-SQL change script against a shadow database that SQL Change Automation maintains (created automatically from your project scripts). The sorts of errors the verification stage can pick up include missing dependencies (such as a user that does not have a related login), invalid code in legacy objects and syntax errors. If the script fails at the verification stage, SQL Change Automation gives us the error details and the option to fix the script.
Now that the migration has been deployed to our sandbox database, we can also use the SQL Change Automation tool-window to verify the deployment outcome.
From the View menu, select SQL Change Automation.
When the tool-window appears, click the Refresh button on the window's toolbar.
This will build a separate (empty) copy of your schema called the Shadow database, based purely on the migrations present in your project. This is compared back to the Sandbox database that this project was connected to in the first step (for more information, see Development and shadow databases).
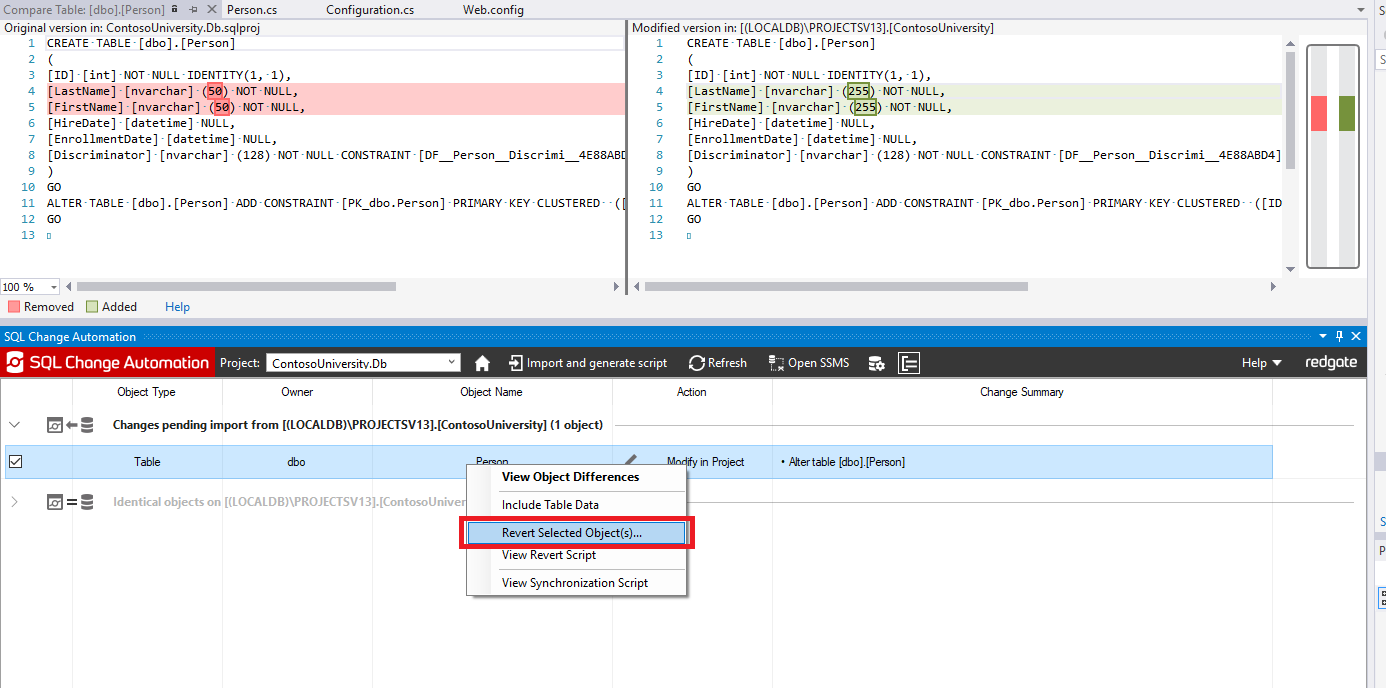
The image below gives an example of the original/sandbox and target database both in-sync after the Person object in the database was changed to increase the length of the LastName and FirstName properties:

Filtering objects in the list
To filter the objects in the list, simply click into the tool-window to give it the focus, and start typing the name of a database object
Double-click the Person object to display the side-by-side diff. Since the SQL Change Automation project (displayed on the left) and the sandbox database (displayed on the right) are in-sync, we know that the changed was deployed as intended.
Reverting a model change - How to go Down
If, after deploying a change to the database model, we decide we want to undo that migration, we can use SQL Change Automation to revert that specific change without having to redeploy the database from scratch (thus preserving the data within our database).
If we first delete the migration we want to revert from the project, we can then use the SQL Change Automation tool-window to re-synchronize the database to the revised project model. This is done by clicking the Refresh button within the tool-window, which will display the object differences between the project and the sandbox database. We can also see the individual object differences in a side-by-side view, with the project model version on the left and the sandbox database version on the right:
We can select the object we want to revert and discard the change. This brings the sandbox database into sync with the project sources, by generating a one-time script (using SQL Compare under-the-hood) and applying it to your sandbox database.
The final step is to ensure that Entity Framework remains in sync with our connected database. This can also be set up using the SQL Change Automation tool-window. To do so, right-click the __MigrationHistory table (note that you may need to expand the Identical objects section to find the object), select Include Table Data, click Refresh and then right-click the Data item and select Revert Selected Object(s)...:
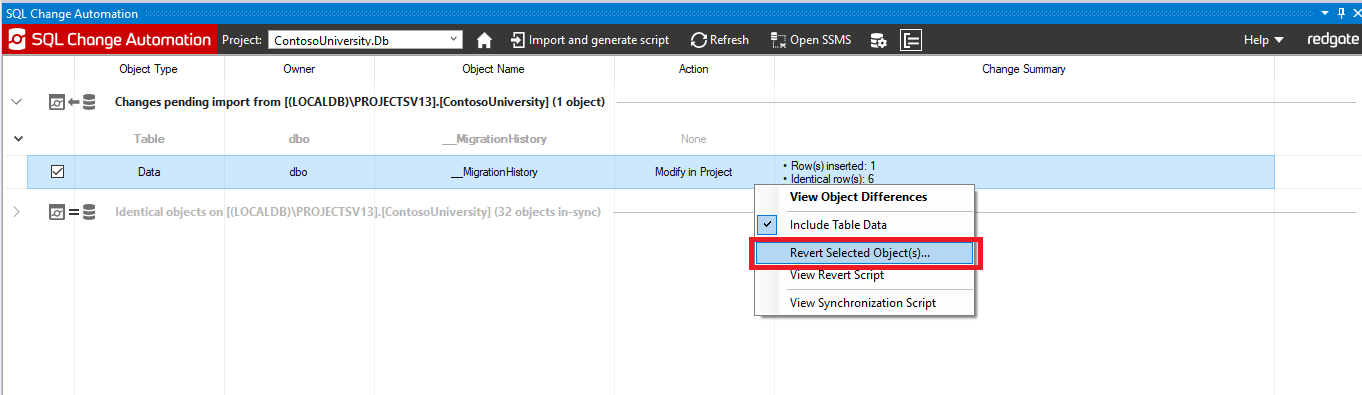
To discard the change, right-click the change and click Revert Selected Object(s).
Alternative approach - Develop with CodeFirst, but release using T-SQL
At the beginning of this tutorial, we set Automatic Migrations=True in the Entity Framework-enabled application in order to switch from Code First migrations to T-SQL migrations. This suits teams that want to shift entirely over to T-SQL based migrations for your deployment, but what if you’d like to follow a hybrid approach: continue to use CodeFirst to develop your changes, but use T-SQL to actually perform the deployments to your Test and Production environments?
The good news is that, if you prefer, you can leave AutomaticMigrations=False and continue adding CodeFirst migrations to your application project. You can then use the Update-Database -Script command to subsequently add the T-SQL scripts into your SQL Change Automation project. This may benefit teams that may choose to delay the generation of their T-SQL scripts until certain checkpoints in a project lifecycle are reached (e.g. just before the Test environment deployment).
Further database change management techniques
This article has so far covered how you can use SQL Change Automation with Entity Framework for setting a baseline and migrating changes up or down. There is more you can do with SQL Change Automation to support your database change management processes, including:
How to gain an overview of your database schema
Please note that the below refers to functionality that is not available in SQL Change Automation Core. Read more
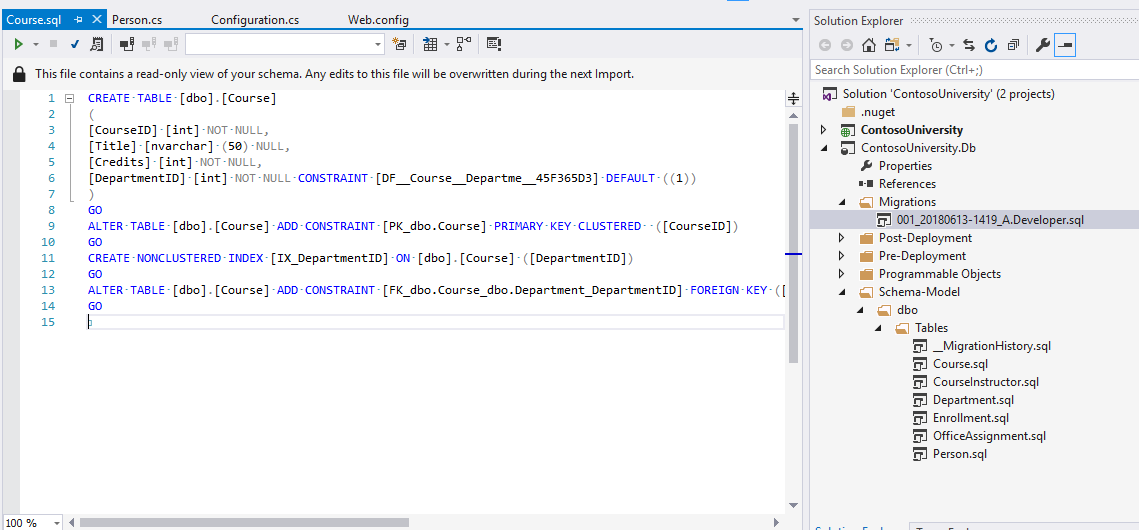
SQL Change Automation provides an option for us to include an Offline Schema Model within the project assets, which means we get a read-only view of our database changes at the object level. This is one of SQL Change Automation's hybrid features provided through the use of the SQL Change Automation tool-window, and borrowed from the state-based model for making database changes. The offline schema model lets us audit changes to the tables, schemas, users and types in our database within the project itself. This makes it possible to track changes to those objects over time, e.g. using the source control Annotate command. Whenever we import changes from our sandbox database, the tool-window updates the offline model in line with the schema changes being imported. It’s useful for auditing and also for assessing the higher level structure of our database before developing further changes.
The image below shows how the offline model stores database objects by type in sub-folders, using their fully qualified names, such as dbo\Tables\Person.sql
How to save time when working with code-based objects
Please note that the below refers to functionality that is not available in SQL Change Automation Core. Read more
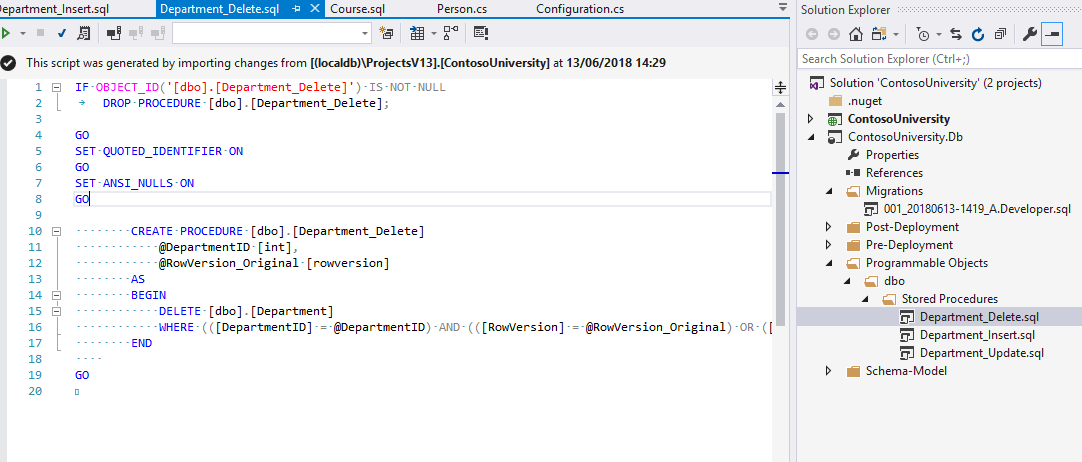
If we’re making changes to code-based objects, such as stored procedures, triggers or views, on a regular basis, SQL Change Automation's Programmable Objects saves us time. By extracting all the supported objects from our schema into idempotent script files (e.g. dbo\Stored Procedures\Department_Update.sql), we can re-use the scripts by simply editing the existing files. This means we can deploy the same object more than once without having to add a numeric migration script each time. Not only it is easier to source control each of our database objects as individual files, but we can also more simply branch, merge and annotate them, which is handy when working in teams with developers making concurrent changes to those objects at any one time.
The image below shows SQL Change Automation's programmable objects folder structure, with a script for each of the objects accessible:
Sample Project
The completed projects detailed in this tutorial are available in the below zip file. It contains the ASP.NET/Entity Framework project and the SQL Change Automation project.
This documentation contains proprietary information and is protected by copyright law.
Copyright © 2026 Red Gate Software Limited. All rights reserved


