Exporting the comparison results
Published 05 June 2013
When you have run a comparison, you can export the comparison results. You may want to do this, for example, to produce a detailed report, or to keep a record of the comparison results.
Exporting to CSV files
To export the full comparison results, or a subset of the results, to a collection of comma-separated value (CSV) files:
- On the Tools menu, click Export Comparison Results.
The Export Comparison Results dialog box is displayed.
- Type the path for the export files in the Export to box, or click Browse to choose the export folder.You can change the default path in the Application Options dialog box.
- Select the check box in the Export column for the tables or views that you want to export.You can right-click the list of tables and views and click Include All to select all the check boxes or Exclude All to clear all the check boxes.
- Under Rows to Include, select the check boxes for the rows that you want to export:
- Identical includes rows that are the same in both databases.
- Different includes rows that exist in both databases but are different.
- Only in database name includes rows that exist only in that database.
- Click Export.
For each selected table or view and for each of the row types that you selected under Rows to Include, SQL Data Compare creates a separate CSV file. As well as the data in the source and target tables, SQL Data Compare includes a Type column:
- #a means the row only exists in the source database
- #b means the row exists in both databases, but is different
- #c means the row only exists in the target database
- #d means the row exists in both databases and is identical
SQL Data Compare also creates a Results Summary file.
Exporting to other formats
To export a summary of the comparison results to other file formats, including PDF, text, and image files:
- On the File menu, click Print Preview.
The Print preview window opens. - In the Print preview window, on the File menu, hover over Export Document to see the list of export options:
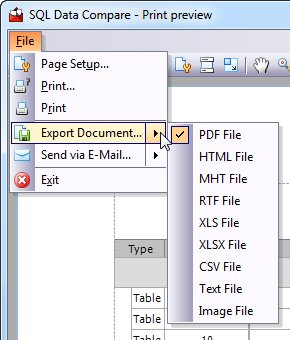
- Click on the file type you need.
The Export Options dialog for that file type opens. - On the Export Options dialog, enter the details you need, and click Ok.
The Save As dialog opens. - Choose the location to save the file to, and click Save.
This documentation contains proprietary information and is protected by copyright law.
Copyright © 2026 Red Gate Software Limited. All rights reserved


