Authenticating with OpenID Connect
Published 21 October 2021
By default, users log in to SQL Monitor using the passwords set by the administrator.
Alternatively, administrators can set SQL Monitor to authenticate users with their OpenID Connect which can enable scenarios with single sign-on or two-factor authentication. When a request is not authenticated SQL Monitor will contact your identity provider and redirect to its login page. After the login credentials are verified the identity provider will redirect back to SQL Monitor.
When using OpenID Connect administrators can restrict which servers users can access in the same way as when Active Directory authentication is used.
Configuring Authentication Provider
The first step to set up OpenID Connect is to register SQL Monitor as an application in your identity provider. Specify the redirect URL for SQL Monitor as https://yourSqlMonitorHost.com/openidconnectaccount. This is the URL that the Identity Provider will use after a user is authenticated.
SQL Monitor will make the OpenID Connect authorization request using the "openid profile" scopes.
This step should also provide you with information like the ClientID (sometimes referred to as ApplicationId) that you will need to finish the setup in SQL Monitor itself.
Switching to OpenID Connect authentication
OpenID Connect is only supported with HTTPS enabled. See here for more information on how to set up SQL Monitor in IIS and here on how to set up in the default web server (Kestrel). When using IIS, application initialization should also be configured as described here.
Only administrators can switch to OpenID Connect authentication.
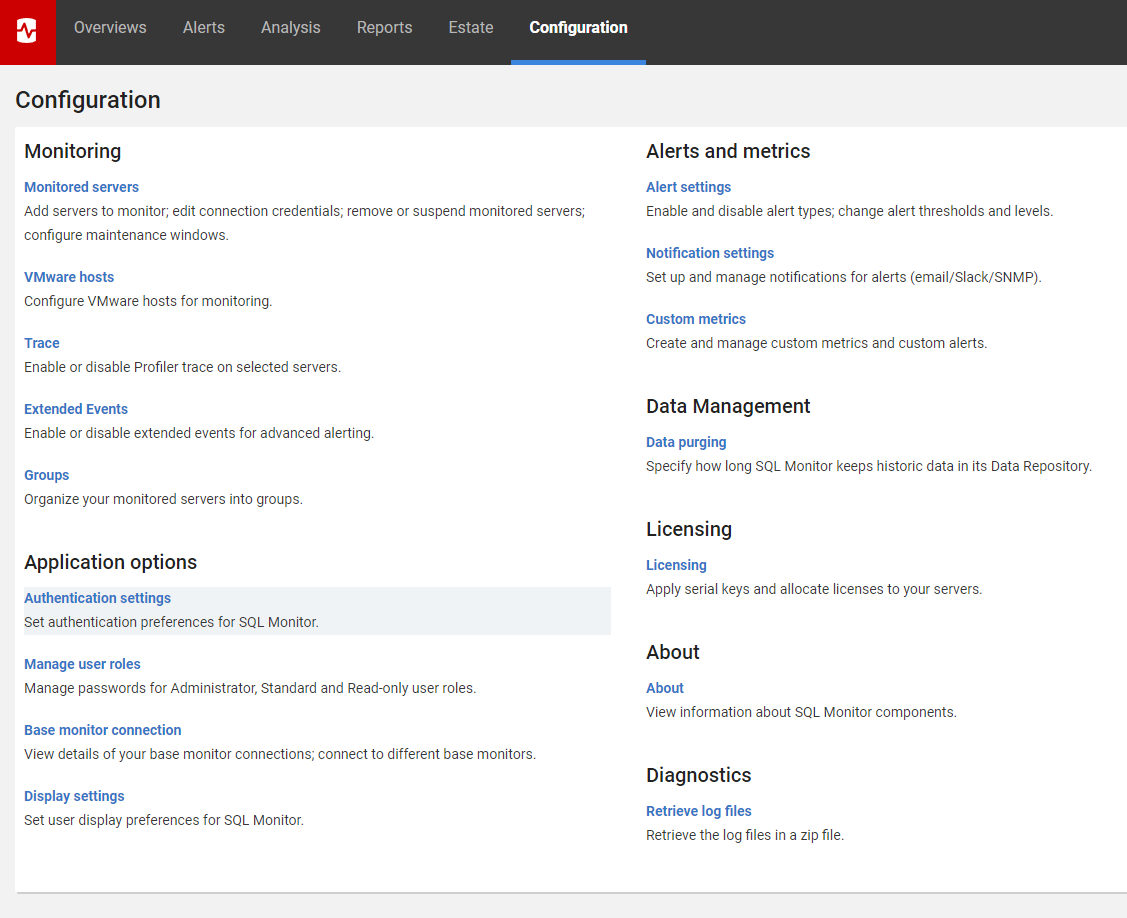
- In the Configuration tab, under Application options, click Authentication settings:
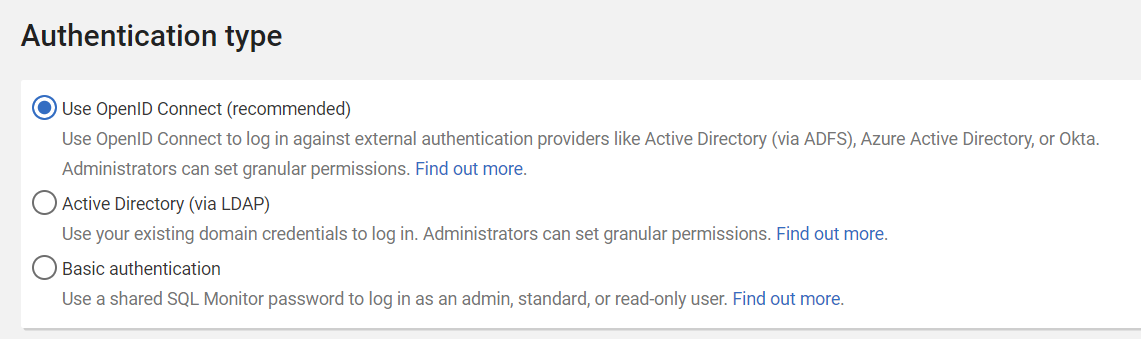
- Select Use OpenID Connect:
- A popup appears:
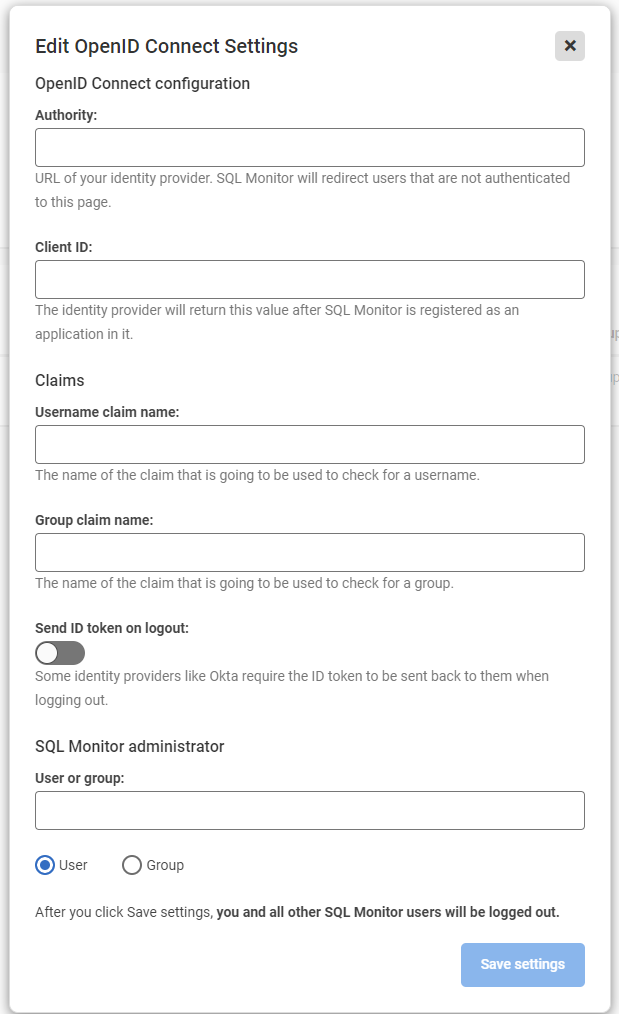
- Under Authority, enter the URL to reach your authentication provider. E.g. https://login.microsoftonline.com/[tenant-id]/v2.0. This value will also be used to verify the issue of your id token through an exact match (including any trailing slashes).
- Enter the Client ID. It was returned by your Identity Provider after registering SQL Monitor in it.
- Enter the Username claim name or Group claim name. This is the name of a claim that will be supplied by your identity provider after a user logs in and SQL Monitor will use that information to identify which user logs on. Common examples of claim names to be used for the
Username claim namefield value areemailorpreferred_username. For theGroup claim namea common example isgroups. Define if SQL Monitor should send ID token on logout. This will depend on which identity provider you will be using and is not required by default. However some providers like Okta require this option to be enabled as their specification requires the id token to be sent back when a logout is requested.
Add an Administrator user or group. Normally it is the username of the Administrator of SQL Monitor or a name of a user group to which an Administrator belongs to. It needs to map to the value returned in the field specified in Claim name before.
We recommend you create an administrator group and specify this as the administrator account. This means you can add more users to the administrator group in your identity provider instead of configuring new users in SQL Monitor.
- Click Save settings. SQL Monitor logs you and all other users out.
- Access the login page for SQL Monitor which should redirect you to your Identity Provider's login page.
Configuring OpenID Connect scopes
By default, SQL Monitor will use openid and profile as the scopes for the authentication request. Some authentication providers may require additional scopes to return specific data like groups or an email field. You'll be able to configure these scopes by running the following these steps:
- Connect to your SQL Monitor repository.
Run the following script. It's important to keep the previously mentioned default scopes (“openid” and “profile”) and add any others you might need like “groups” or "email".
Edit OpenID scopes used by SQL Monitor
INSERT INTO [settings].[KeyValuePairs] VALUES ('OIDC-Scope', 'openid profile <AnyAdditionalScope>', 'STRING')- Restart SQL Monitor’s website.
Switching from OpenID Connect authentication to default authentication
Only administrators can switch back from OpenID Connect authentication to default authentication.
- Log in to SQL Monitor as an administrator.
- In the Configuration tab, click Authentication settings.
- Select Basic authentication.
The Confirm authentication changes window opens: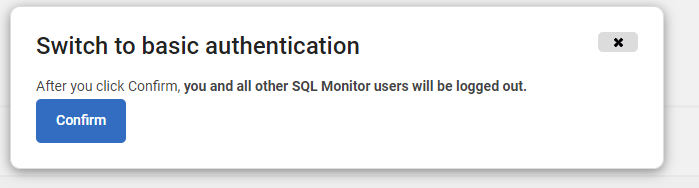
- Click Confirm. SQL Monitor logs you and all other users out.
- Log in to SQL Monitor with your SQL Monitor credentials.
Switching back to basic authentication does not clear any OpenID Connect configuration stored in SQL Monitor.
This documentation contains proprietary information and is protected by copyright law.
Copyright © 2026 Red Gate Software Limited. All rights reserved


