Setting up the synchronization
Published 23 May 2013
When you have reviewed the comparison results, select the rows you want to synchronize, and run the Synchronization Wizard.
Selecting the rows to synchronize
By default, all rows that differ are selected for synchronization.
Use the check boxes in the Results pane to select rows for synchronization:
- All Different for all rows that are different for a table or view
- for all rows in a table or view that exist in the source but do not exist in the target
- for all rows in a table or view that exist in both databases but the rows are different
- for all rows in a table or view that exist in thetarget but do not exist in the source
You can also use the Actions drop-down menu to select rows:
- Include All and Exclude All select and clear the check boxes for all rows.
- Include All in Source and Exclude All in Source select and clear the check boxes in the (only in source) column.
- Include All Different and Exclude All Different select and clear the check boxes in the (different) column.
- Include All in Target or Exclude All in Target select and clear the check boxes in the (only in target) column.
Object selections are remembered when you save a project.
Use the Row Differences pane to select individual rows to synchronize:
- Click a table or view to display its row differences.
- Click the appropriate tab to view the type of row differences.
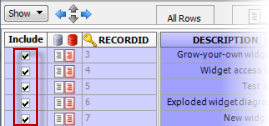
- Select or clear the check boxes in the Include column as required:
Selecting the rows to synchronize using keyboard shortcuts
To select a row for synchronization, highlight the row and press the space bar to select or clear its check box.
To highlight multiple rows:
- For the previous or next row, press Shift + Up or Shift + Down
- For all rows from the current row to the first or last row, press Ctrl + Shift + Home or Ctrl + Shift + End
- For all rows, press Ctrl + A
You can also use Shift + Click and Ctrl + Click to highlight multiple rows.


