Use the TeamCity plugin
Published 20 July 2016
This example shows you how use the DLM Automation TeamCity plugin to validate, test and sync your development schema.
In this stage, you'll use TeamCity and DLM Automation's TeamCity plugin build runners to:
- build a database package
- test the package
- sync the package to a CI environment
- publish the package to a NuGet feed
When you've finished, TeamCity will automatically trigger a continuous integration process every time a change is checked into version control.
Before you start
Get a copy of your database scripts folder and place into source control, you can either:
- checkout a copy from your database source controlled using SQL Source Control
- generate a folder from an existing database using SQL Compare
- download and unzip WidgetShop.zip
On your build server:
- Install JetBrains TeamCity version 7 or later. We've tested this example against version 9.1.1. This automatically installs a default build agent.
- From the Redgate DLM Automation add-ons page, download the DLM Automation TeamCity plugin and copy to the TeamCity data directory plugin folder. See Setting up the TeamCity plugin.
On your build agent:
- Install Redgate DLM Automation
Create a TeamCity project
- In TeamCity Administration, under Projects, click Create project:

- On the Create New Project page, add WidgetShop as the name for the project.
The Project ID is created automatically: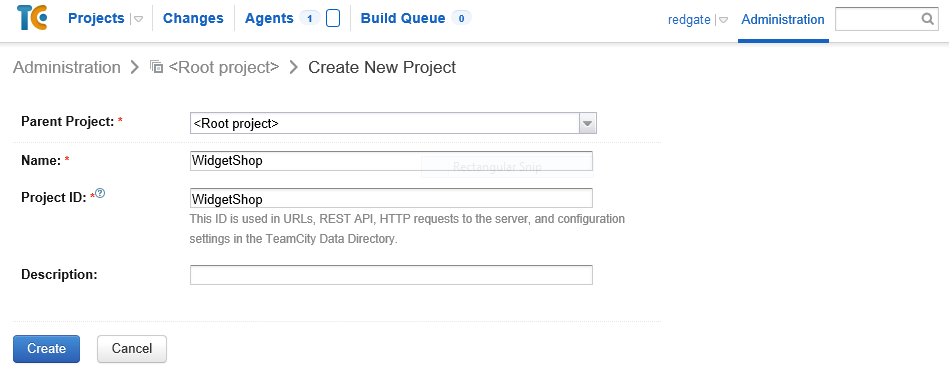
- Click Create.
- Under Build Configurations, click Create build configuration:

- On the Create Build Configuration page, add WidgetDevelopment as the build name:
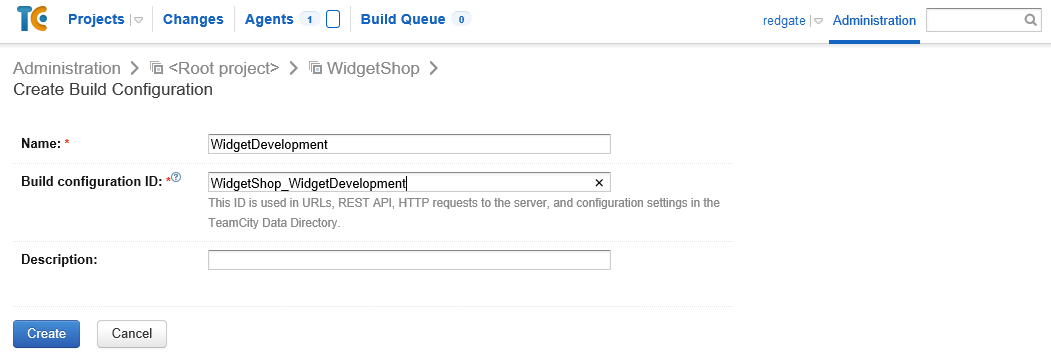
- Click Create.
Link the database to TeamCity
Configure the TeamCity VCS settings so it knows which network folder to monitor for changes. Here we link to an SVN repository, but you can use whichever VCS you set up earlier:
- On the VCS Roots page, from the Type of VCS drop-down list, select Subversion.
Under VCS Root Name and ID, in the VCS root name field, enter SVN WidgetShop as the unique name for this root.
Under SVN Connection Settings, in the URL field, enter file:///Z:/WidgetShop/.
This was the Database repository URL you entered when you linked the database to source control.
If authentication is required for your source control server, you must specify a username and password.
- Click Test connection. TeamCity checks that it can connect to the source control location.
Once the 'connection successful' message is displayed, close it and click Create.
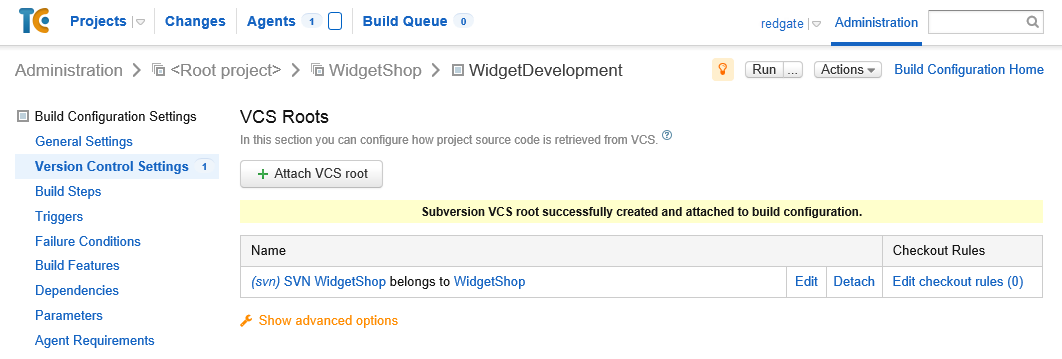
The VCS settings are complete.
 Continuous integration
These sections explain how to add automated steps to:
- build a package every time a change is checked into source control
- run tSQLt tests against the package
- sync the package to a CI environment
- publish the package to a NuGet feed
Build a package
In this section you'll use the DLM Automation TeamCity plugin to:
- add a build step to validate the SQL creation script and create a NuGet package
- add a VCS trigger to force a build every time a change is checked into version control
- trigger a build to test this step
Add a build step
You'll add the build step using one of Redgate's build runners for TeamCity.
A build runner allows a specific third party build tool, such as DLM Automation, to integrate with TeamCity. This example uses the DLM Automation Build runner that's part of Redgate's DLM Automation TeamCity plugin. It defines how to run the build and handle the output.
For more information on build runners, see Configuring Build Steps (JetBrains documentation).
When the build step validates the creation script, DLM Automation creates a temporary version of the database using LocalDB. This database is dropped once the build is complete.
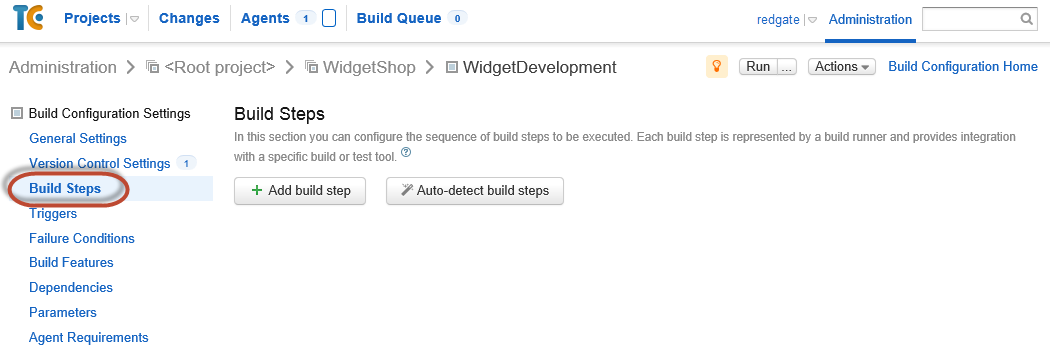
- From the Build Configuration Settings menu, select Build Steps.
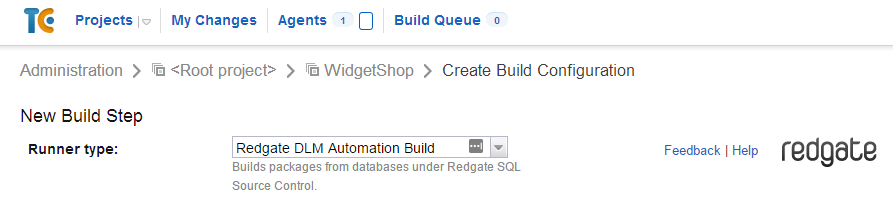
- Click Add build step:
- From the Runner type drop-down, select Redgate DLM Automation Build:
- Under Source-controlled database, leave the Database folder is my build VCS root option selected.
We've already configured the VCS root as our database location. Under Output package, at the Package ID field, enter WidgetShopLatest.
This is the name of the NuGet package you'll create. The name must be unique and can't contain spaces.When you're thinking of a package name to use in your own environment, remember that it's going to be deployed to other databases. A generic name that describes what you're deploying is better than one that's specific to the build step or the database itself. For example, if your database is called Development, this wouldn't make sense as a package name deployed to your production database.
Under Temporary database server, select SQL LocalDB.
DLM Automation uses LocalDB to recreate and validate a temporary version of your database. This database is dropped once the build is complete.If you're using Redgate's DLM Dashboard (version 1.4.4.313 or later), DLM Automation can send schema information to it every time the build step runs. Under DLM Dashboard integration:
- Enable the Send schema information to DLM Dashboard check box.
- Enter the name or IP address of the machine hosting the DLM Dashboard.
- Enter the DLM Dashboard port number. The default port is 19528.
Once you deploy changes (for example, by running the sync step), DLM Dashboard:
- recognizes the deployed schema from the information DLM Automation sent during the build step
- adds the schema to its list of recognized schemas, with the name <packageId-packageVersion>, for example, WidgetShop1.0
- labels the schema with the DLM Automation icon

- labels the schema as an update
 , not drift
For more information about how DLM Automation works with DLM Dashboard, see DLM Automation integration (DLM Dashboard documentation). For help understanding SQL Doc documentation, see What's in the documentation?
DLM Automation can include SQL Doc database documentation in the NuGet package that it builds. To select this option, under Database documentation, click Include database documentation.
Including database documentation will increase the size of the NuGet package and the time it takes to build, particularly for large databases.
The documentation is stored in db > docs > main.html in the NuGet package. If you're using DLM Dashboard version 1.6.3 or later and have set up DLM Dashboard integration, you can also view the documentation directly from DLM Dashboard. See DLM Automation integration (DLM Dashboard documentation).
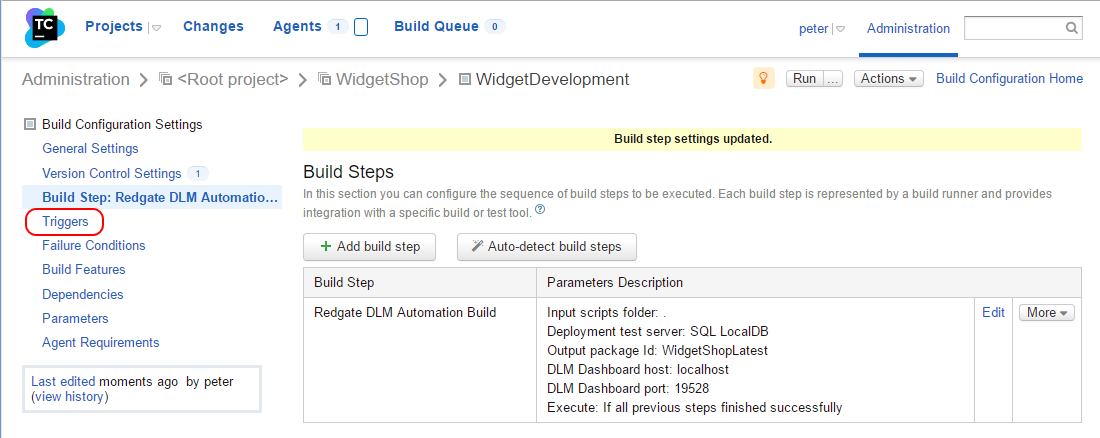
- Click Save.
Add a VCS trigger
Add a trigger that'll force a build every time a change is checked into version control:
- From the Build Configuration Settings menu, select Triggers:
- On the Triggers page, click Add new trigger and select VCS Trigger from the drop-down:
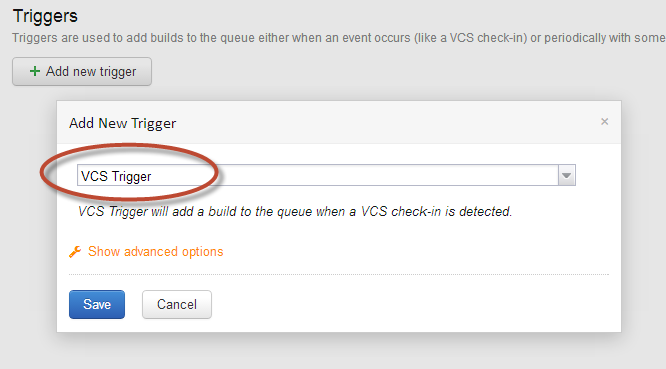
- Click Save.
TeamCity will now run a build when you check in a change to your WidgetDevelopment database.
Trigger a build
- To run abuild either make a change in the source control repository or click Run.
- To display the build status, click Projects:
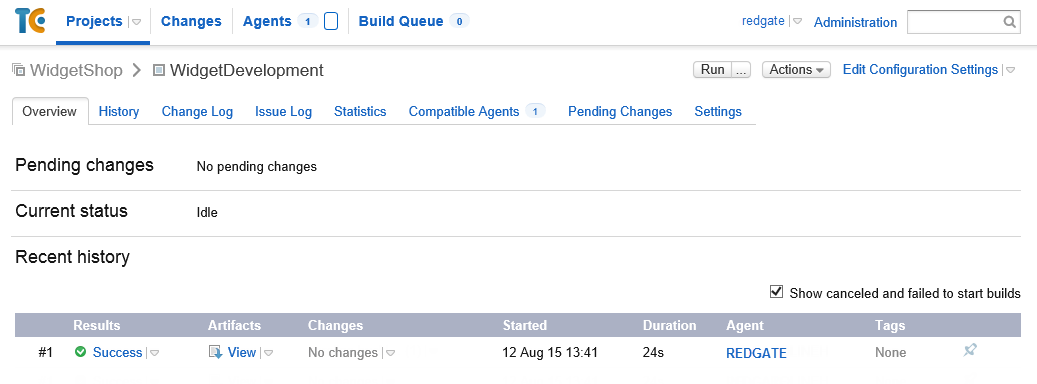
- To show a summary of the log messages printed by the build, move your cursor over the Success
 drop-down button, and then click Build log.
 To view the NuGet package, click Artifacts:
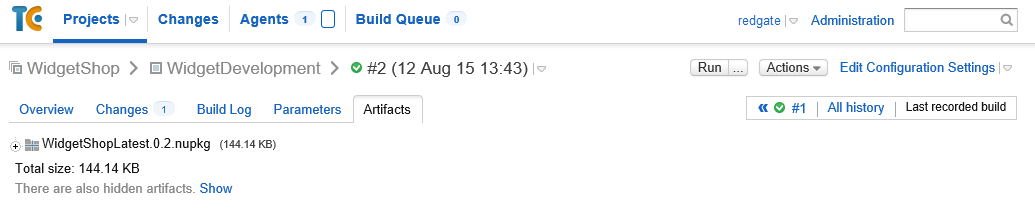
The build artifact is the name TeamCity gives to the output of a build step. In this example, the NuGet package is the artifact, and it's stored on TeamCity's server until we're ready to deploy it.
Test the package
In this section you'll:
- check a SQL Data Generator file into version control. This will generate meaningful test data for the database
- add a test step so that every time there's a new build of your database, DLM Automation will create a temporary version and run tSQLt tests against it
- trigger a build to test this step
The WidgetDevelopment database already has tSQLt installed. When you're setting this up in your own environment, you'll need to install it. For more information, see SQL Test.
Check the SQL Data Generator file into version control
We've provided a SQL Data Generator file that's already configured to generate data that's meaningful to the rows, columns and tables in the WidgetDevelopment database. You extracted this file from the WidgetDevelopmentDatabaseCIDemo.zip file.
Check the WidgetTestData.sqlgen file into SVN:
- Using Windows Explorer, copy the WidgetTestData.sqlgen file from WidgetDevelopmentDatabaseCIDemo > WidgetShop > Database to C:/WidgetShop
- Right-click on the WidgetTestData.sqlgen file and select TortoiseSVN > Add.
- Right-click again and select SVN Commit.
- At the Commit dialog, add a comment, for example, sqlgen file added. Click OK.
Add a test step
You can run different types of tSQLt tests, such as static analysis, unit or integration tests, against your temporary database.
The database schema for WidgetDevelopment already includes four basic SQL Cop tests that will run against the temporary database and check for:
- procedures named SP_
- procedures using dynamic SQL without sp_executesql
- procedures with @@Identity
- procedures with SET ROWCOUNT
There's also a unit test in the schema that checks email addresses in the Contacts column. Once the tests are complete, DLM Automation generates test reports for review. The temporary database is then dropped.
To create the test step:
- On the Build Steps page, click Add build step:

- From the Runner type drop-down, select Redgate DLM Automation Test.
- Under Output package, at the Package ID field, enter WidgetShopLatest.
This is the name of the NuGet package created by the build step. Under Temporary database server, select SQL LocalDB.
DLM Automation will use LocalDB to recreate the database for testing.- At the Run tests option, leave Run every test selected.
- At the Generate test data option, select the Populate the database with data before testing check box, and enter the path to the WidgetTestData.sqlgen file.
This must be relative to the VCS Root folder. In this example, the path is file:///Z:/WidgetShop/, so you just need to enter WidgetTestData.sqlgen. - Click Save.
Trigger a build
Make a change to the WidgetDevelopment database to trigger the build and test steps automatically:
- Check in a change to the WidgetDevelopment database.
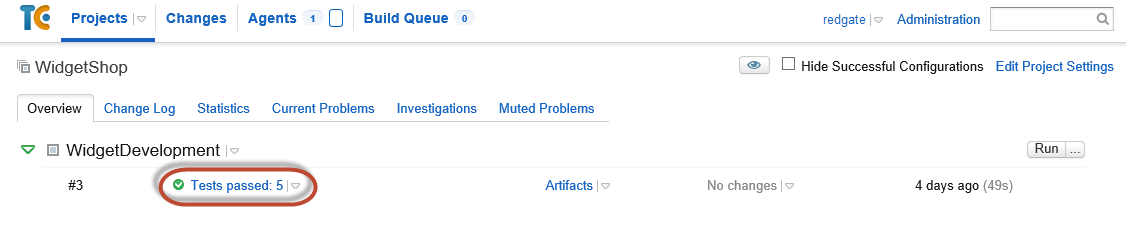
- To display the build status, in TeamCity click Projects > WidgetShop.
Once the build step is complete, the test step starts automatically. - Once the steps are complete, click Tests passed: 5:
- Click the Tests tab.
Details of the completed SQL Cop tests and unit test are displayed: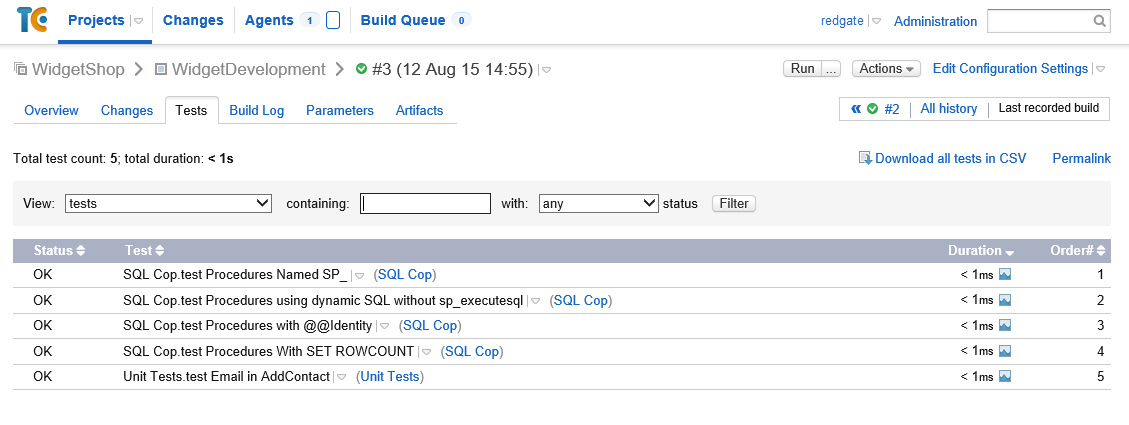
To see more details about a specific test, or for troubleshooting a failed test, move your cursor over the drop-down button and select Show in build log.
Sync the package to a CI environment
Once your database has been through an initial test phase, it's good practice to run system, acceptance or smoke tests against it in an environment that simulates production. We'll called this the CI database, although it's sometimes called staging or preproduction.
In this section you'll:
- create a CI database
- add a sync step so that every time your database has been built and tested, DLM AUtomation will synchronize it to your CI database
- trigger a build to test this step
Create a CI database
Create a blank database called WidgetCI as your CI database:
- Open SQL Server Management Studio (SSMS).
- Click New Query.
Execute the following SQL query to create the WidgetCI database:
CREATE DATABASE WidgetCI
GO
USE WidgetCI
GO
The database is now configured. It doesn't need to be checked into source control because it'll be updated automatically every time a change is made to the WidgetDevelopment database.
Add a sync step
Add a sync step in TeamCity:
- On the Build Steps page, click Add build step.
- From the Runner type drop-down, select Redgate DLM Automation Sync.
- Under Output package, at the Package ID text box, enter WidgetShopLatest.
- This is the name of the NuGet package you've already built and tested.
- Under Database server, enter the name of the target server and database you want to update. In this example, we're updating the WidgetCI database using Windows authentication.
- Click Save.
Trigger a build
Check in a change to the WidgetDevelopment database to trigger a build.
Once the build and test steps are complete, open SSMS to verify that the WidgetCI database has been synchronized with the contents of WidgetDevelopment:WidgetCI is in sync with WidgetDevelopment:

The WidgetCI database is now up to date with the latest version in source control. At this point, you could run additional tests against it.
Publish the package to a NuGet feed
Now that you've finished testing, you can publish the package to a NuGet feed. You can then use Octopus Deploy with DLM Automation to manage deployments.
We'll use TeamCity as a NuGet server to save you having to set up your own repository. For more details, see Using TeamCity as a NuGet Server (TeamCity documentation).
In this section you'll:
- enable the TeamCity NuGet server so you can publish the package to its NuGet feed
- trigger a build to test this step
If you're using a different release management tool, check the help documentation provided by that tool vendor.
Enable the TeamCity NuGet server
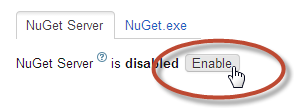
- In TeamCity Administration, under Integrations, click NuGet:

- On the NuGet Server tab, click Enable:
Trigger a build
Trigger a build to publish the package to the NuGet feed automatically.
This documentation contains proprietary information and is protected by copyright law.
Copyright © 2026 Red Gate Software Limited. All rights reserved


