2. Getting your Repository Ready
Published 03 September 2024
There are two currently supported ways to get your copy of Flyway Autopilot. If you wish to use GitHub and it's Actions deployment pipelines, follow the first guide on using the template repository. If you wish to use Azure DevOps, skip to the next step and import the repository into a ADO Project!
IMPORTANT - These repositories could hold database schemas. We recommend making them private and giving access to only authorized people.
Getting started with GitHub
The entire project, and all needed files/scripts are located inside one easy-to-copy GitHub repository.
- Go to the Flyway Autopilot for SQL Server repository and make sure you are signed into GitHub in the top right.
- Click Use This Template > Create a new Repository. Doing this will create a personal copy of the repo under your account, including all of the files needed to get started.
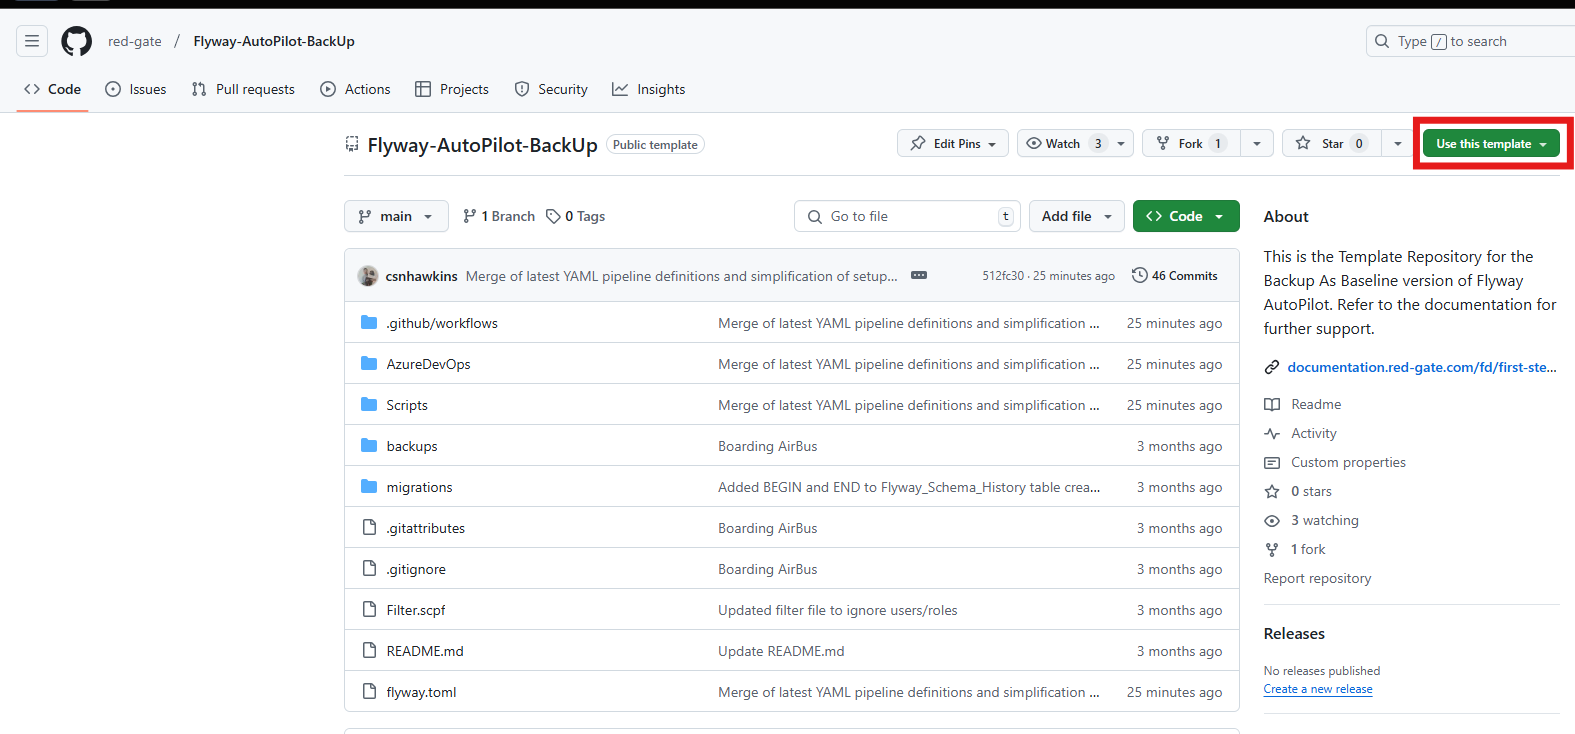
Tip - If you don't see the 'Use this template' button, ensure you first login to GitHub
Important - Do not fork the repository. Instead, create a private repository using it as a template. This keeps it secure and away from the public eye!
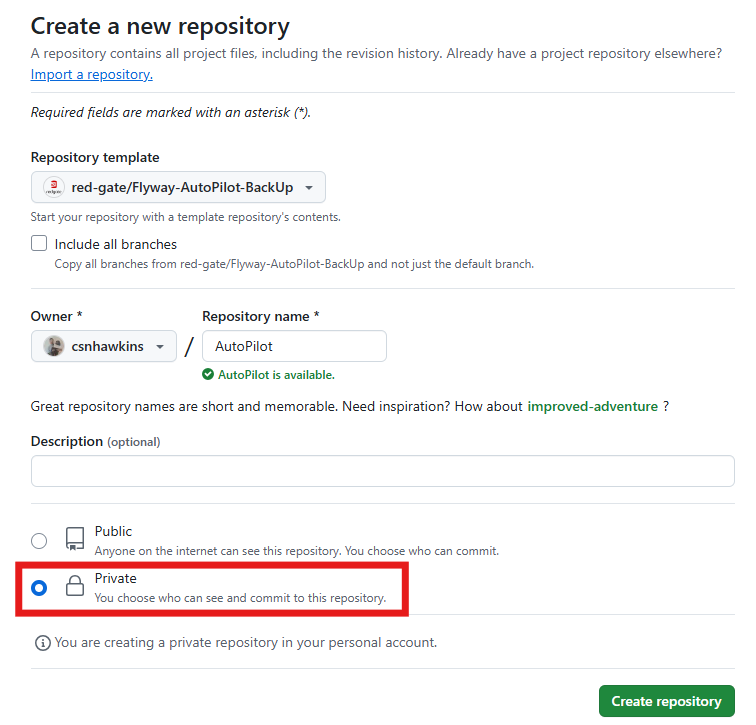
3. Give this repository an easily accessible name and set it to Private, allowing you to move your own schema into it without it being public! Then click Create Repository.
4. Click on the green Code button and copy the URL under the HTTPS tab. You’ll need this to create a new project from version control in Flyway Desktop.

Next step: See Opening Repository in Flyway Desktop below.
Getting started with Azure DevOps (Instead of GitHub)
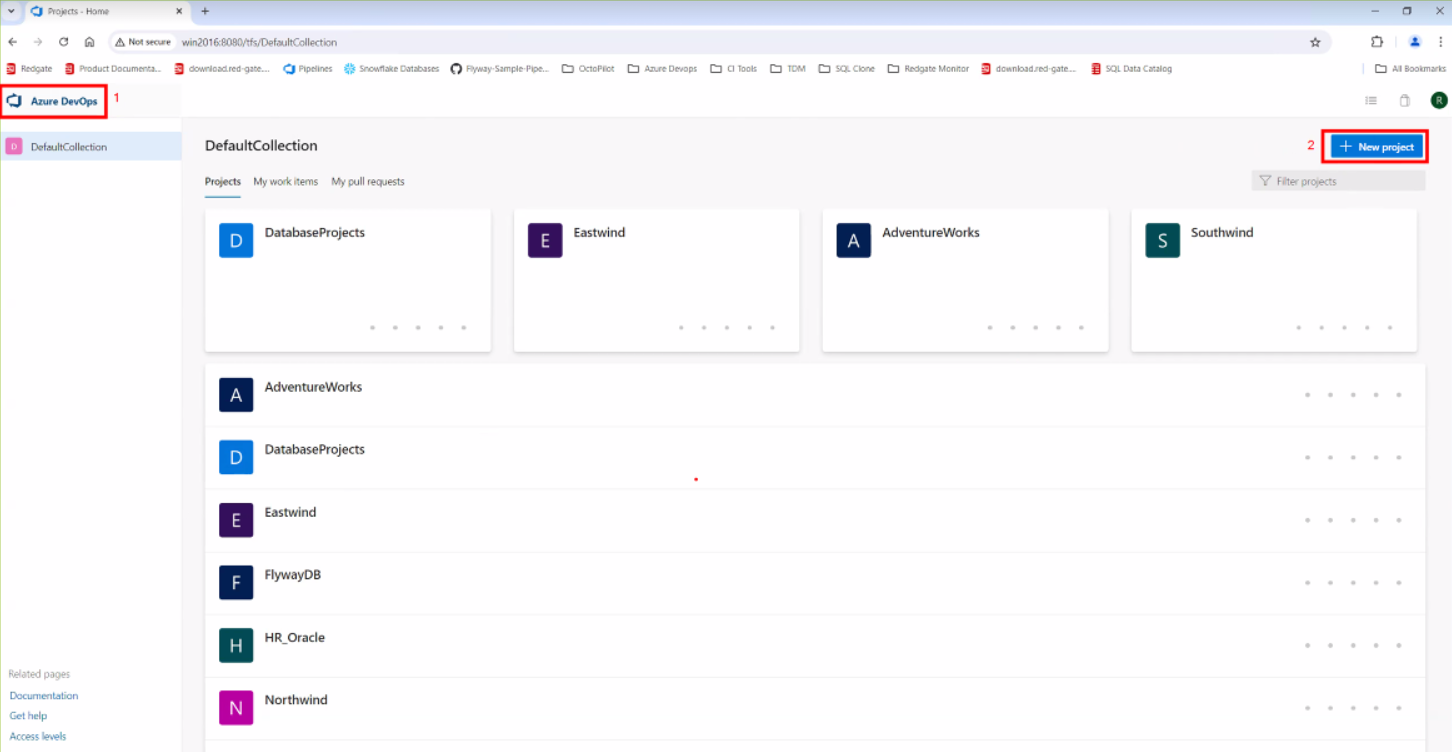
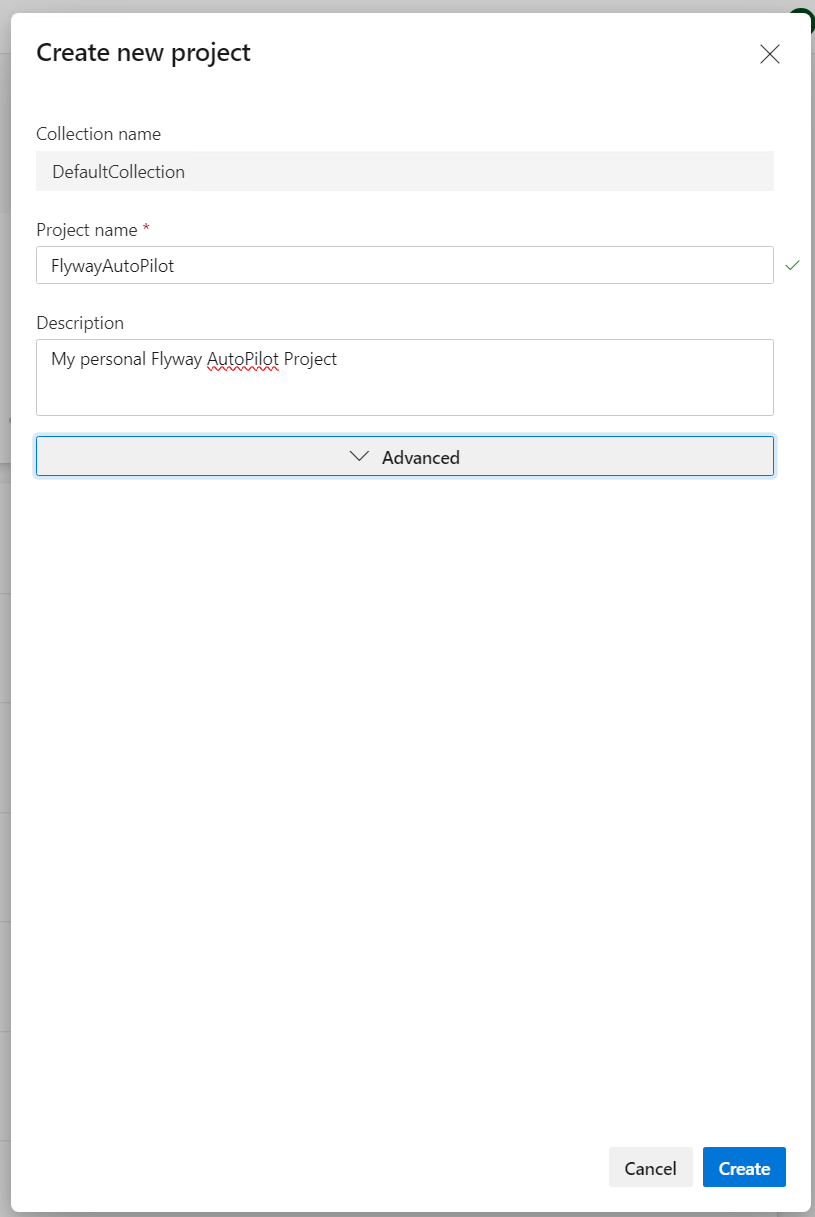
- Create a new Azure DevOps Project (Or navigate into a pre-existing project)
2. Head to Repos > Import Repository > Use the main GitHub repo link ( https://github.com/red-gate/Flyway-Autopilot-BackUp )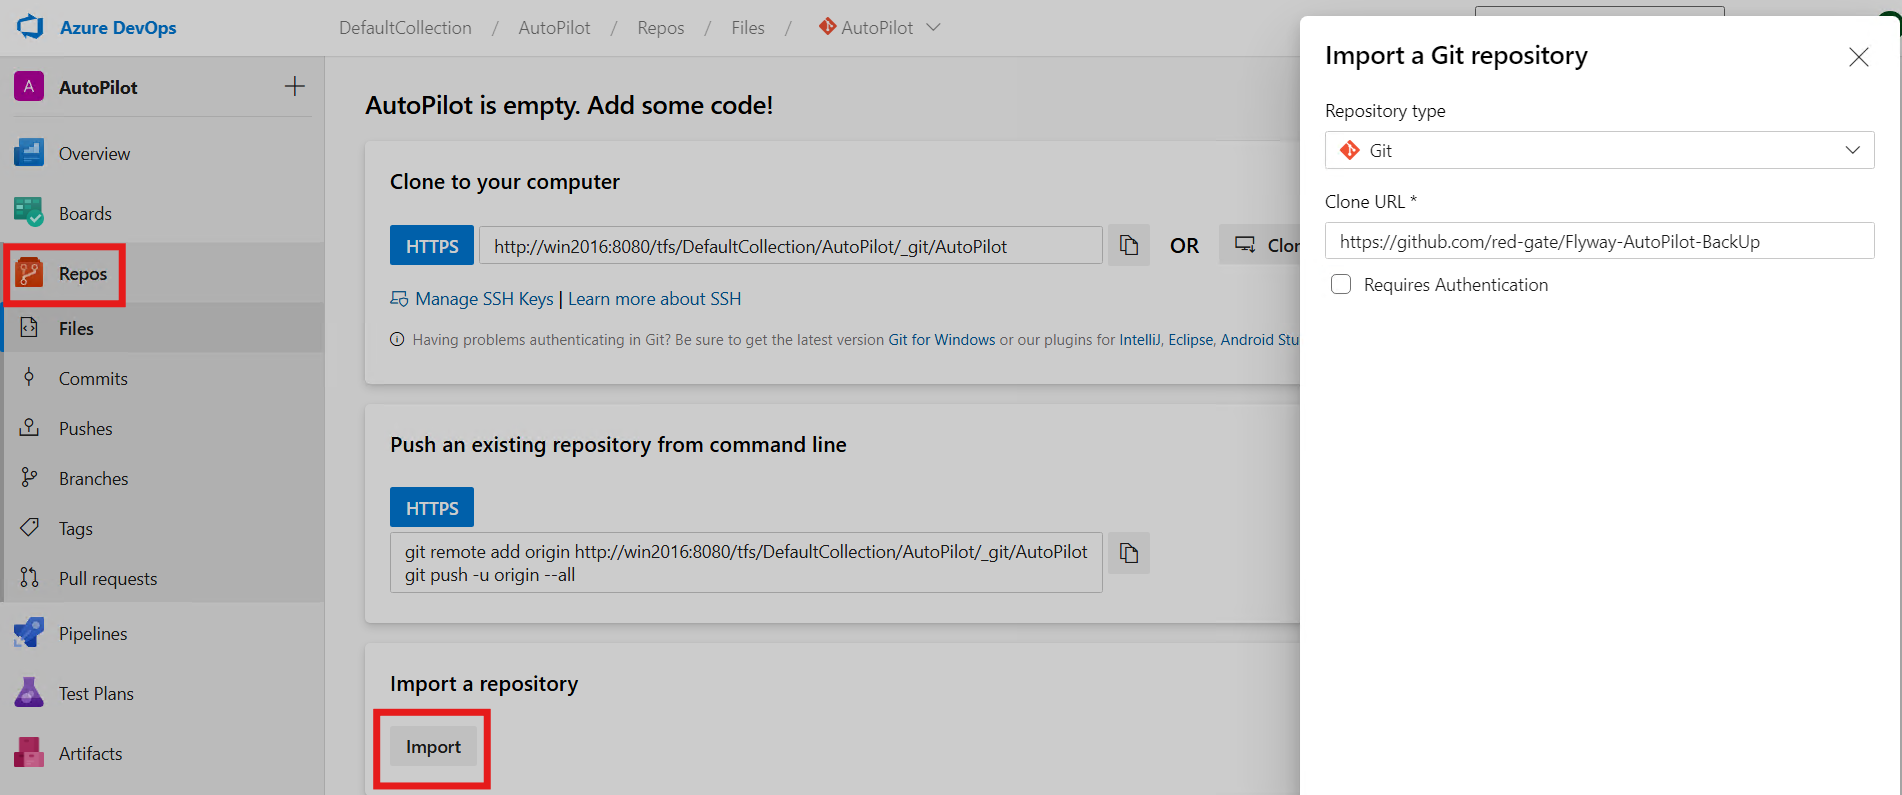
Tip - If you don't have permissions to create a new repository, speak to your in-house DevOps experts first.
Tip x2 - If your repository is created with a .readme and you are unable to choose 'Import a repository' (As it's not empty). Then simply download all project files from the GitHub Repo and copy these into your new Azure DevOps repo area
3. Your new Repository will look similar to the below. Now it's necessary to copy the repo URL, you can do this by clicking the 'Clone' button and copying the URL outlined (This will be used within Flyway Desktop in the next step).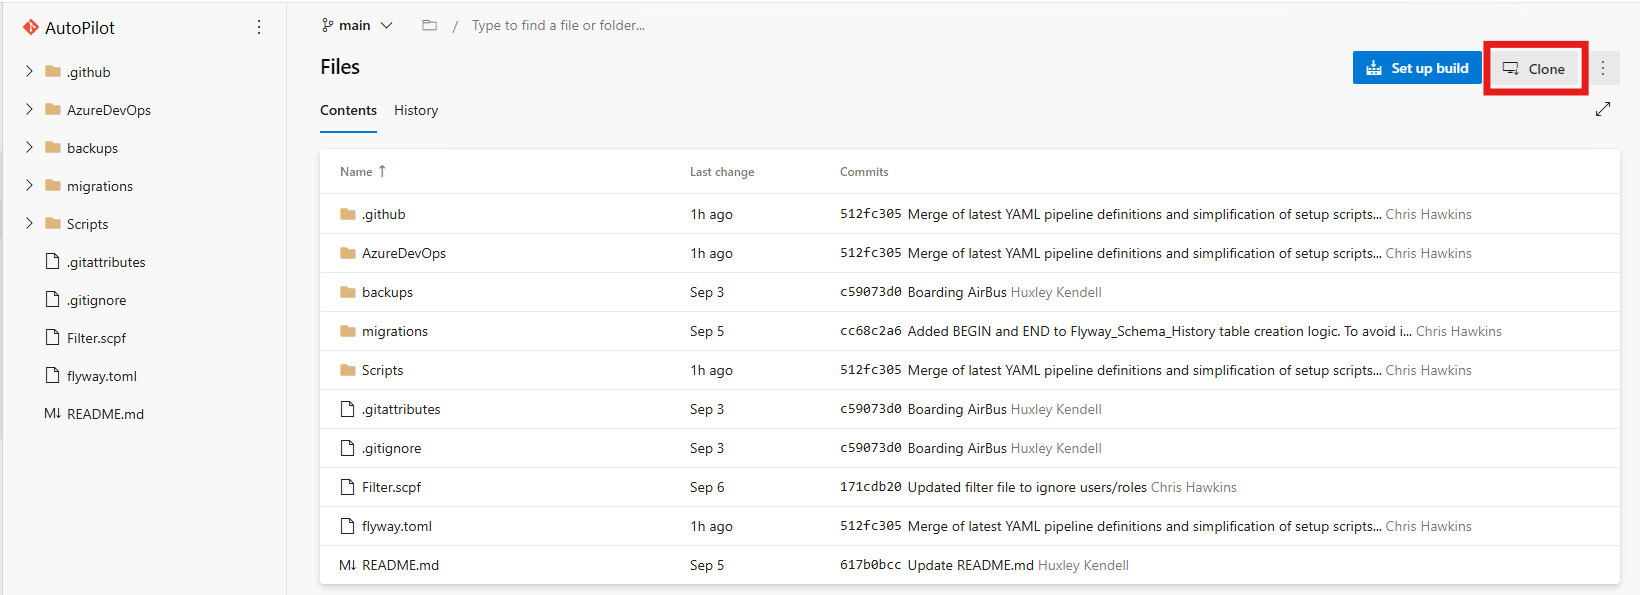
Cloning GitHub or ADO Repository into Flyway Desktop
Tip - You should only have done one of the set of steps above, creating either a GitHub or Azure DevOps Repository.
Remember: These repositories should be Private.
The next step of steps require Flyway Desktop to be installed.
Flyway Desktop WILL show a connection error the first time you load your repo, this is to be expected as the databases don't currently exist. Keep following this guide to create these.
- Click the Open project drop down > Open from version control. Paste the copied URL, select an empty folder as the directory, and click Clone.
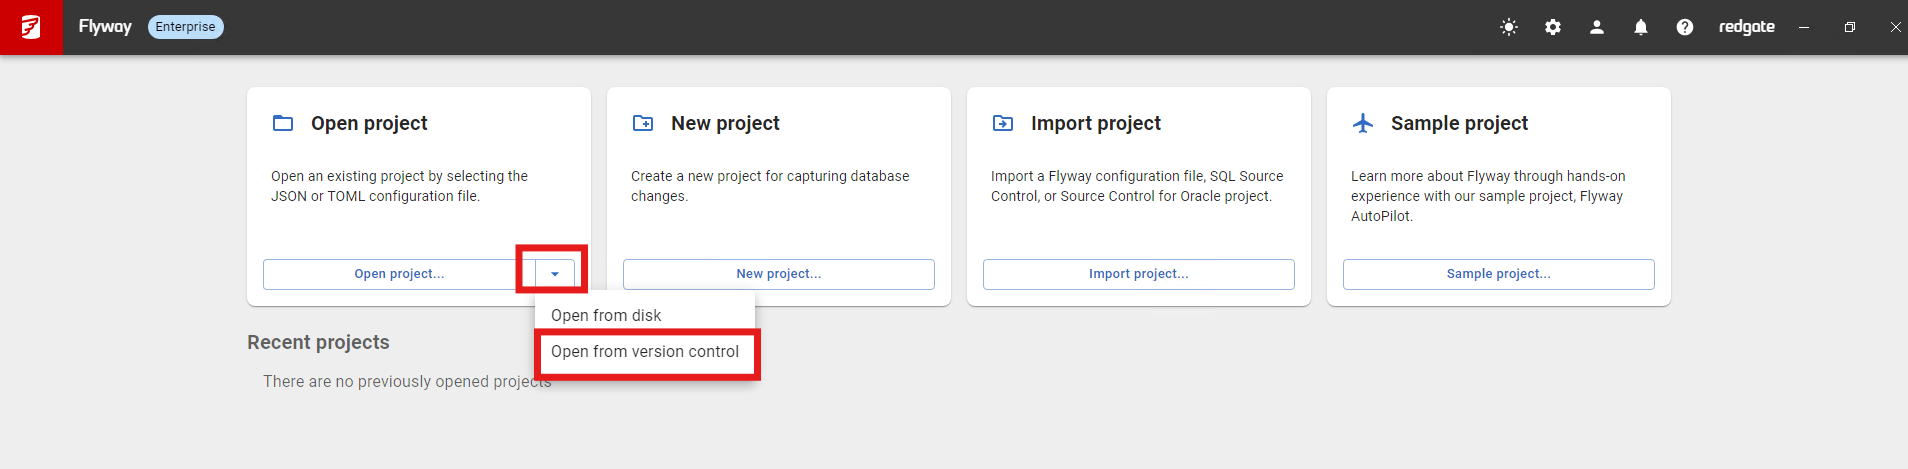 →
→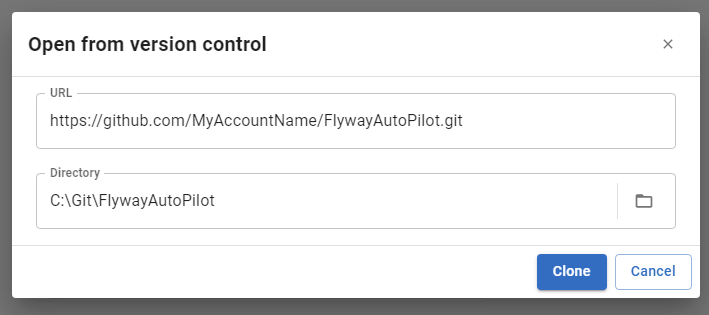

Tip - If your repo is private, which is the recommendation, ensure you use the correct URL when cloning. For example:
Repo URL - https://github.com/MyAccountName/FlywayAutopilot.git (Using this may fail through Flyway, as it cannot find the private repository)
Updated Repo URL - https://MyAccountName@github.com/MyAccountName/FlywayAutopilot.git (By adding my GitHub username before github.com, this helps GitHub ensure I first need to login as this user, before it searches for the repo)
*If problems continue, simply clone down your repository outside of Flyway using your preferred GIT method. Then use the 'Open from disk' method above and select the Flyway.toml as shown in the step below.
2. Select the `flyway.toml` file and click Open. In newer versions of Flyway Desktop, it will find your toml file automatically, so this will not be needed.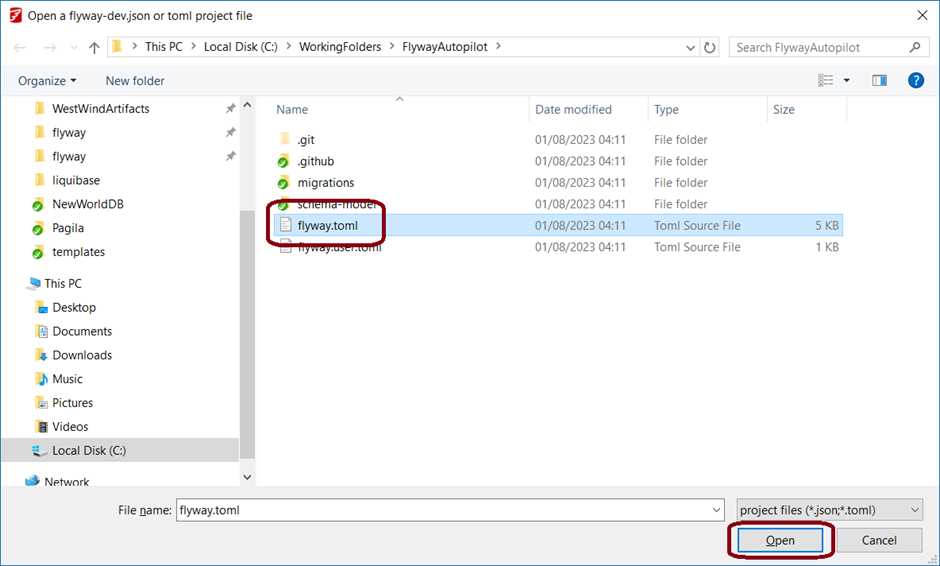
3. Don't panic, this error is expected. This is simply because there are no Autopilot databases to connect to yet. To create these, click on the blue folder icon in the upper right to jump to the files on disk.
Once you have followed these steps, you will have successfully created your own repository with a Flyway Project in Flyway Desktop!
Next step > Provision your environments
This documentation contains proprietary information and is protected by copyright law.
Copyright © 2026 Red Gate Software Limited. All rights reserved


