Get started with Flyway Insights
Published 29 September 2026
ENTERPRISE
Flyway Insights is in public preview for Flyway Enterprise users. Features may change before general availability. Got an idea or found a problem? Tell us what you think
Connect Flyway to Flyway Insights so every deployment is recorded.
Before you start, you need:
- A Flyway Enterprise license
- Flyway Desktop 9.10.2 or later, if using Flyway Desktop for configuration
- The Redgate edition of the Flyway CLI or the Flyway Docker image. The open-source edition doesn't include publishing.
- A Flyway project that uses a
flyway.tomlfile. If you're still usingflyway.conf, convert it to TOML first. - A Redgate ID. To share deployments with your team, it should be in your Redgate organization. See Sharing with your organization.
- Outbound HTTPS access to flyway.red-gate.com and identityprovider.red-gate.com. No inbound access is needed. See Network requirements.
1. Turn on publishing
Tracking changes is a project setting, so it's saved in your project's flyway.toml and applies to everyone who uses the project:
- Flyway Desktop sets
publishResult = trueinflyway.toml.
You can turn on tracking in the following ways:
From the prompt:
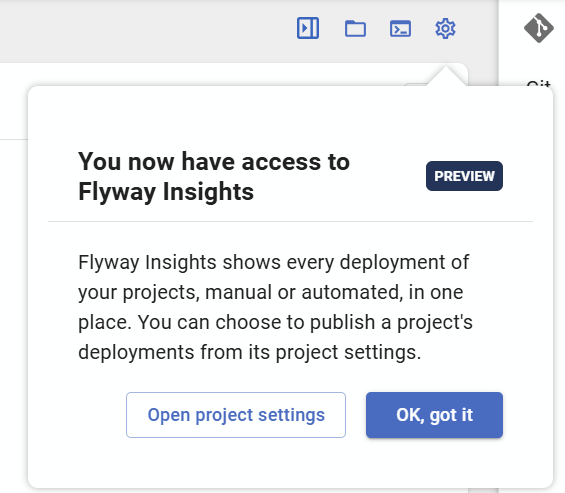
Open your project and go to the Deploy or Automate deployment page. At the top of the page, you'll see Track this project with Flyway Insights. Select Enable tracking. That's it; the setting is saved to the flyway.toml file straight away.
From project settings:
- Select the cog (Configure project settings) to open Project settings.
- On the General tab, under Flyway Insights, select Track this project's deployments in Flyway Insights.
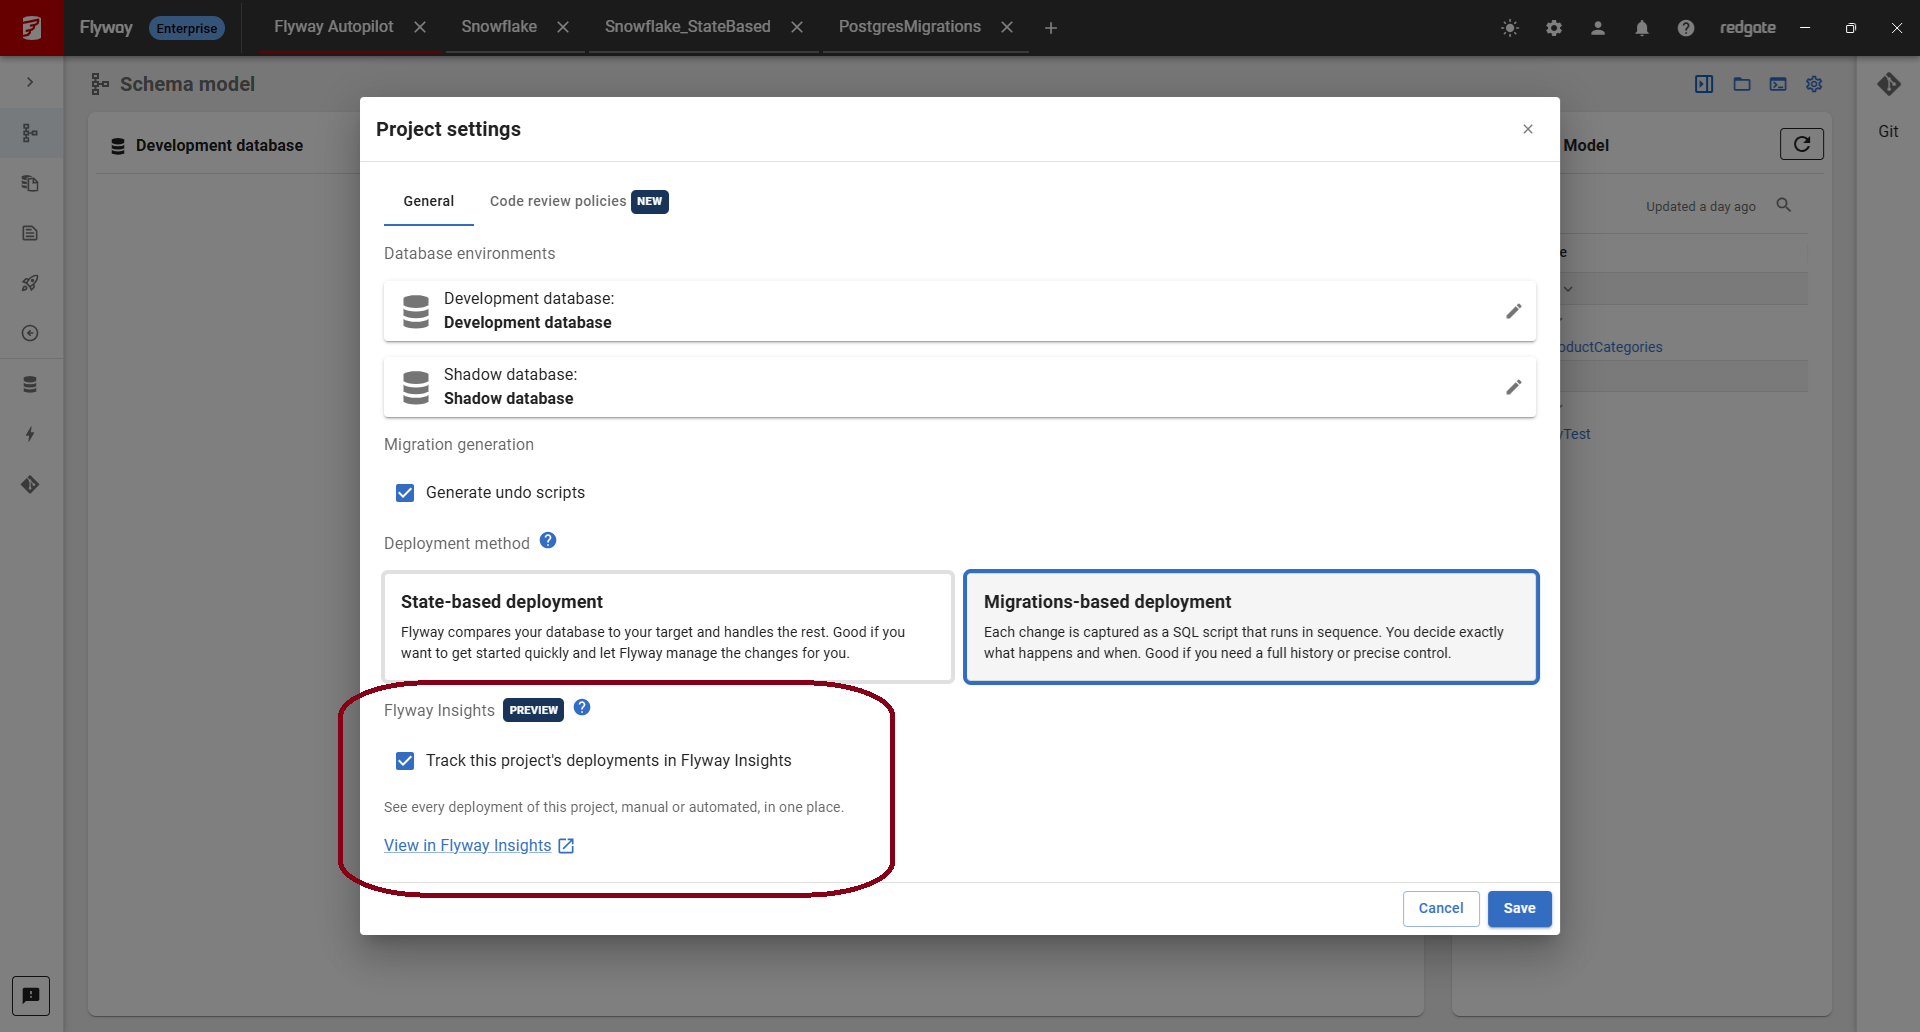
- Click Save.
Add this to the [flyway] section of your project's flyway.toml:
[flyway]
publishResult = true
If you haven't created the project through Flyway Desktop or flyway init , run flyway init to make sure you have the right settings. If you're still using flyway.conf, convert it to TOML first.
To leave an environment out, such as a local development database, set publishResult = false for that environment:
[environments.development.flyway]
publishResult = false2. Commit and push
Commit and push flyway.toml so your automated deployments are tracked too.
3. Run it in CI/CD
Every time flyway migrate, flyway deploy, or flyway check -drift is called for this project, the results will be published to Flyway Insights.
Create a Personal Access Token
When deploying with Flyway locally via the CLI or Flyway Desktop, or as part of a CI/CD process, you'll need to ensure Flyway Enterprise is authenticated by logging in with your Redgate ID or using a Personal Access Token (usually done in CI/CD pipelines).
- Go to Redgate Personal Access Tokens.
- Sign in with the Redgate ID you want your pipeline's deployments recorded under. Make sure it's in your Redgate organization, so your colleagues can see them.
- Select New token, and copy the token. You won't be able to see the full token again.
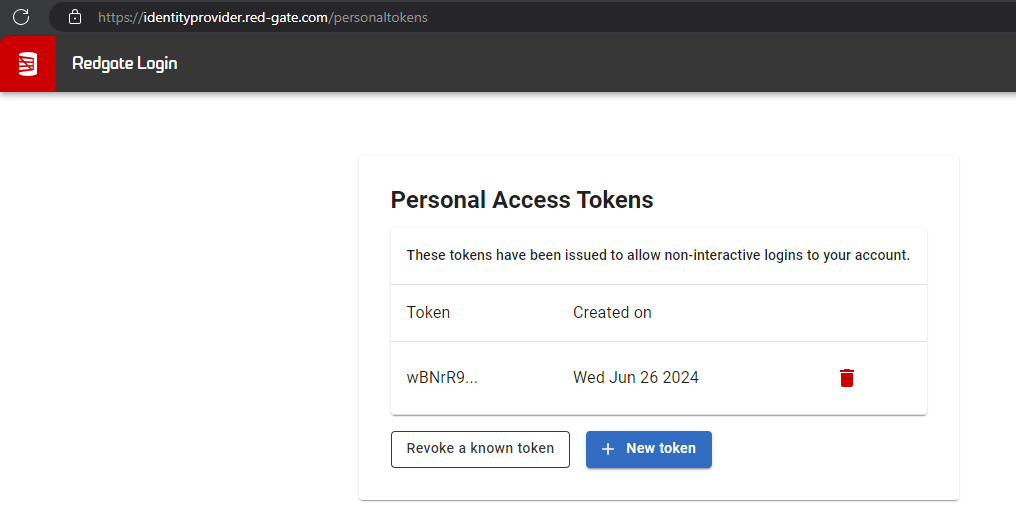
Treat the token like a password. Store it as a secret variable in your CI/CD tool, and never commit it to source control.
Pass the token to Flyway
With publishResult = true committed in flyway.toml, set these secret variables in your pipeline:
FLYWAY_EMAIL=<email address linked to your PAT>
FLYWAY_TOKEN=<your PAT>
If you'd rather not change flyway.toml, set an environment variable, FLYWAY_PUBLISH_RESULT=true. Or pass everything on the command line, taking the token from a secret variable:
flyway migrate -email=<your email> -token=<$your PAT> -publishResult=true
Prefer to be guided? Sign in to Flyway Insights, open Deployments and select Add pipeline.
Note: Manual deployments from Flyway Desktop are not yet published out of the box, since email and token parameters are also needed. Add these to your flyway.toml under [flyway] to publish from Flyway Desktop until we fix this. Be sure to keep your TOKEN as a secret and out of source control.
4. View your deployments
Go to Flyway Insights (https://flyway.red-gate.com) and sign in with your Redgate ID. Until your organization's first deployment is published, the Deployments page is empty. You can explore the sample data. Once you have published data, your project appears with its latest status:
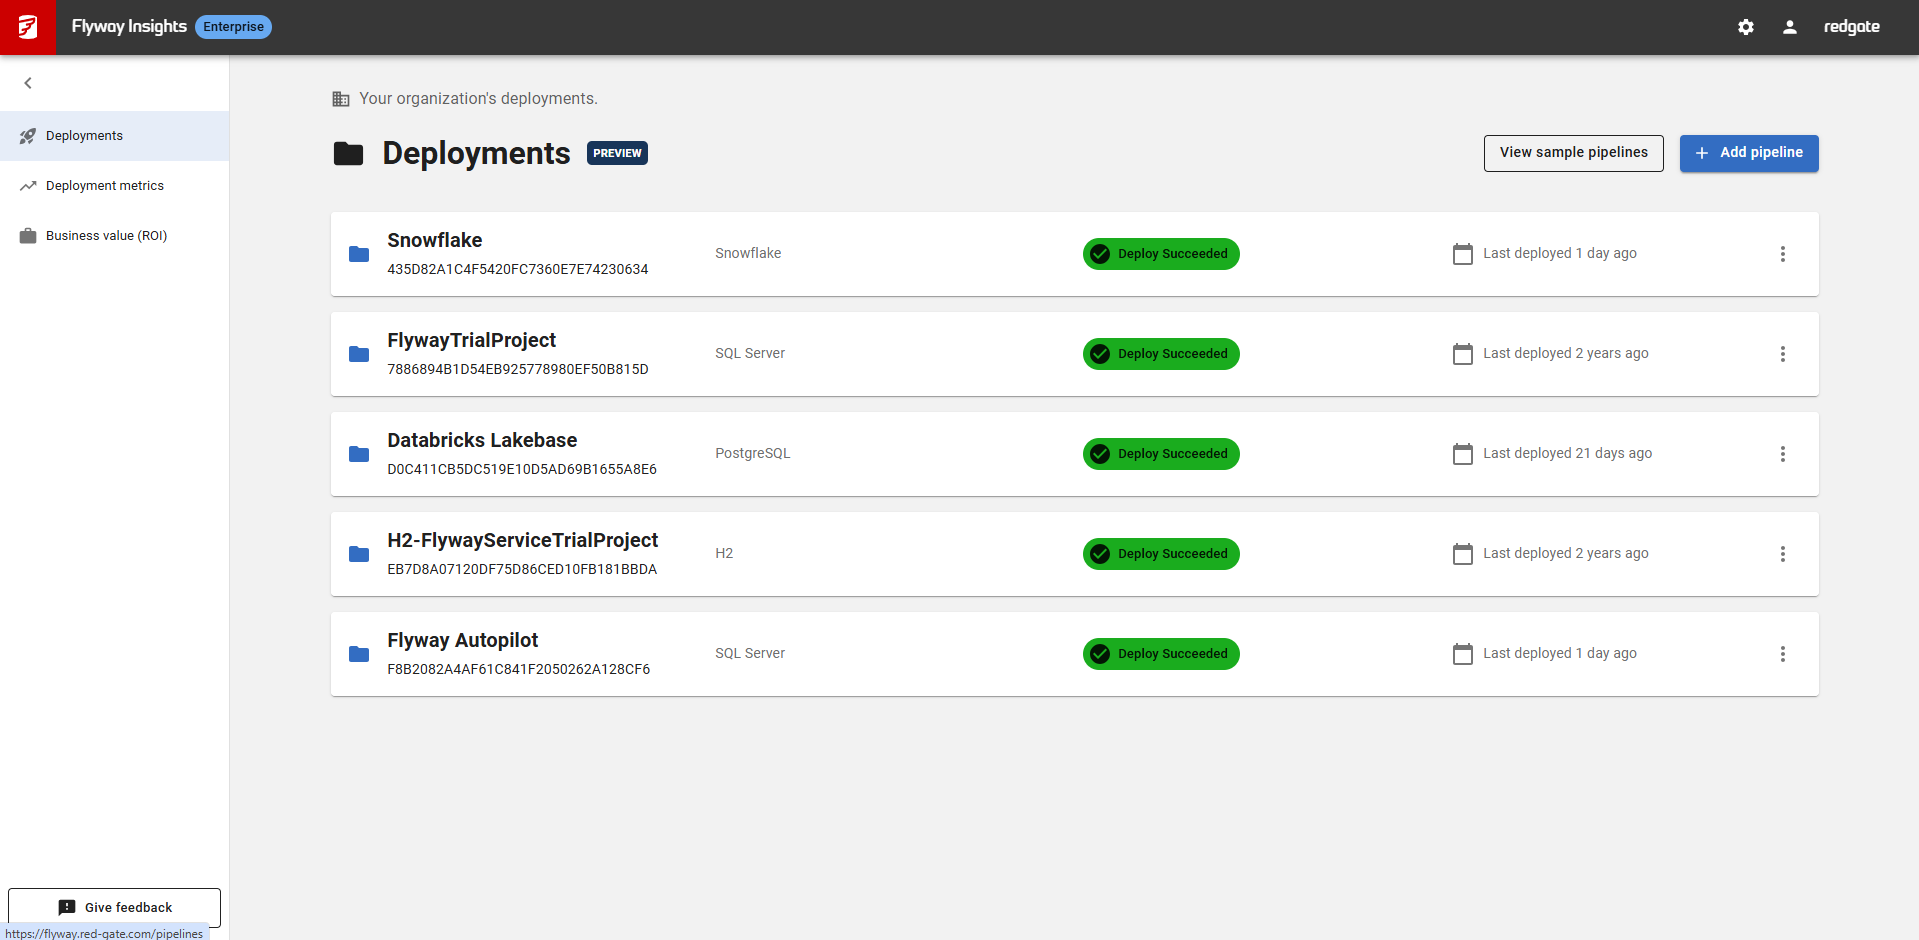
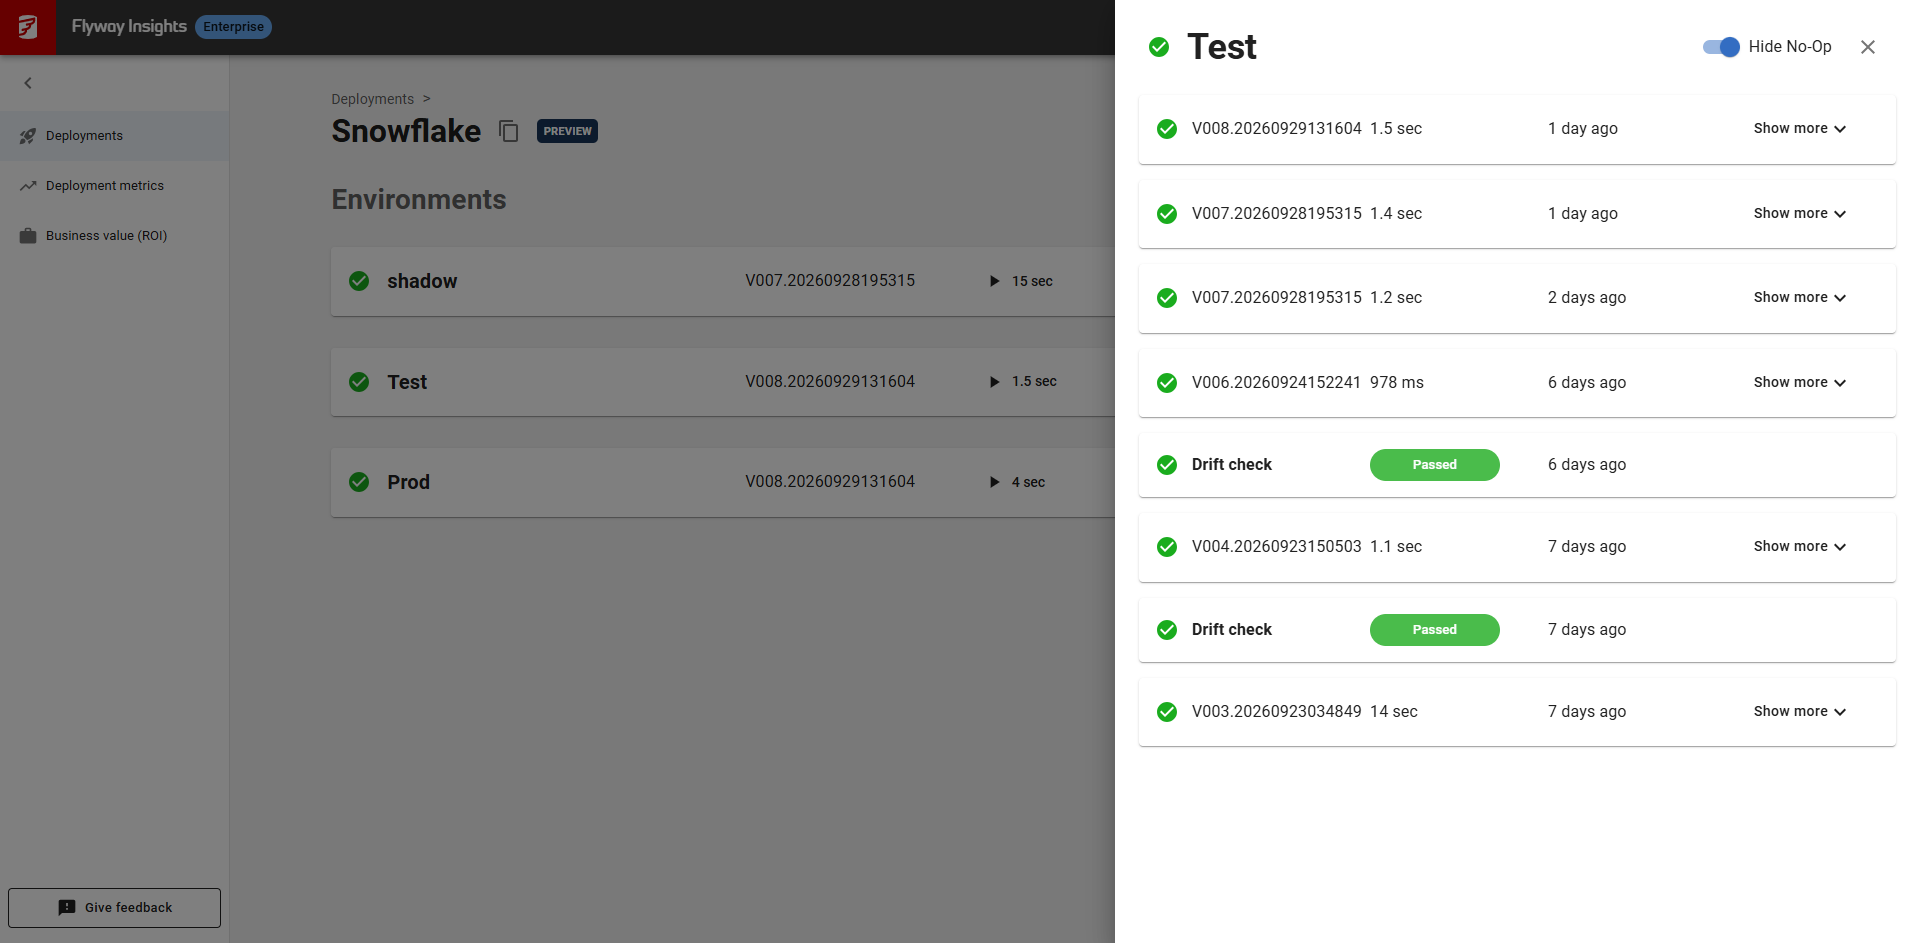
Select the project to see its environments. On an environment, select Show more, or Deployment history, to see every deployment, the name of the script that ran, and how long they took.
Next steps
- Check your DORA metrics
- Make sure your team can see each other's deployments - Sharing with your organization
- Learn what's sent to Redgate - Security, hosting, and data
This documentation contains proprietary information and is protected by copyright law.
Copyright © 2026 Red Gate Software Limited. All rights reserved


