Setup and baseline a project via the command line (cli)
Published 11 December 2024
This how-to guide uses SQL Server and the Windows Command Prompt to create a Flyway project and baseline it via the command line (cli). This example uses SQL Server and Windows. Similar steps would apply for Oracle, PostgreSQL, or MySQL databases, and for Linux or macOS. This script can be used as a starting point for more advanced automation via the command line, e.g., loop through multiple databases on a server and setup multiple projects with baselines quickly.
Setup
- Create the sample databases on a SQL Server.
This script creates the following databases with a few sample objects in each.- AutoPilotDev
- AutoPilotTest
- AutoPilotProd
- AutoPilotCheck
- AutoPilotBuild
- AutoPilotShadow
- Create a local folder to work in. In this example, we'll be working in C:\Users\stephanie.herr\Documents\Redgate\CommandlineProject
md FlywayAutoPilotcd FlywayAutoPilot
Flyway Project Setup
- In the FlywayAutoPilot folder, create the project using the flyway init command.
flyway init -init.projectName=FlywayAutoPilot -init.databaseType=sqlserver
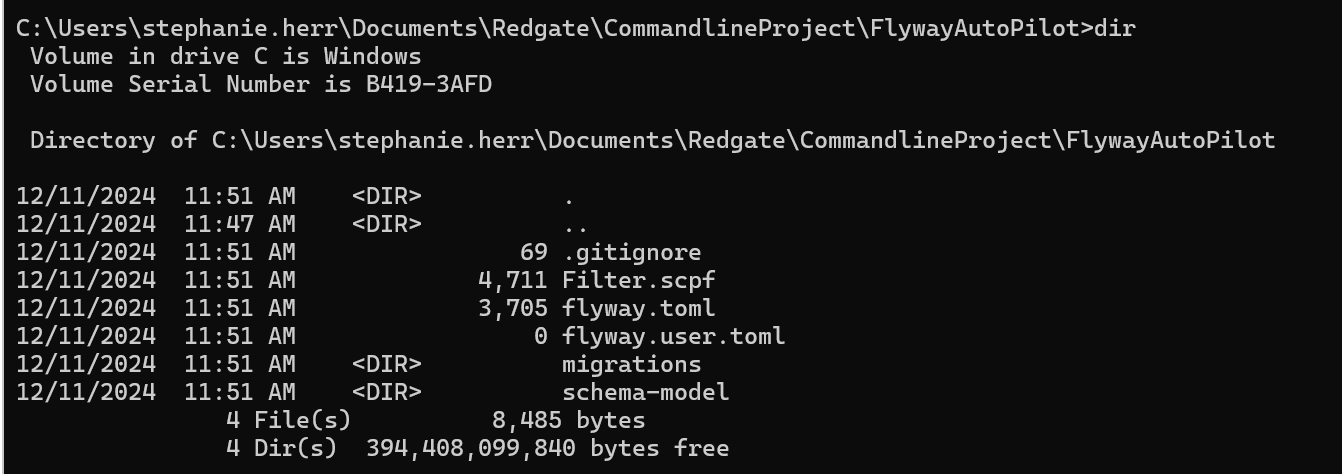
This creates the following folders and files in your directory: - Link your development database
TODO
Your flyway.user.toml file will look like (with your own server/instance name):[environments.development] url = "jdbc:sqlserver://localhost;instanceName=SQLExpress;databaseName=AutoPilotDev;encrypt=true;integratedSecurity=true;trustServerCertificate=true" displayName = "Development database"
Save your initial Schema Model
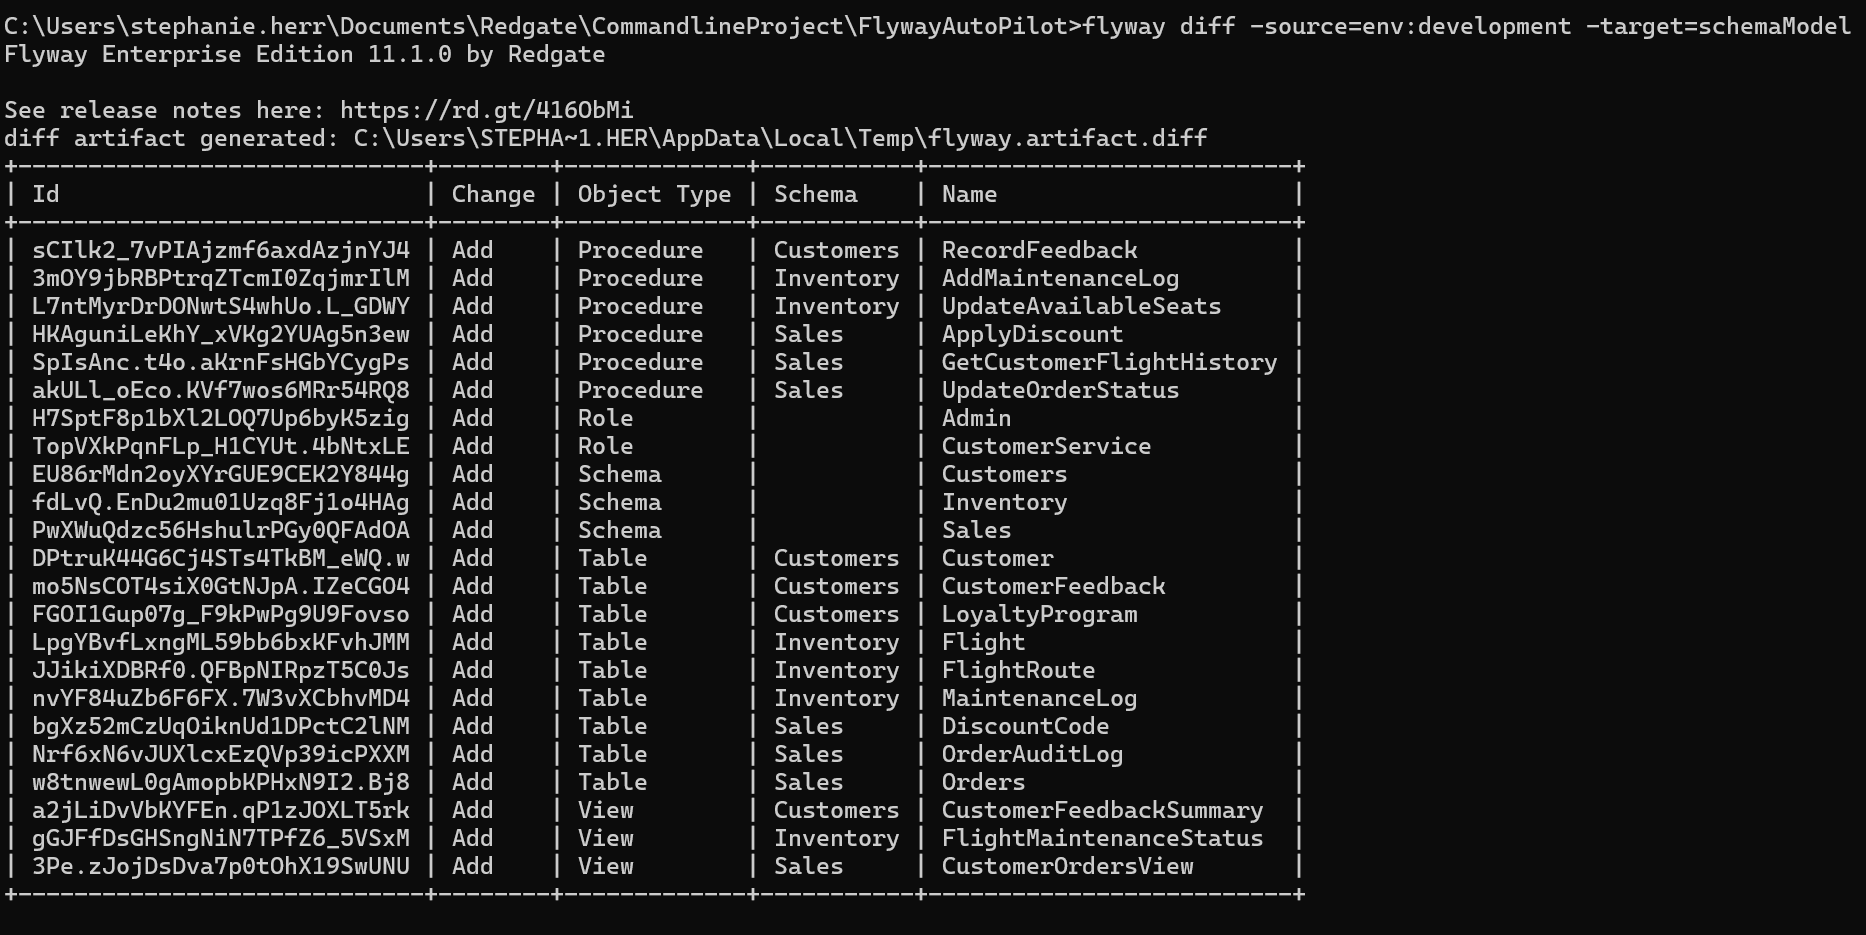
- Run the following command to see all the differences between your development database and your SchemaModel on disk. This will currently be everything.
flyway diff -source=env:development -target=schemaModel
The output will be a diff artifact, which looks like:
Nothing has been written to disk yet. - Now, let's save the differences to the "schema-model" on disk in the current folder.
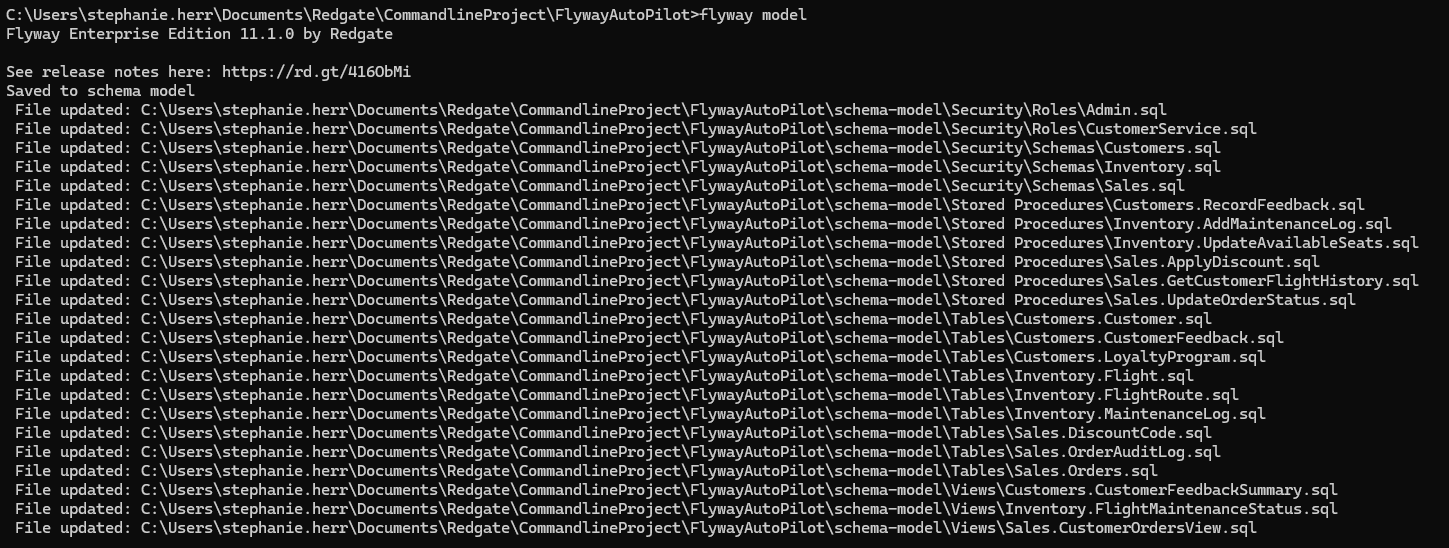
flyway model
The output will look like:
These files are now written to disk. - At this point, you could use the git command line to initialize your folder to be a git repository (if needed) and do an initial commit of your project files and schema model.
git init
git commit -am "Initial Flyway Auto Pilot project and schema model"
The output should look like:Note: In a real project, some additional configuration may be needed. This could include specifying what Static Data tables to track, changing comparison options, and specifying what objects to be filtered out or ignored from version control.
Create the baseline script
- Generate a timestamped baseline migration script in the default directory (/migrations).
flyway generate -types=baseline -description=BaselineScript
The output will look like:- In this example, our development database matches production, so the diff used to get the initial Schema Model can be re-used to generate the Baseline script with no additional parameters needed. If this is not the case, you'll need to use flyway diff with the following parameters and then run flyway generate:
- source - a database that represents what has already been deployed to production
- target=empty - because the baseline script represents how to build the database from scratch
- If you don't want your migration script names to contain timestamps by default, then add -timestamp=never in the example above. Timestamps are recommended when working in teams or when working across branches to avoid conflicting version information in filenames, which is not allowed in Flyway. Learn more about Migrations and setting your version numbering.
- In this example, our development database matches production, so the diff used to get the initial Schema Model can be re-used to generate the Baseline script with no additional parameters needed. If this is not the case, you'll need to use flyway diff with the following parameters and then run flyway generate:
Next Steps
- Setup a remote repository and use the Git command line to push your repo to the remote.
- Learn how team members can access the project from the remote to capture additional schema model changes and generate new migration scripts.
- Make changes to your development database. Use the Flyway Desktop GUI or the Flyway CLI to capture the new changes in the schema model and generate new migration scripts to be deployed to your downstream environments (e.g., Test > UAT > Staging > Prod). These deployments could be done as part of your CI/CD system.


