Step 4. Review & create
Published 10 June 2025

This step summarizes the settings completed earlier in the wizard, and allows you to enable or disable the custom metric and alert before creating them.
If you want to change any of the earlier settings, click the Back button.
Click the Save metric button. The new metric is listed on the Custom metrics and alerts page.
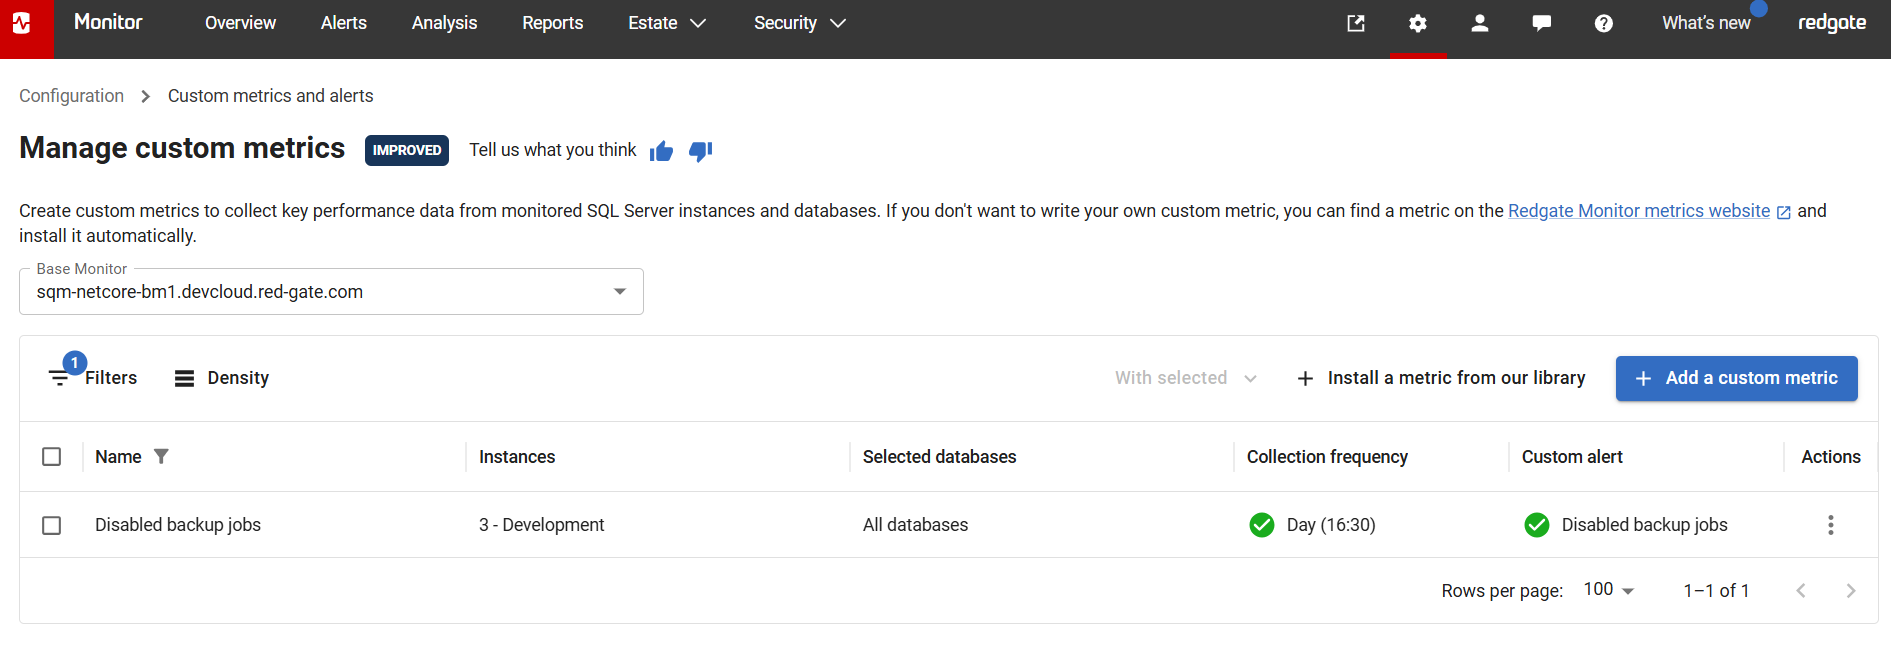
From the Custom metrics and alerts page, you can:
- create additional metrics and alerts. Click the Add a custom metric button again to start a new wizard.
- edit existing metric and alert settings. You can enter the wizard at any time to make changes to it. See: Editing custom metrics and alerts.
- look at the analysis graph for this metric to see collected values plotted as data points. You can also display additional metrics in the graph at the same time to identify correlations. The first collection will take place within 10 seconds of the metric being created; subsequent collections take place according to the defined metric collection frequency. See: Analyzing Metrics.
For custom metrics that measure a rate of change, the first data point can only be displayed once two data collections have been made. This is because the rate is calculated from a pair of consecutive values.
This documentation contains proprietary information and is protected by copyright law.
Copyright © 2026 Red Gate Software Limited. All rights reserved


