Generating migrations
Published 29 July 2021
In v5, Redgate Change Control has been renamed to Flyway Desktop. Check out the latest documentation at https://documentation.red-gate.com/fd
Redgate Change Control allows you to make changes to your development database whilst you are working on features and improvements. When you are happy with your changes you can capture them as migration scripts by using the generate migrations workflow. Once saved in your project, migration scripts can be shared with the rest of your team and deployed to other environments.
Migration scripts can be generated once changes have been made to your development database In the example below, we are adding a new column called `email` to the `customers` table and we're also creating a new stored procedure `sprGetEmails` to return this new column.
1. In Redgate Change Control, navigate to the Generate migrations tab

In the connection dialog, specify your shadow database connection details: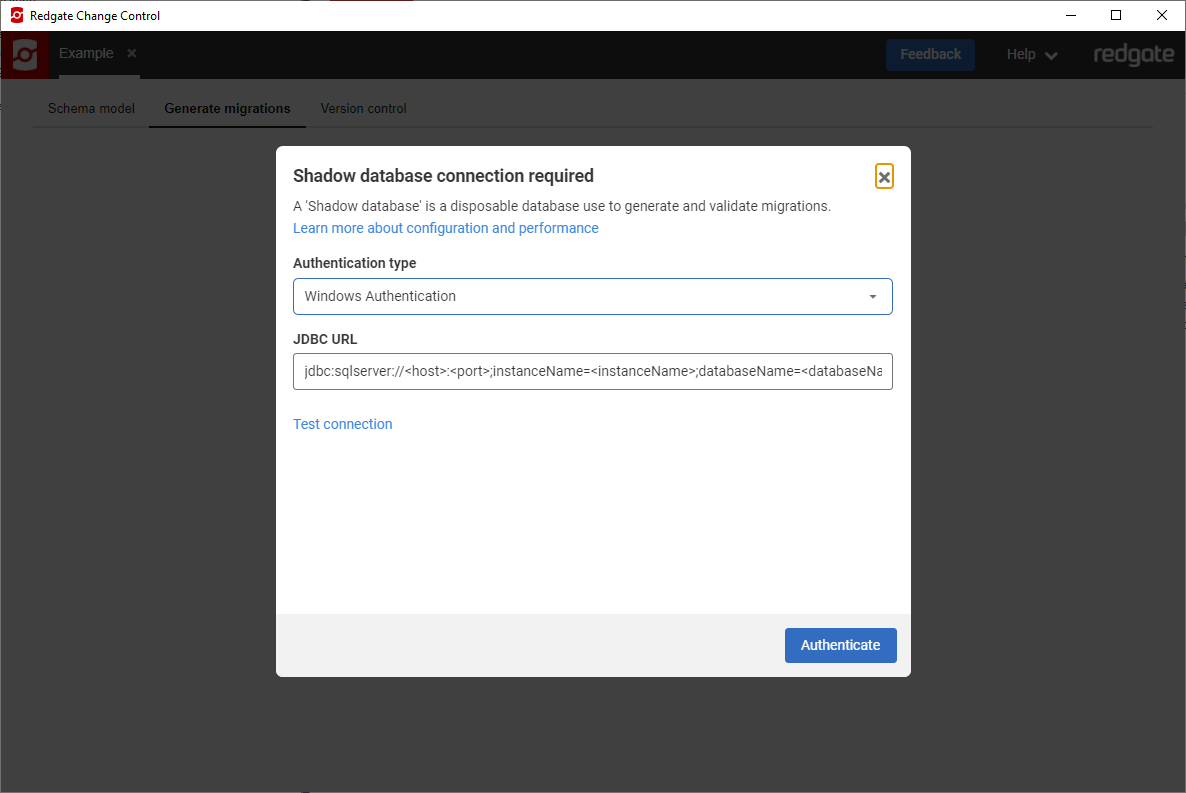
There's information that shows how long ago the project was refreshed. If there are any changes in your schema model, a little red asterisk will appear on the Refresh button.
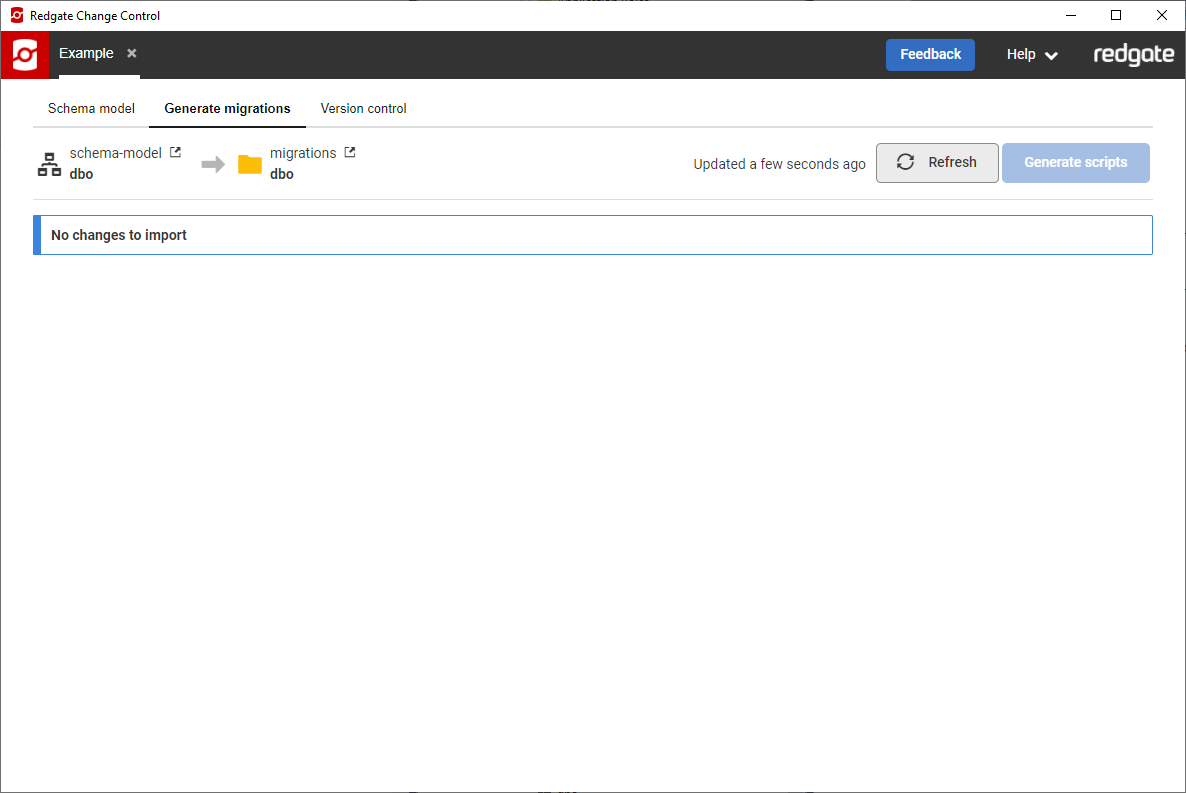
After clicking Refresh the changes are shown:
2. Review the differences
Click on the objects in the top list to show the differences for that object at the bottom. This allows you to see exactly how each object will change. You can also sort the columns by clicking on the different column headers.

3. Generate scripts for the selected objects.
Select each object that you are ready to script out changes for. You can select all objects by using the checkbox in the column header. Then click Generate scripts in the top-right.
Make sure that only your changes are selected if your team is using a shared development database.

4. Review scripts and update the version and description
This next page allows you to review the generated scripts. If your changes involve an object that stores data, such as a table, then a versioned migration script will be created. The version number will automatically incremented, and a timestamp will be included to minimize the chance of merge conflicts.
Timestamps are included in vesioned migration filenames by default. RCC/RCA cannot apply two migrations with the same version number, which can happen when multiple developers are merging parallel migrations. The sequential timestamp ensures that even identical version numbers are still able to be applied to a database, since their timestamps will almost certainly differ.
You can specify your own version number (e.g., maybe this is the next major version, V2.0). You can also provide a clearer description, which is the second part of the filename, so it's more obvious what change is contained in the script. You can also customize the generated versioned migration script. An example of this is if a new NOT NULL column is added without a default, and an initial value need to be set for existing records.
If you selected any Programmable Objects (e.g., Packages, Procedures, Functions, etc.), a repeatable migration script will also be generated for each object. There is only one repeatable migration per programmable object, and they are applied after versioned migration scripts. Maintaining programmable objects as repeatable migrations ensures that the number of versioned migration scripts is kept to a minimum. This also allows you to see how each object changes over time using your version control system and easily get back to previous versions. It also helps with conflict detection if your branching in your version control system.
You can learn more about the different migration scripts in our Terminology Reference.
Once you're happy with your changes, click Save. This will write the scripts on the screen to your project folder on disk.

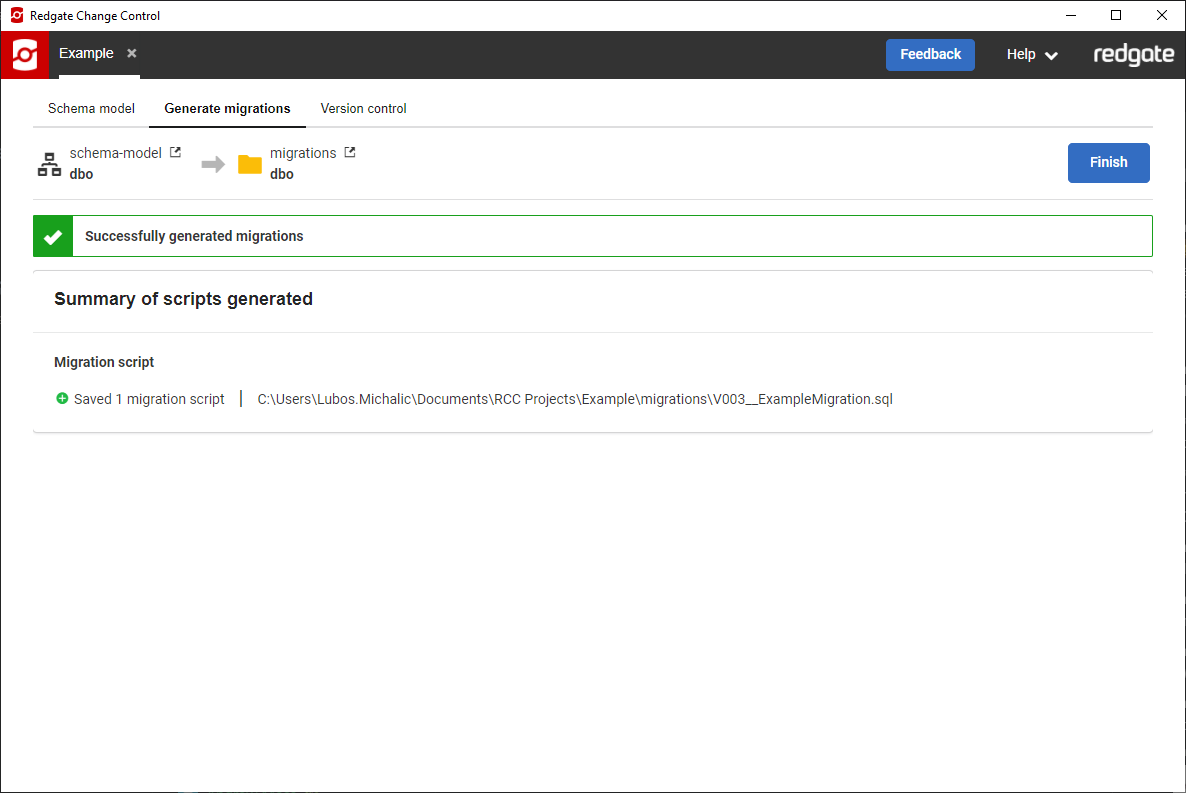
5. Review the summary
The summary page confirms which scripts were generated and their names.
Next steps
- Commit the files to version control using your VCS command line or preferred tool.
- Once your changes are in version control, they can be included in your CI/CD processes. Learn more about this at Deploying database changes.
Writing your own migration scripts
You can also add your own migration scripts in the project folder. Make sure you are following your project's naming convention (V###__<description>.sql or R__<description>.sql). This can be useful for migration scripts that deal with updating transactional data or for scripts that are supplied to you by someone else. Once the migration scripts are in your project folder, you will need to apply the changes to your development database.
This documentation contains proprietary information and is protected by copyright law.
Copyright © 2026 Red Gate Software Limited. All rights reserved


