PowerShell Deployment
Published 10 February 2016
If you are using VSTS/TFS, then see Create VSTS/TFS build
If you are using Octopus Deploy, then see Tutorial: Octopus Deploy Step Template
Configure your project to output a re-usable deployment package during build, which can be deployed onto all of your SQL Server environments using PowerShell or from the command line.
ReadyRoll's SQLCMD packages contain all the logic needed to determine whether any migration scripts need to be applied and, if so, execute them batch-by-batch, or simply exit if the database is already up-to-date. If any errors occur during deployment, then the deployment will be immediately halted and the transaction will be rolled back. Additionally, the database will be automatically created on the SQL Server on-premise or Azure SQL instance if it does not exist yet.
Initial project setup
Firstly, within Visual Studio, right-click the project in the Solution Explorer and select Project Properties.
On the Project Settings tab under Outputs, check the SQLCMD package (.sql file) option.
Perform a build of the solution.
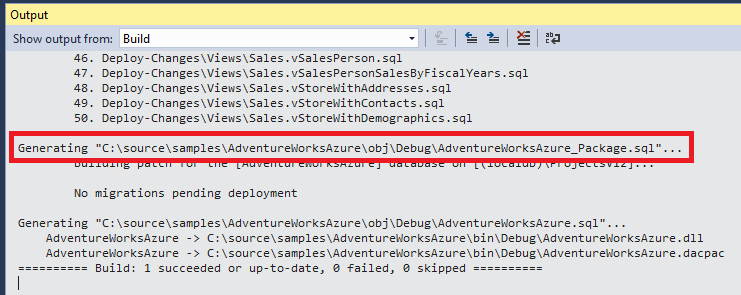
In the output window, you'll notice that a package file is now being created as part of the build (in this case, a file called AdventureWorksAzure_Package.sql is being created):
Ensuring your package is up-to-date
Always perform a build after you've made a change to the project, such as adding a new migration or updating a programmable object script.
This ensures that the package always includes up-to-date copies of all of your project assets.
Build Artifacts
Upon successful build, the following artifacts will be output to the .\bin\Debug folder:
- <ProjectName>_Package.sql: SQLCMD package deployment script. This SQL file, combined with the PS1 file, can be used to deploy your database to all of your environments
- <ProjectName>_DeployPackage.ps1: PowerShell deployment script. This file accompanies the SQLCMD package file and can be used to execute the database deployment from the command prompt (see below)
Deploying from the Command Line
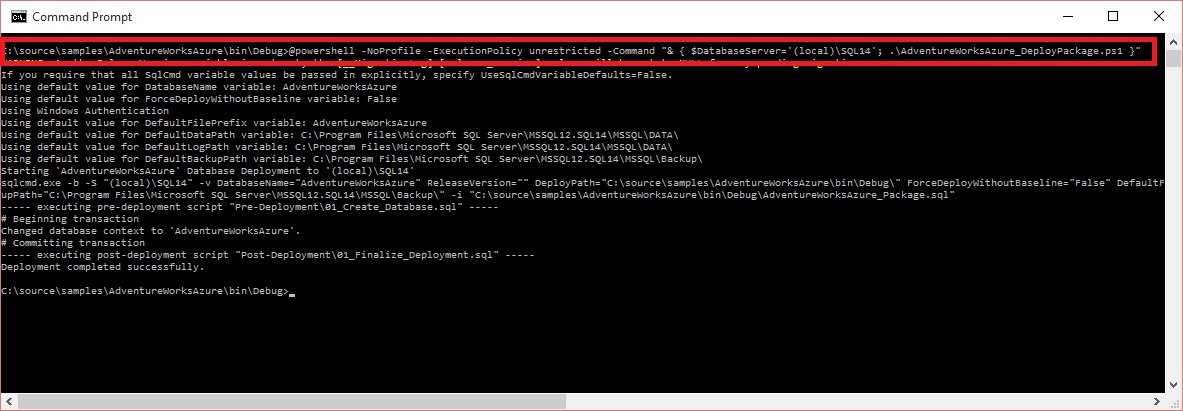
To deploy the generated SQLCMD package artifact to an instance of SQL Server using the Windows command line, use the following syntax:
Command Line Usage
@powershell -NoProfile -ExecutionPolicy unrestricted -Command "& { $DatabaseServer='<DatabaseServer>'; &'<OutputPath>\<ProjectName>_DeployPackage.ps1' }"For example:
Command Line Example
@powershell -NoProfile -ExecutionPolicy unrestricted -Command "& { $DatabaseServer='MYDBSERVER'; &'C:\source\samples\AdventureWorksAzure\bin\Debug\AdventureWorks_DeployPackage.ps1' }"Deploying from PowerShell
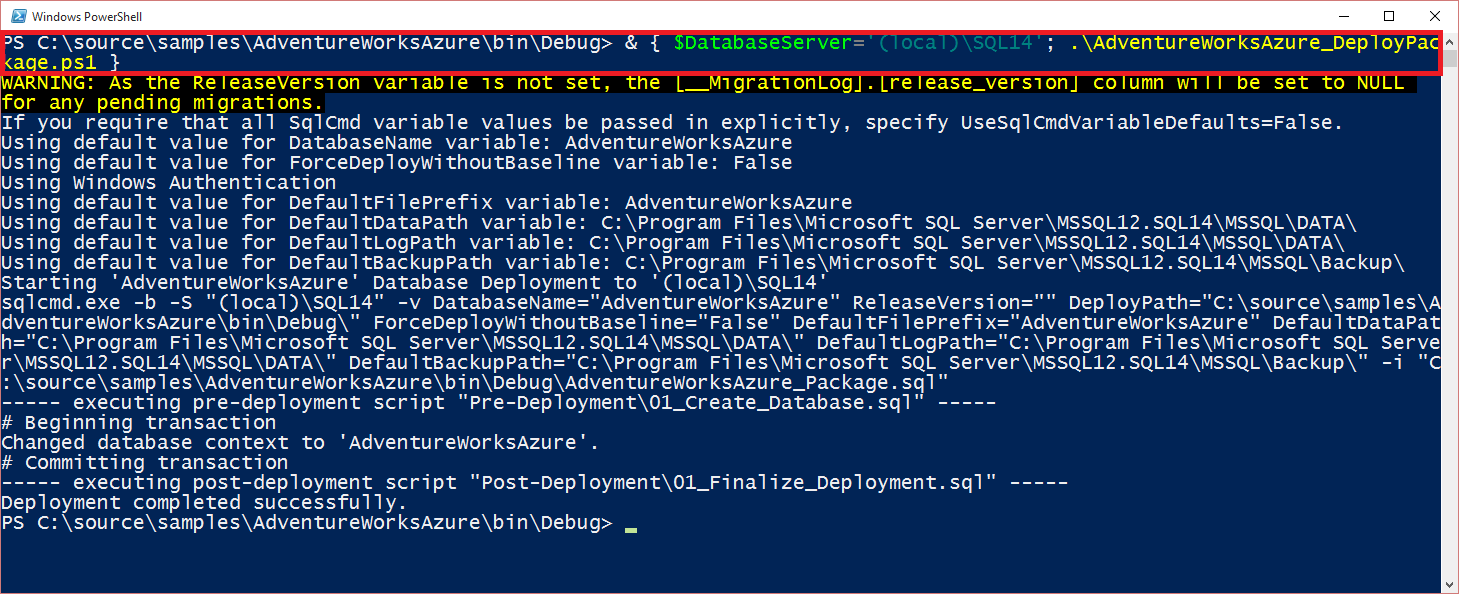
To deploy the generated SQLCMD package using PowerShell directly, use the following syntax:
PowerShell Usage
& { $DatabaseServer='<DatabaseServer>'; &'<OutputPath>\<ProjectName>_DeployPackage.ps1' }For example:
PowerShell Example
& { $DatabaseServer='MYDBSERVER'; &'C:\source\samples\AdventureWorksAzure\bin\Debug\AdventureWorks_DeployPackage.ps1' }Using SQL Server Authentication
By default, Windows Authentication is used to connect to your database server. If you would prefer to use SQL Server Authentication instead, set the values of the following PowerShell variables as follows, prior to executing the script:
- $UseWindowsAuth = False
- $DatabaseUserName = <username>
- $DatabasePassword = <password>
Custom Variables
If you would like to pass in custom values for your project variables, specify additional PowerShell variables between the curly-braces (before the .PS1 file call).
For more information, see our article on SQLCMD variables.


