Implementation checklist
Published 28 February 2024
Overview
This checklist guides new users through setting up and deploying Redgate Test Data Manager for a successful Proof of Concept (PoC).
Our product includes a user-friendly GUI along with powerful CLI tools including anonymize and subsetting.
Looking for a faster route? If you have an AI coding tool (Claude Code, Cursor, Copilot, or similar), the Set up with AI coding tools path walks the tool through install, configuration, and your first run for you. Otherwise read on.
Before You Start: What you need to know
- Test Environment: Use a dedicated test environment to keep live data safe similar to the proof of concept environment below.
- System Requirements: Make sure your system meets our minimum requirements in the installation guides here for a smooth setup. And check out some suggested set up tips in our architecture diagrams.
- Check Foreign Key Relationships: Subset requires Foreign Key relationships. We've created some scripts to help you identify FK links across your database.
- Redgate University Courses: For videos and top tips from the experts, take a look at our Test Data Manager courses on Redgate University.
Example Proof of Concept environment
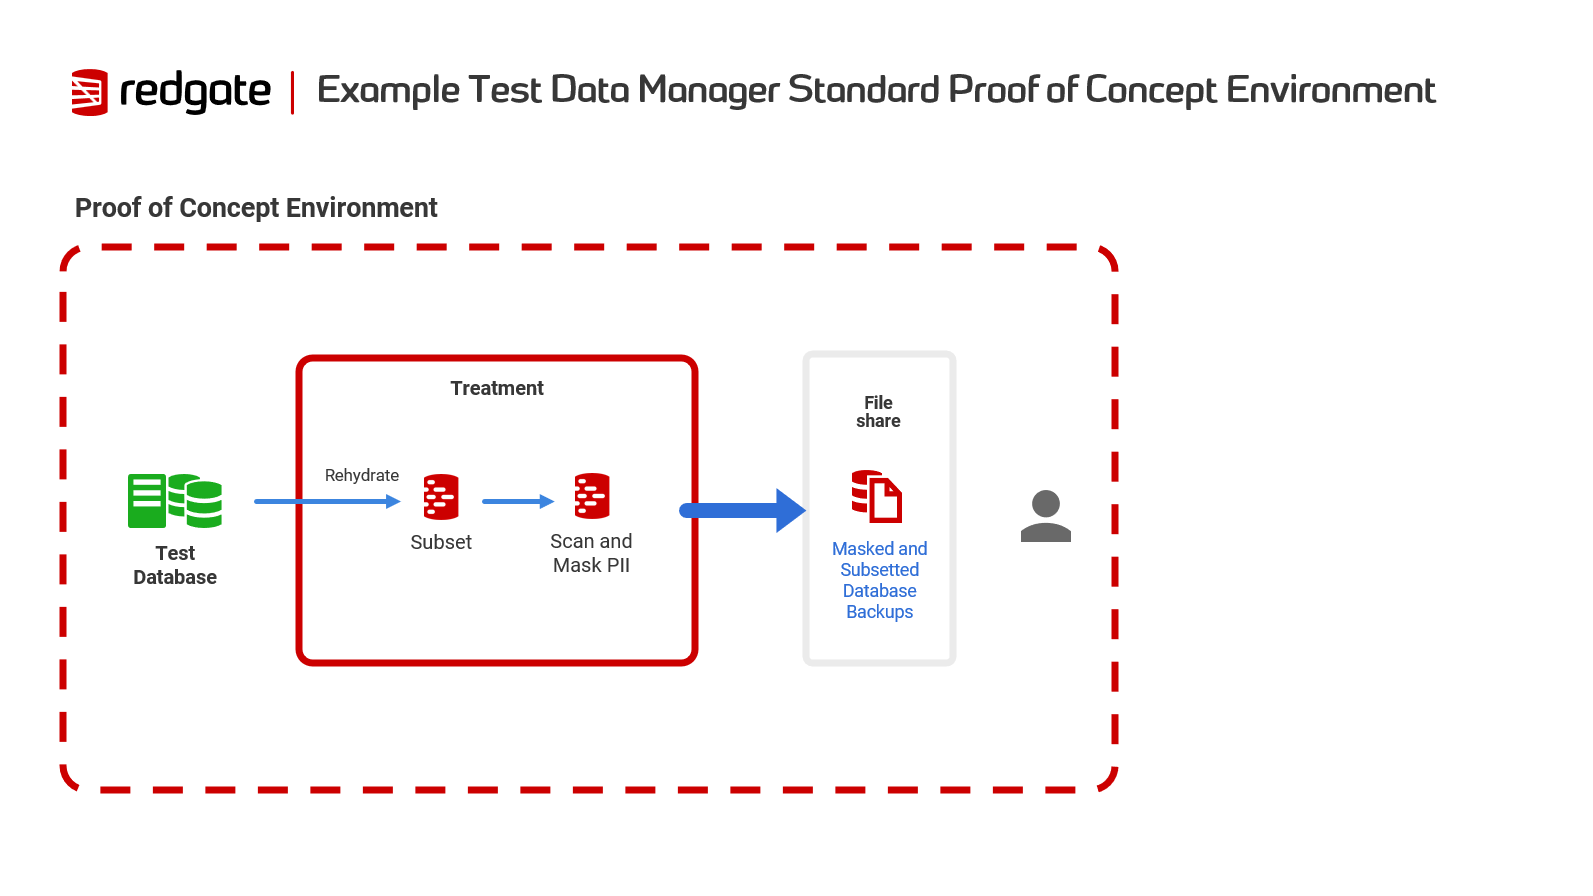
Installation Overview
GUI Installation
- Download the GUI
- AWS users can also follow our guide to deploy TDM to their environment through AWS CloudFormation.
Complete GUI Installation Guide - Follow our step-by-step guide that covers:
- Hardware and software requirements
- Installation procedure with screenshots
- Initial configuration and testing
Command Line Installation
For automation, scripting, and CI/CD integration
- Anonymize: CLI installation and setup guide.
- Subsetting: CLI installation guide | Installation requirements
Getting Started
Using the GUI
The Test Data Manager GUI provides visual workflows for subsetting and anonymization.
Step 1: Create a database model
You'll need: Database connection details (non-production environment)
- Follow our guide: Creating a database model
Step 2: Choose your treatment type (Requires a database model)
Choose based on your goal:
- Mask sensitive data? → Creating an anonymization treatment
- Reduce database size? → Creating a subsetting treatment
Step 3: Run your treatment
Using the Command Line
For automation and scripting workflows
Subsetting
Getting Started with the Subset CLI - Create your first subset
Anonymize
For a step by step guide to Anonymize, check out our Worked Example.
For more details and advanced configuration options, refer to the Anonymize command line reference.
Next Steps
✅ Complete your first PoC:
- Create a database model
- Create an anonymization treatment OR Create a subsetting treatment
- Run your treatment and review results
📚 Explore advanced features:
- Reviewing and editing masking rules - Customize anonymization
- Configuring starting tables subsetting - Extract specific data
- Custom datasets with AI - Generate realistic test data
🎓Learn More:
- Dive deeper into Test Data Manager by exploring our Redgate University videos for comprehensive tutorials and demonstrations
This documentation contains proprietary information and is protected by copyright law.
Copyright © 2026 Red Gate Software Limited. All rights reserved


