Creating images
Published 09 November 2023
This page explains how to create an image in the Redgate Test Data Manager GUI. An image is like a template from which you can later create one or more clones. See also Creating clones from images, Managing images and Managing image permissions.
Contents
Creating an image
Here is how to create an image in the GUI.
Go to the Images page using the navigation drawer.
Click Create new image. The Create new image wizard appears. This wizard asks you questions about how you want your image configured and requests the information it needs to achieve this.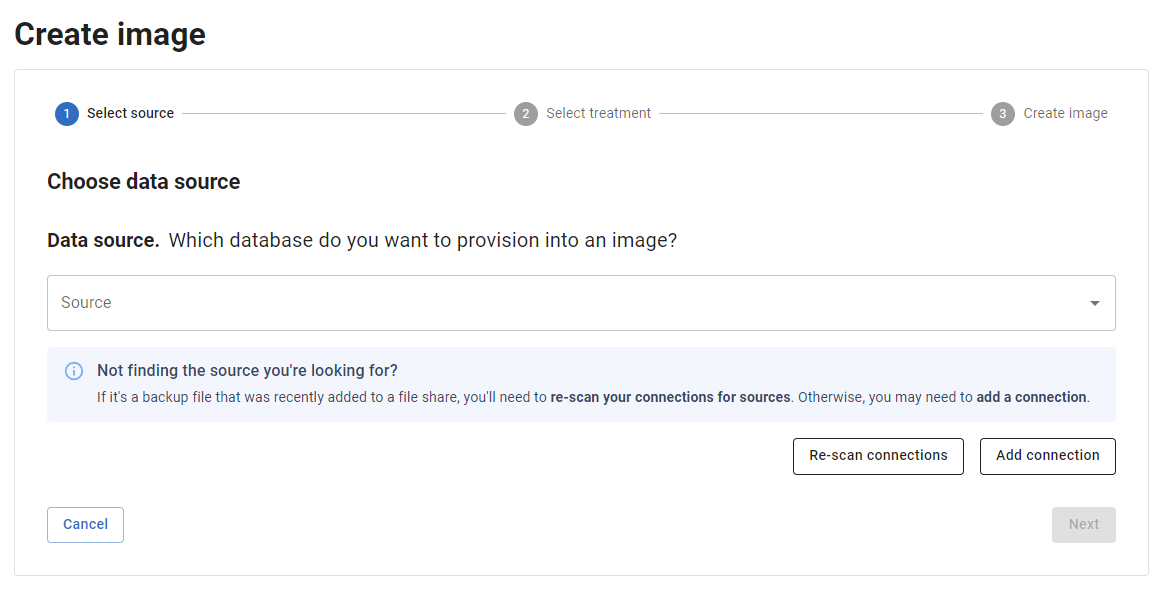
Select source step
The first step in defining the image is Select source where you select which data source you want to provision, what you want your image to be called and some platform-specific information.
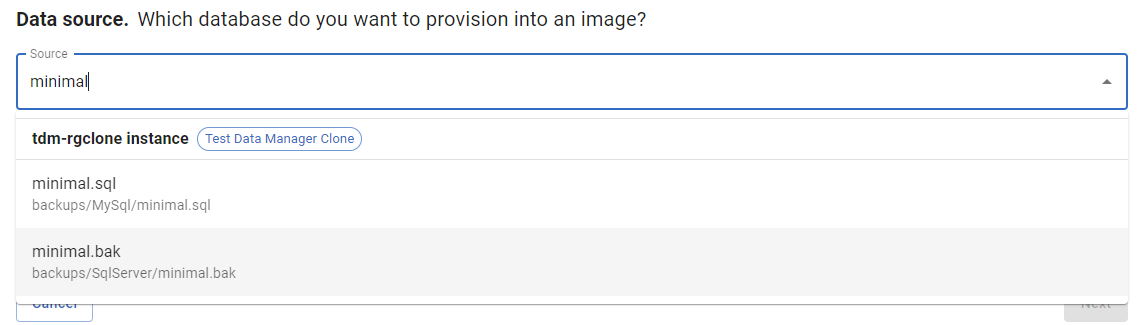
The selection is done via a drop-down menu with text search which will autocomplete. The items in this dropdown are populated by TDM's Provision capability, which scans your connection's file shares for valid backup files. Contextual information is provided with each source in the list including the file path to the backup file.
TDM's Provision capability currently only scans for new sources on start-up, so if you have recently added a source and it doesn't show in the list, a manual scan can be performed using the Re-scan connections button.

FAQ: I'm getting no sources on my SQL Server
If your source list is empty and:
- You are using a SQL Server Connection
- The folder you are using as a file share should have backup files in it
The problem is likely that either your connection's file share path is:
- A relative instead of absolute path.
- Relative to your TDM Hub host machine instead of the SQL Server itself.
- Not accessible to your SQL Server due to permissions issues.
Under the hood, we use the following SQL command to scan your folder:
Search files command
EXEC xp_dirtree '{fileSharePath}', 0, 1This command returns nothing instead of throwing an error if it cannot access a folder.
At the time of writing, we do not have a satisfactory way to validate through other means that the SQL Server has access to that folder, so you will just get an empty list of sources.
Platform specific information
Depending on which type of source and connection you chose, you may need to specify additional information.
If you are starting with a backup file and are provisioning to TDM Clone, you will need to specify which platform and version of Relational Database Management System (RDBMS) the backup file is for.
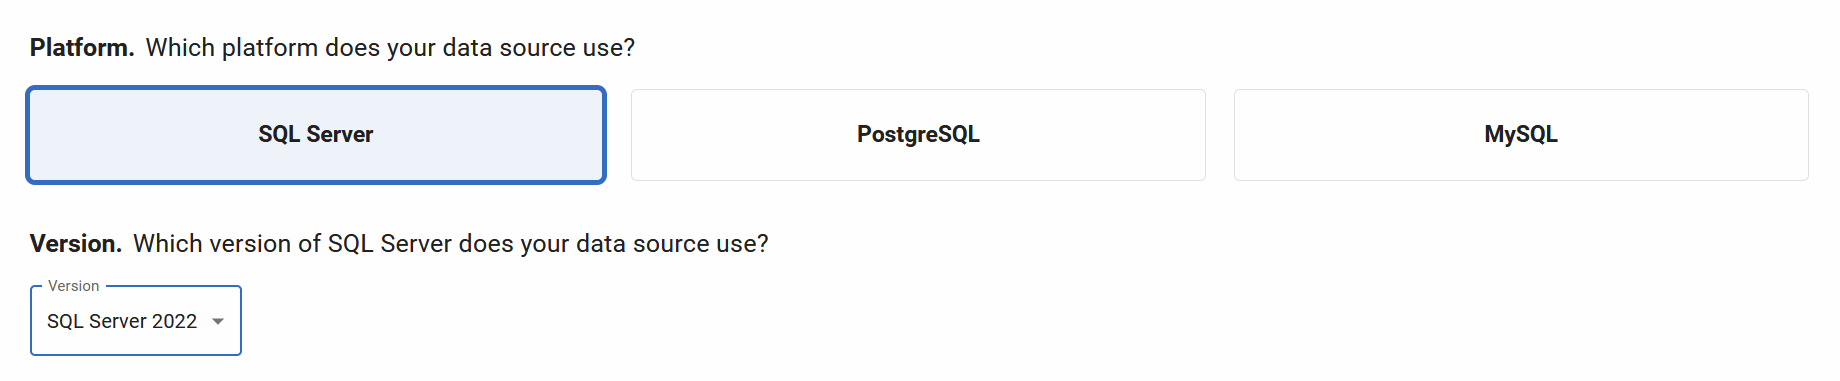
This allows TDM Clone to prepare the correct environment for your backup file to be converted into a TDM Clone data-image.
You may find that if an exact version match does not exist, some platforms will have backwards compatibility (for instance, restoring SQL Server 2016 to a SQL Server 2019 instance).
Select treatment step
The treatment step lets you select what treatment you want to apply to the data in your source, if any.
This treatment comes in two forms in two sections: Data generation and Subsetting.
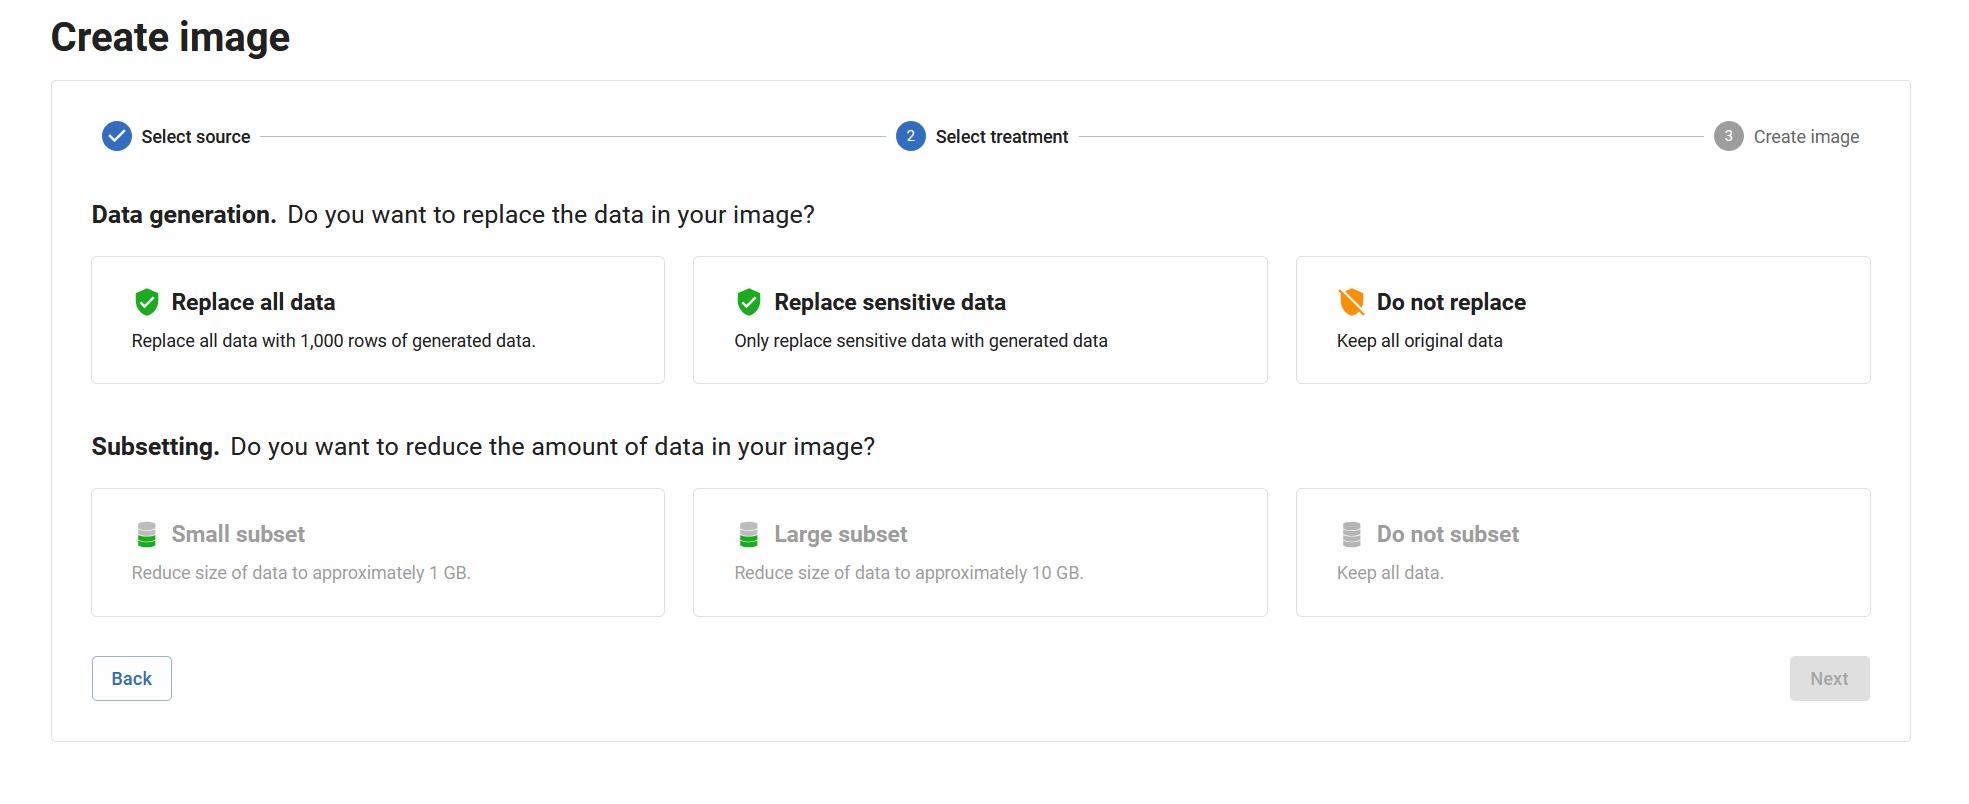
Data generation
Data generation allows you to replace your real data with masked or generated data, typically to protect sensitive information found in production data.
You are provided with three options:
- Replace all data - No data will be copied from the data source, instead entirely new data will be generated based on table and column properties such as field length and data types.
- Replace sensitive data - Some data will be replaced with realistic data, by classifying the source database to identify and replace Personally Identifiable Information (PII).
- Do not replace - The data will be copied unchanged from the data source.

Click on the option that suits your use-case.
Subsetting
Subsetting creates a representative slice of a database to make it smaller. In this section, you choose whether you'd like to subset and to what size.
Note that as subsetting needs to preserve referential integrity, it is inevitably an approximate process and the resulting database size will not exactly match the target size.
When choosing what level of subsetting to apply, you have three options.
- Small subset. Select a subset of data to achieve a database of approximately 1GB.
- Large subset. Select a subset to achieve a database of approximately 10GB.
- Do not subset. Keep all the data rows from the source database. This is the only available option if Replace all data is selected under Data generation.

Create image step
The final step asks you to provide a name for your image and optionally allows you to create a preview of the image rather than immediately creating it. An image preview shows you details such as which tables and columns will have sensitive data replaced.
Alternatively you may trigger image creation immediately without creating a preview by clicking the Create image button. Image creation may take a while depending on the size and nature of your data source, and on the output options you chose.
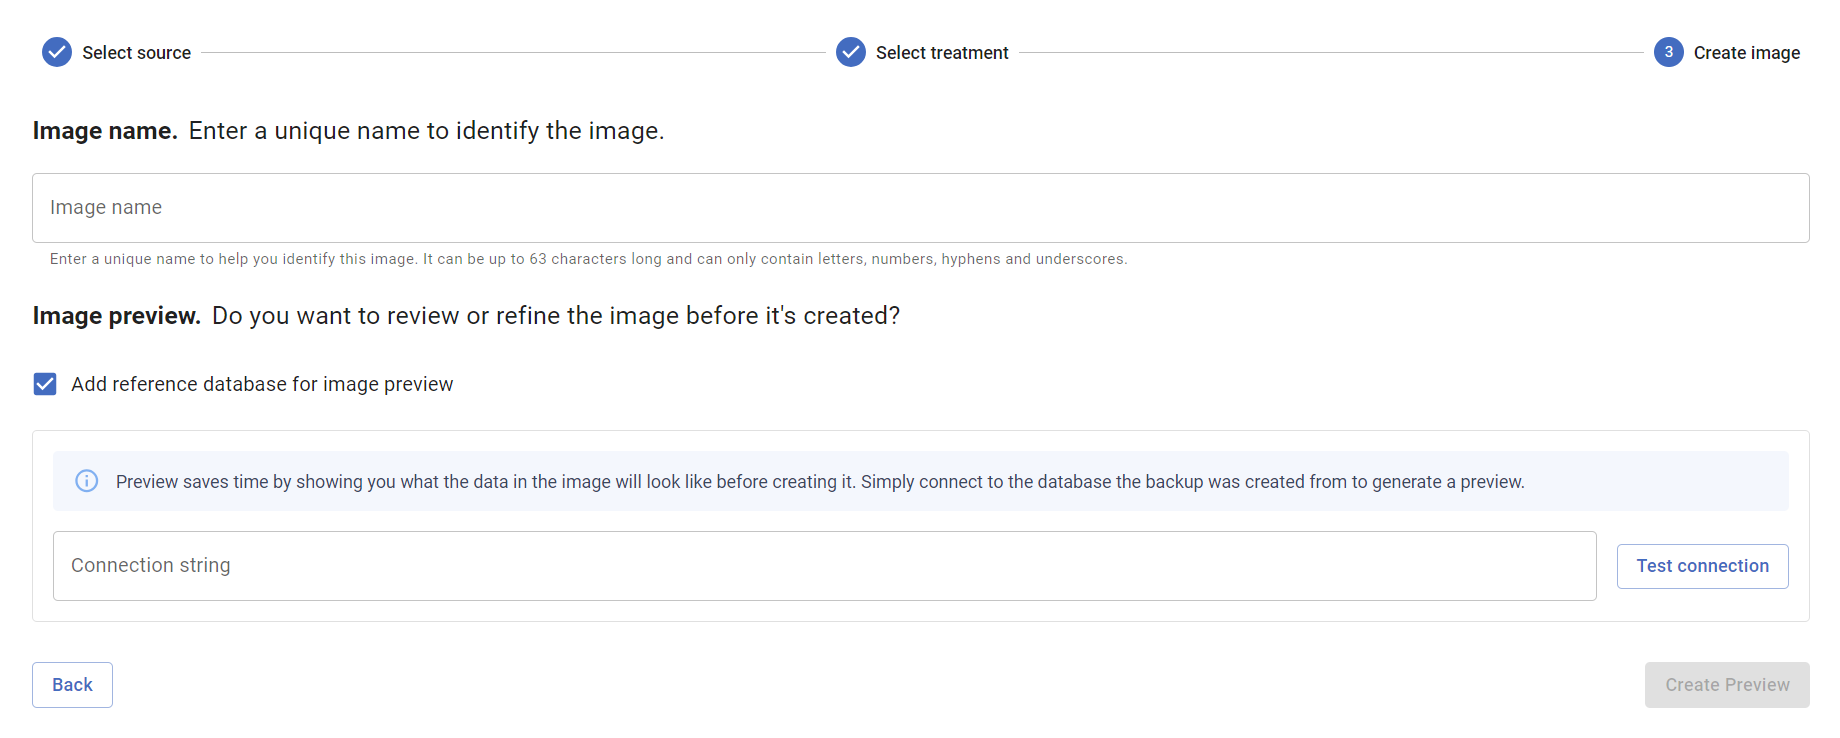
Image name
You will have to provide a name for your image before creating it. This name is what will show in the TDM GUI.
Note: If using TDM Clone this name will not match the name of the data-image, which will be based on that name but with some randomly generated numbers appended.

There are some restrictions placed on the format of the image name that are described under the textbox.
Image preview
Note: The image preview is not available for the Replace all data treatment option.
In order to create an image preview, TDM must connect to and analyse a reference database.
This reference database must be reachable by TDM and have have an identical schema to the backup file you selected under the earlier select source step. The data in this database should ideally also be representative of the data in the backup for classification purposes.
Create an image preview
Check the add reference database for image preview checkbox.
Enter a .NET (ADO) format connection string so that TDM Hub can connect to the reference database.
Click the Test connection button to check that the connection string is valid and a connection can be initiated. If the connection string is invalid or TDM cannot connect, an error message will be shown below the the connection string is not valid, Test connection will show you the relevant error message to help you diagnose the issue.

If test connection succeeds, you will see a success message.

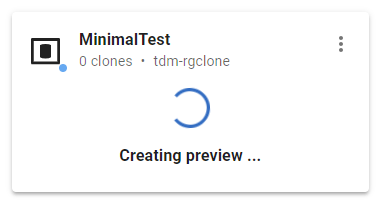
Finally, click Create preview to trigger the preview creation process. This process will take you out of the wizard and back to the Images page.
A card will show you the progress of the preview creation.
When the preview is ready, the card will change to indicate the preview is created.
Using an image preview
In the Images page, find the card for your image preview. It will be labelled with the image name you chose when you created the image.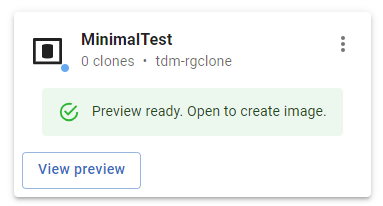
Click View preview (or just the main body of the card) to view the preview. The preview screen will appear.
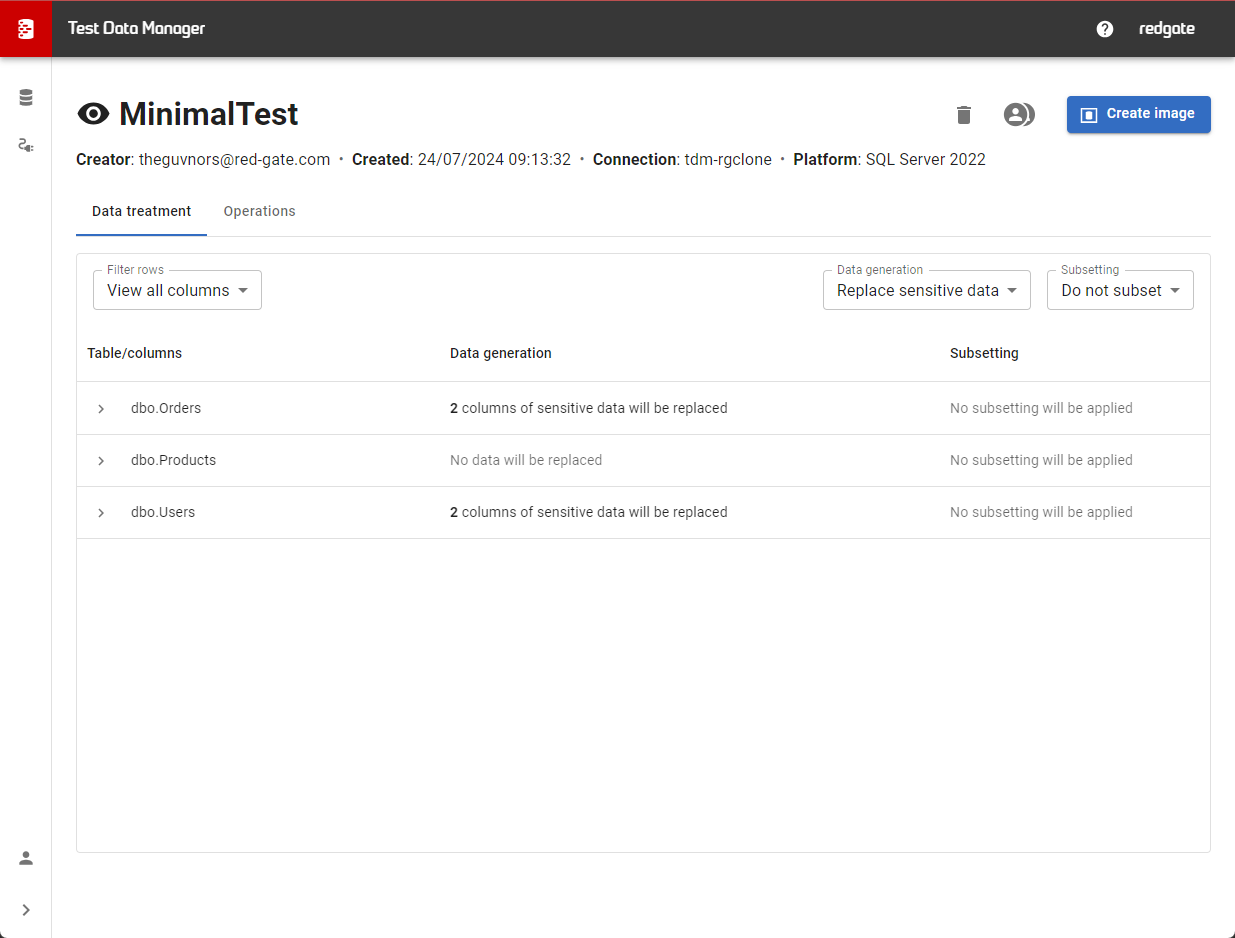
This page is split into a couple of sections:
The Title Bar, which contains:
- The name of the image the preview is for
- Some action to perform on the preview including deleting the preview, sharing it with others or and creating an image from it.
- Some extra information about the preview, such as when it was created and what platform it is for.
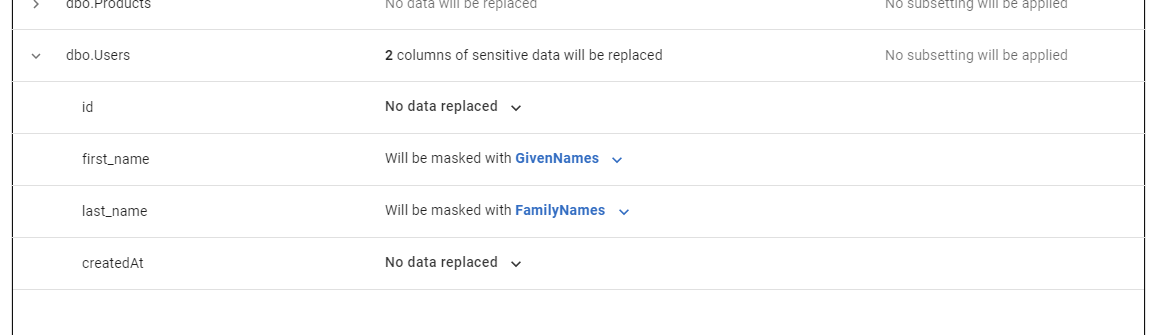
A table showing information about the contents of the source for the image and how it will be treated. This includes:
- A filter to hide untreated columns
- Dropdowns to change what data generation and subsetting to apply
- Table body which shows all tables and their columns, and how the data generation and subsetting options above will affect them.
The table's rows are nested, showing first database tables, then database columns inside of them.
If you wish to refine which columns get masked and with what data, see Customizing your image.
When you are happy with your selections, you can click the Create image button to trigger image creation. Image creation may take a while depending on the size and nature of your data source, and on the treatment options you chose.
Monitoring image creation
You trigger image creation as described above in either the create image screen or from an image preview. Image creation may take a while so you may like to monitor the progress. You can monitor the image creation process from the Images page. The card for the image will show Creating image while image creation is underway.
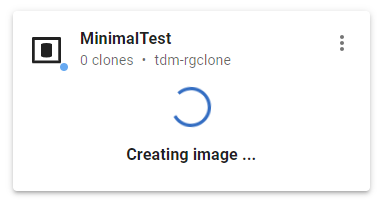
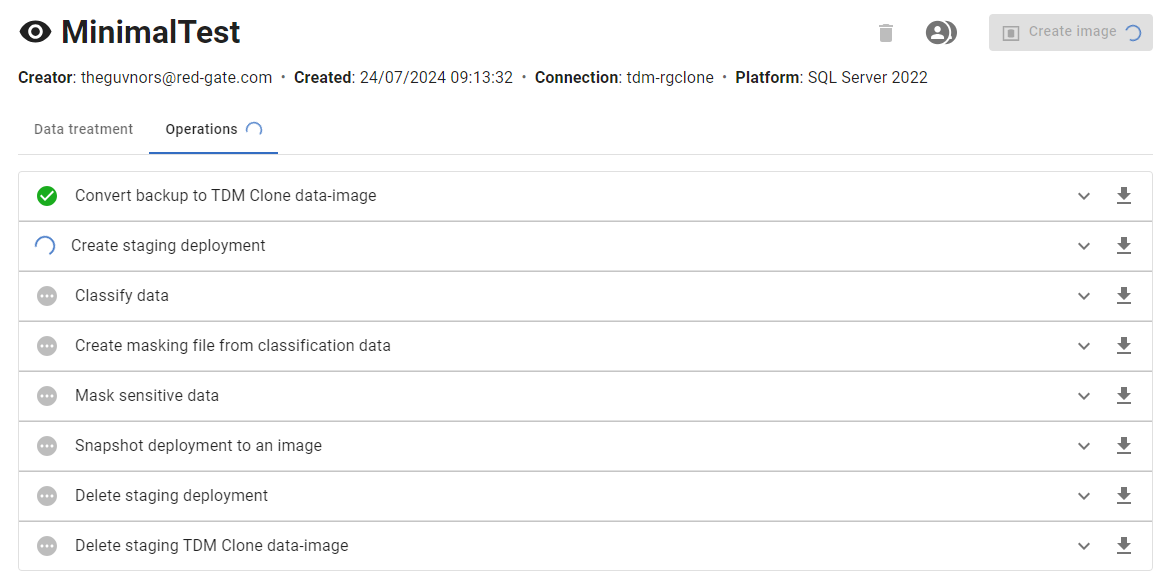
You can view more information about the image's creation progress by clicking on the card again to visit the image details page, and switch to the Operations tab.
When image creation has finished, the card will change to show the new image.
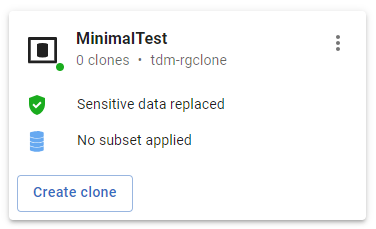
You can now view image details, create clones and manage your images.


