Configuring SCIM with Microsoft Entra ID
Published 30 July 2024
Please do not use Microsoft's SCIM validator against Redgate's SCIM API. It's intended for use by SCIM API developers and does not delete resources that it creates. For any questions or issues relating to Redgate's SCIM API, please contact support.
1. Configure your IdP
Note that Entra requires a new enterprise application to be created for SCIM, separate to the one used for SSO. This is because Entra does not support SCIM provisioning and OIDC-based SSO in the same enterprise application.
Sign in to portal.azure.com
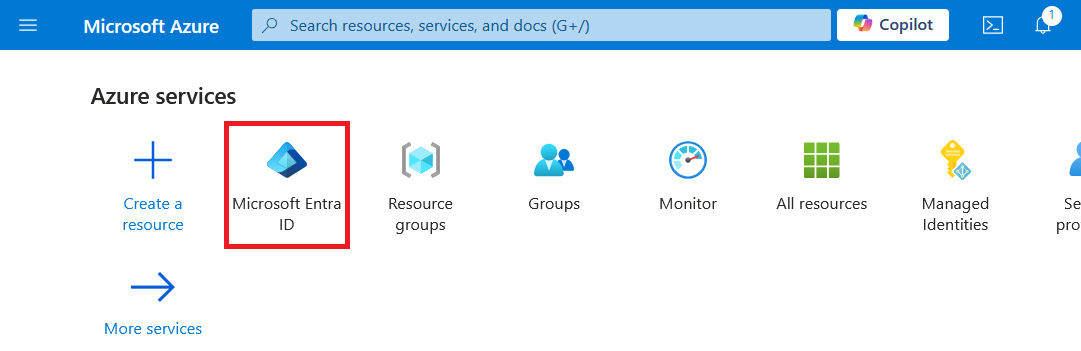
Select Microsoft Entra ID from the dashboard.
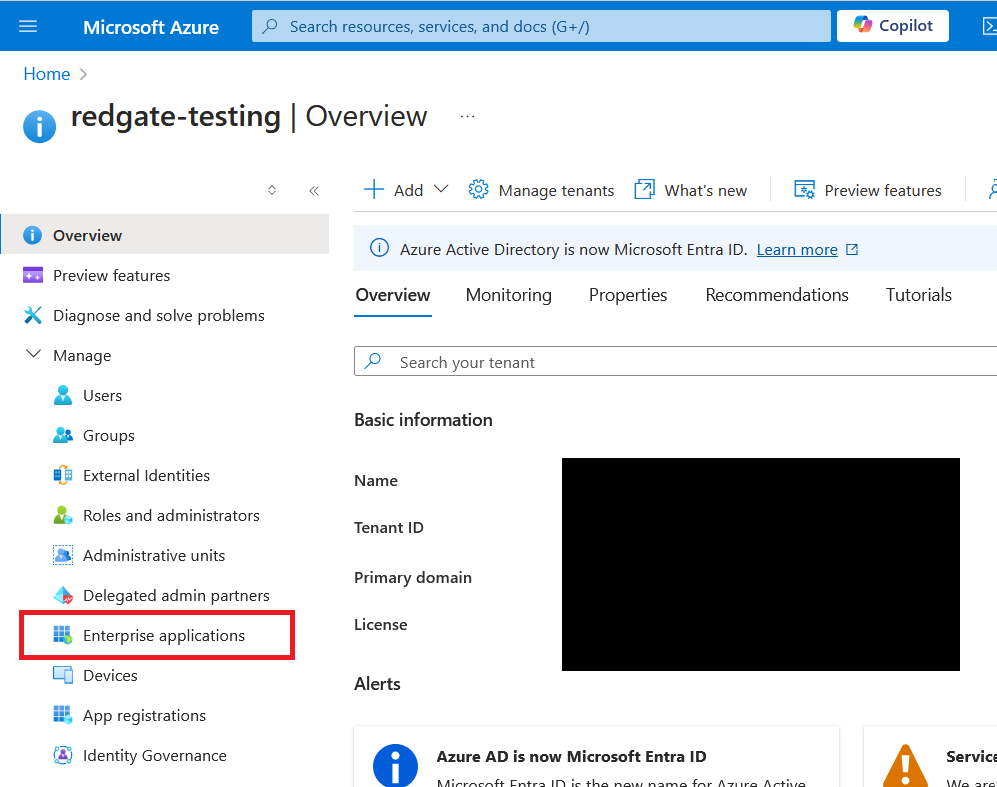
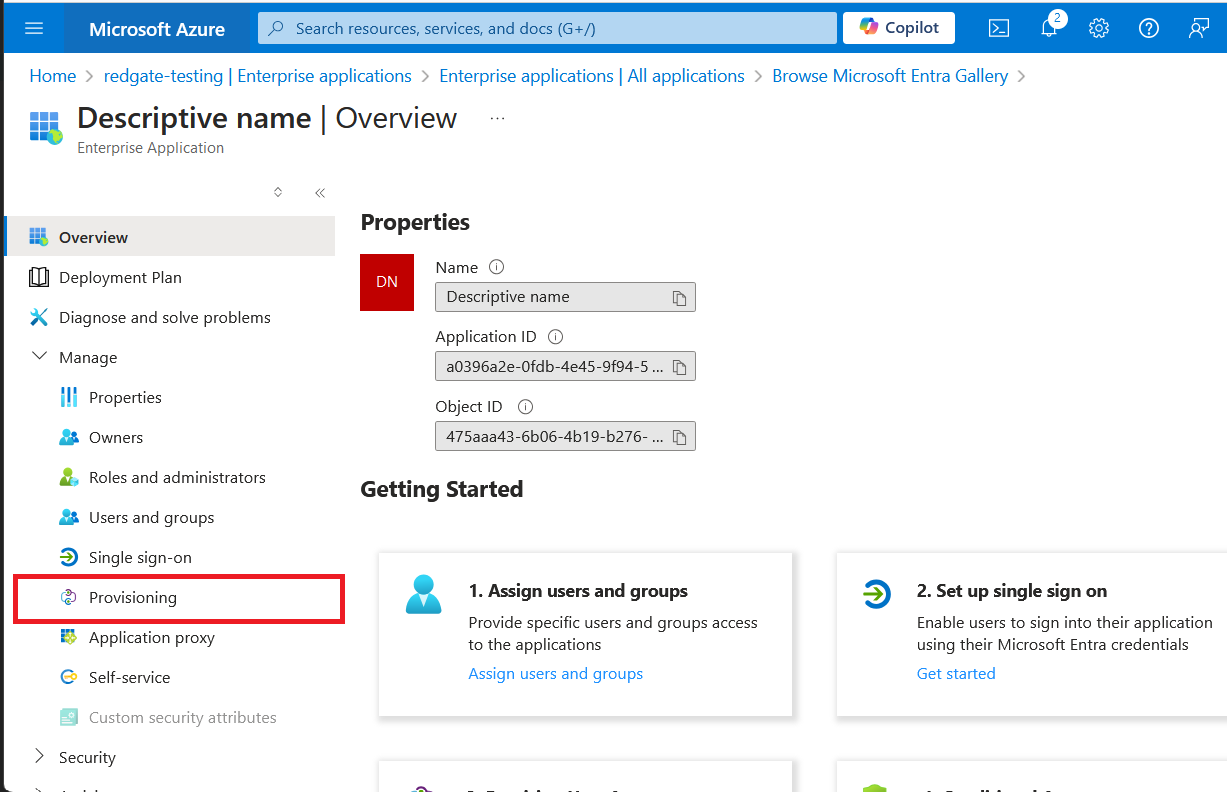
Select Enterprise applications from the Manage section in the menu.
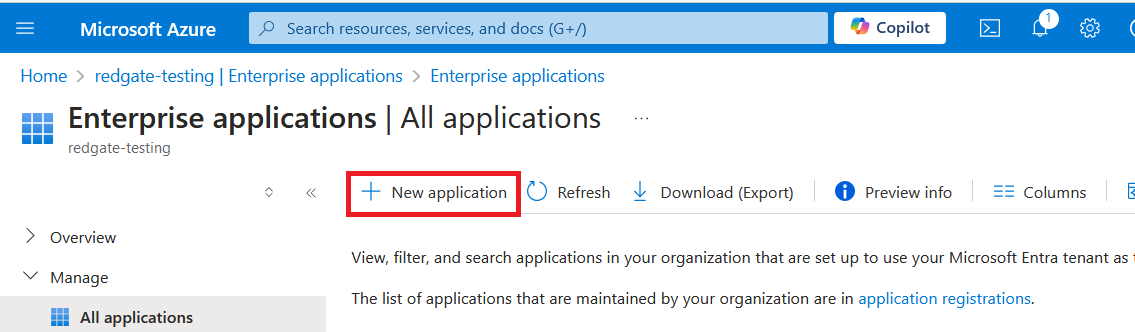
Press the New application button.
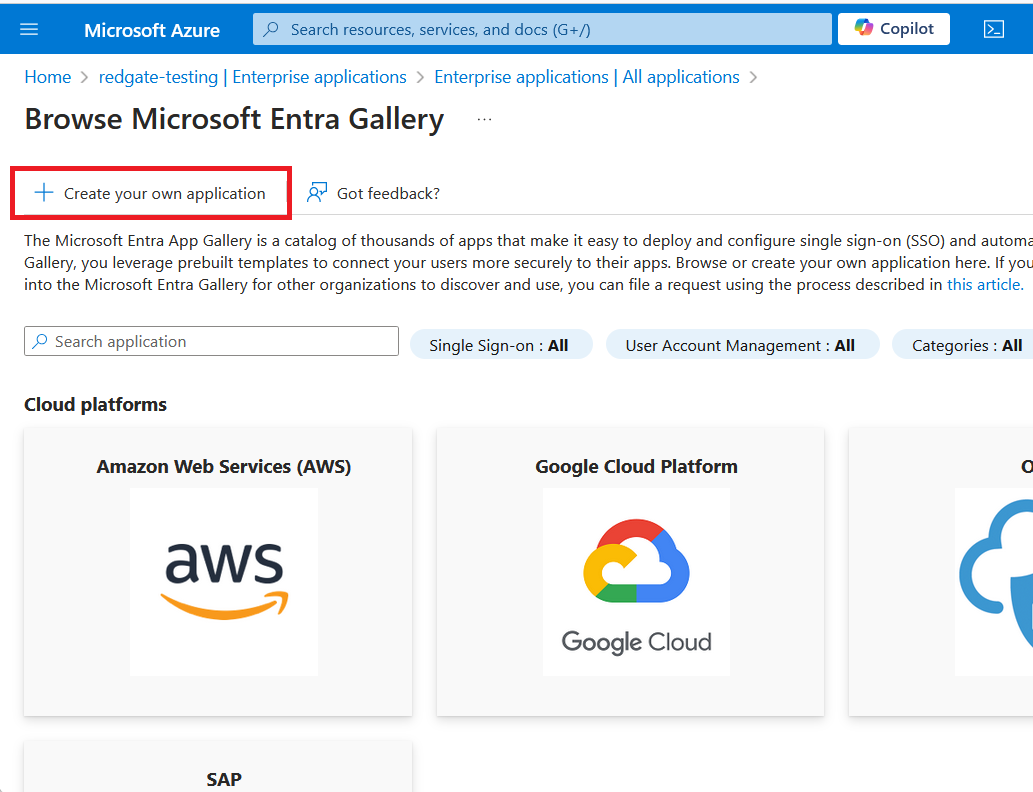
Press the Create your own application button.
Enter a descriptive name of the application and ensure Non-gallery is selected, then press Create.

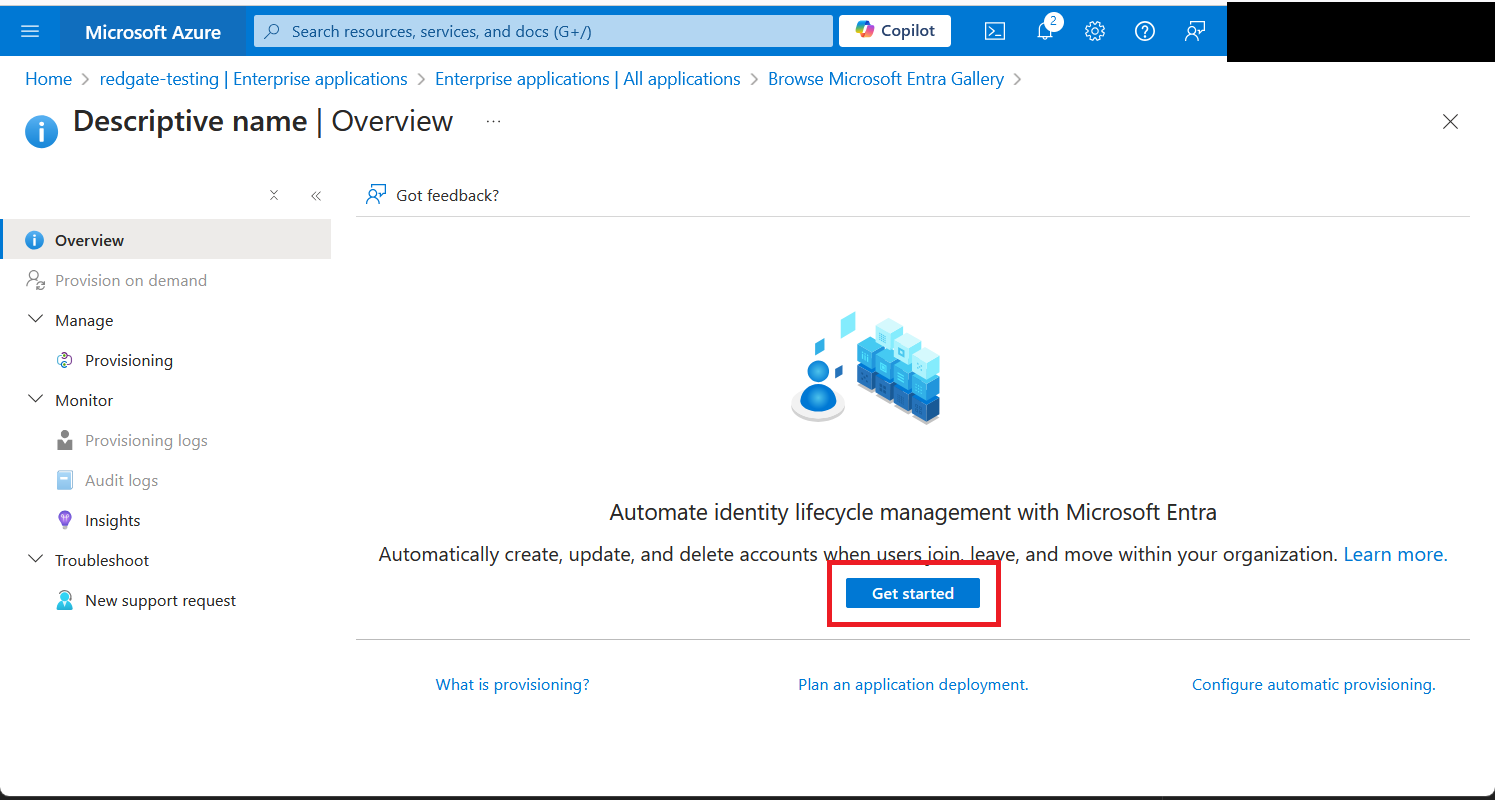
Select Provisioning from the Manage section in the menu, and then Get started.
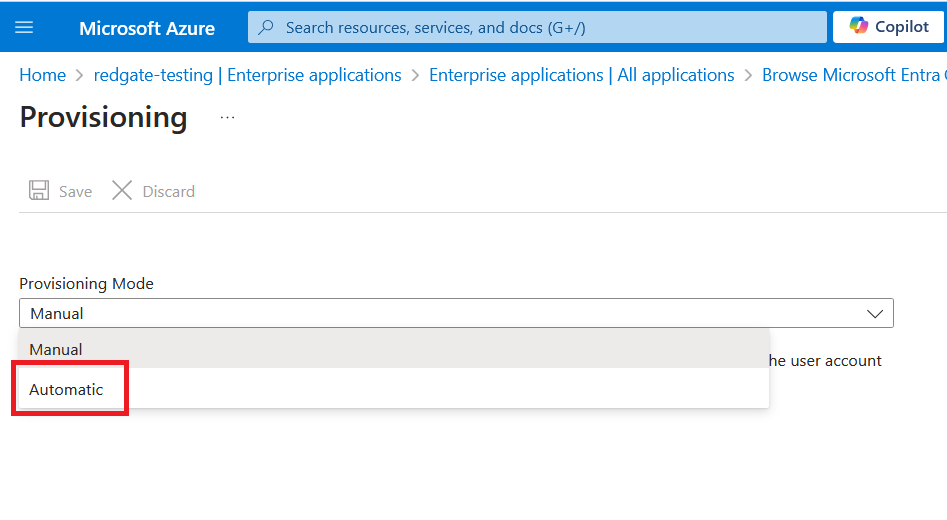
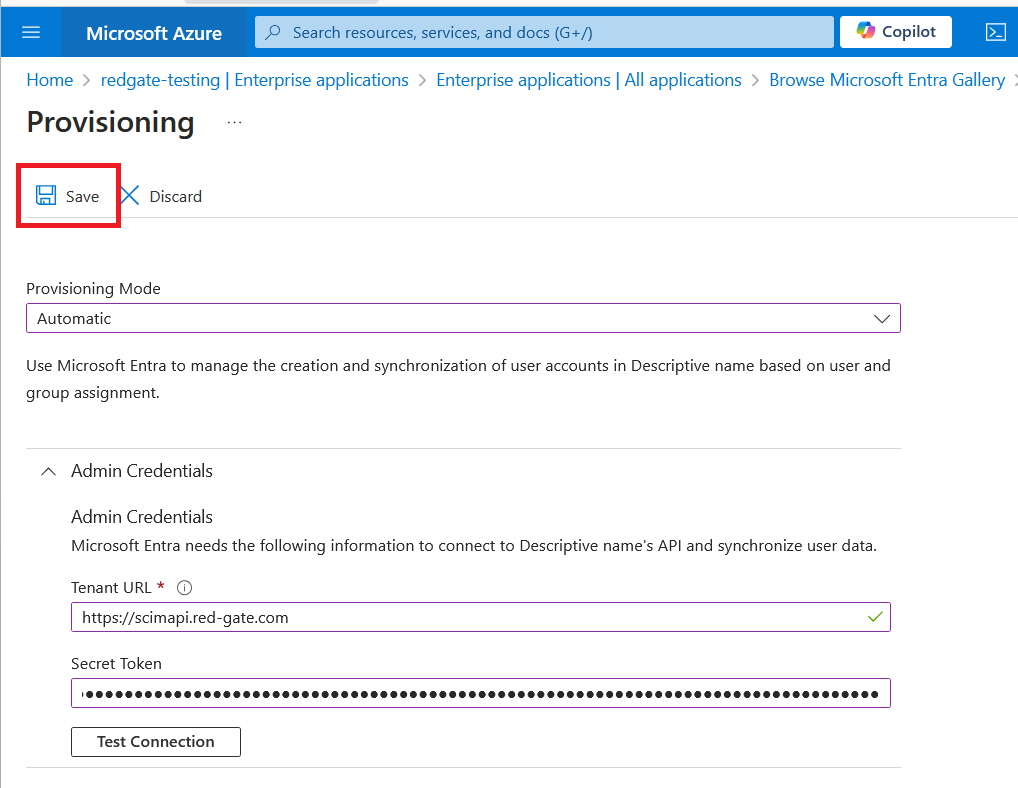
Set Provisioning mode to automatic. The Admin credentials section will now require a Tenant URL and Secret Token, which will be generated in the next step.
2. Generate SCIM Token
Keep the Entra tab open, and navigate to https://portal.red-gate.com/settings.
Press the Connect Directory button in the SCIM section and follow the steps to generate a SCIM token.
Copy the Tenant URL and Secret Token from the last step of the setup. The secret token should be considered sensitive and should be revoked if leaked.
3. Finish configuring your IdP
Back in Entra, paste the Tenant URL and Secret Token from step 2 into the Admin credentials section in Entra.

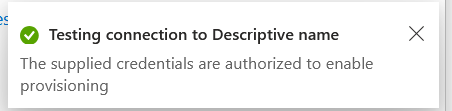
Press Test connection to ensure these credentials are working correctly.
Press Save.
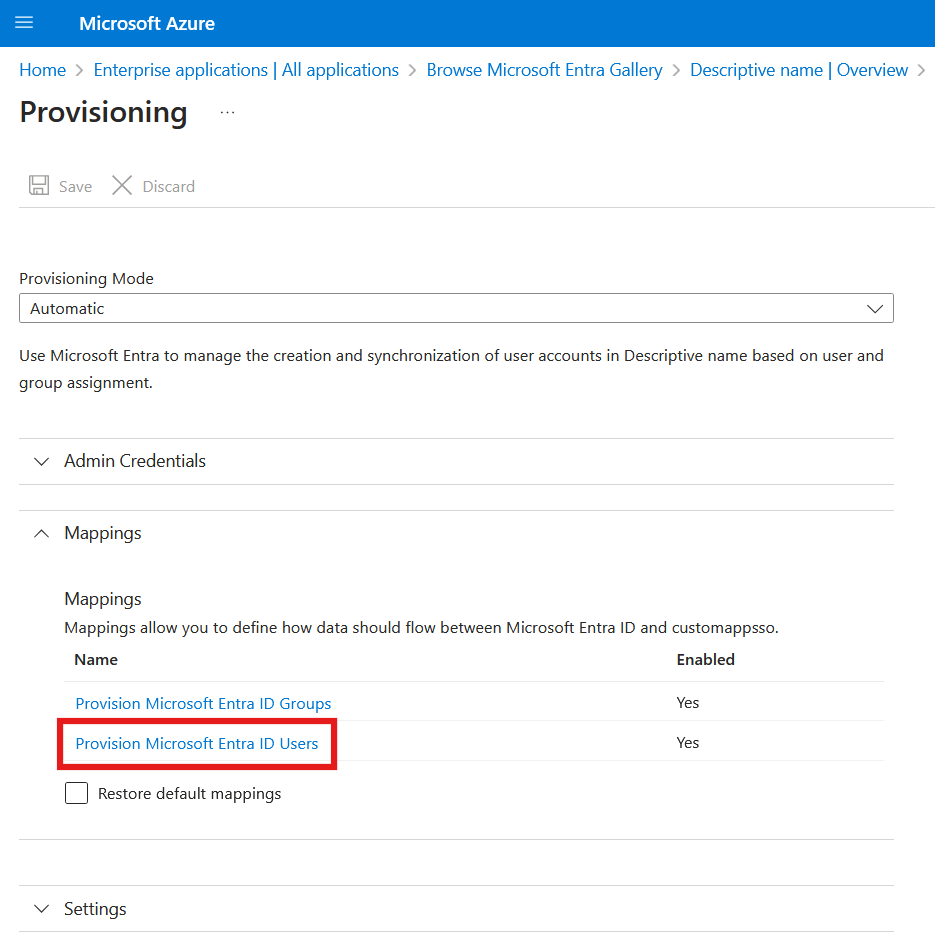
Expand the Mappings section and press Provision Microsoft Entra ID Users.
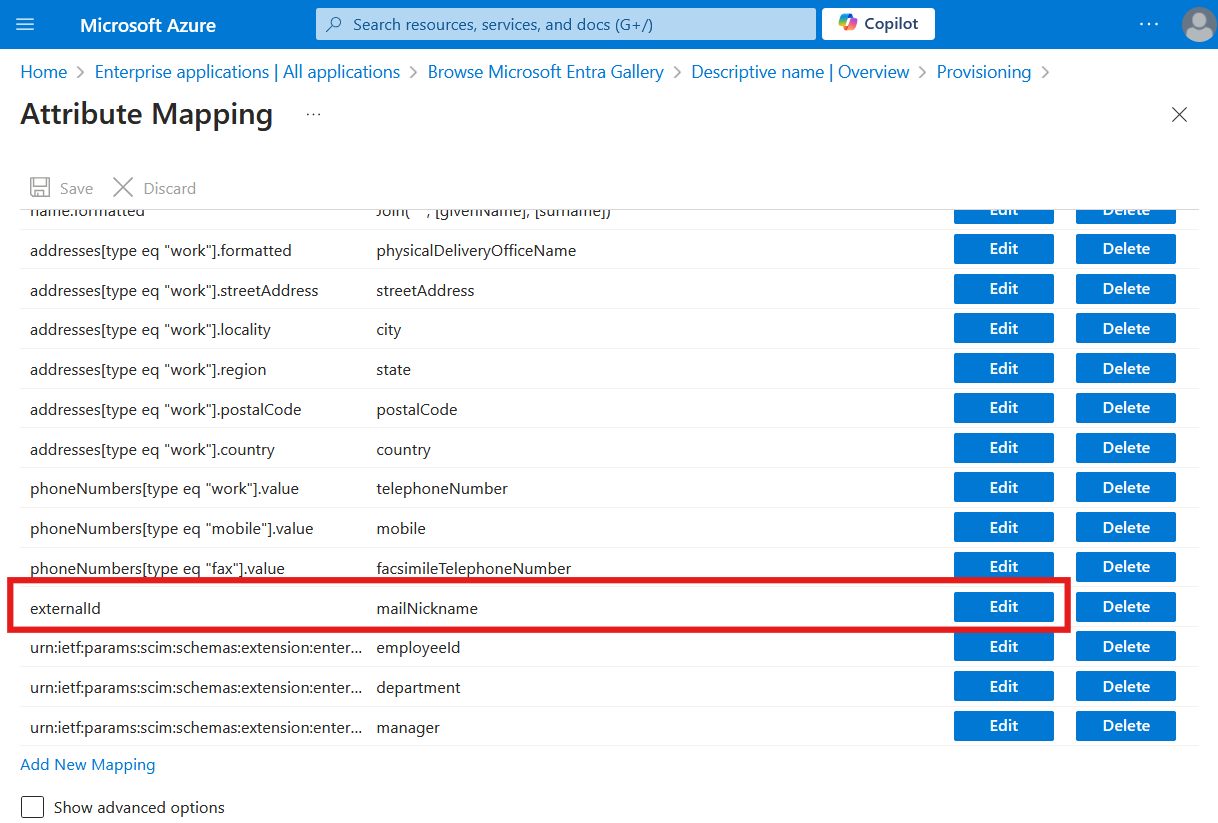
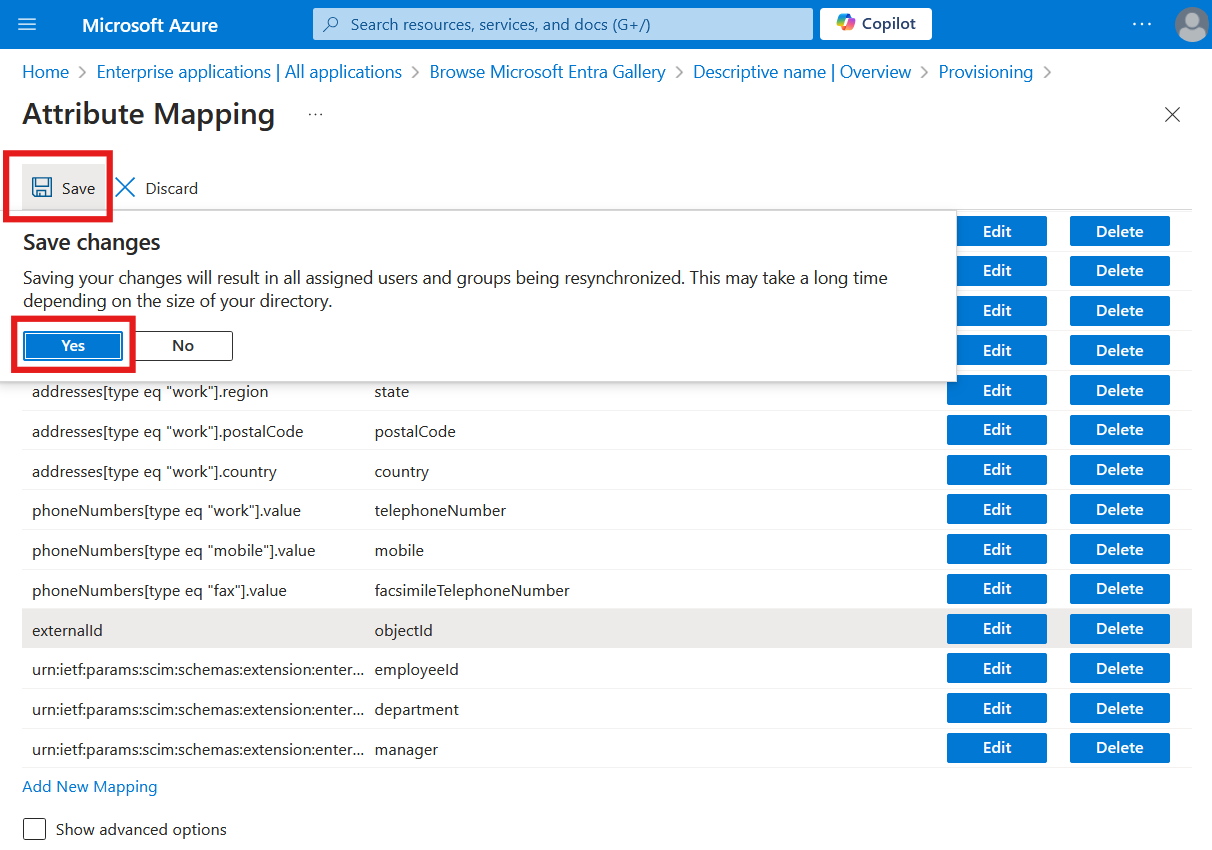
Scroll down and press the Edit button for externalId.
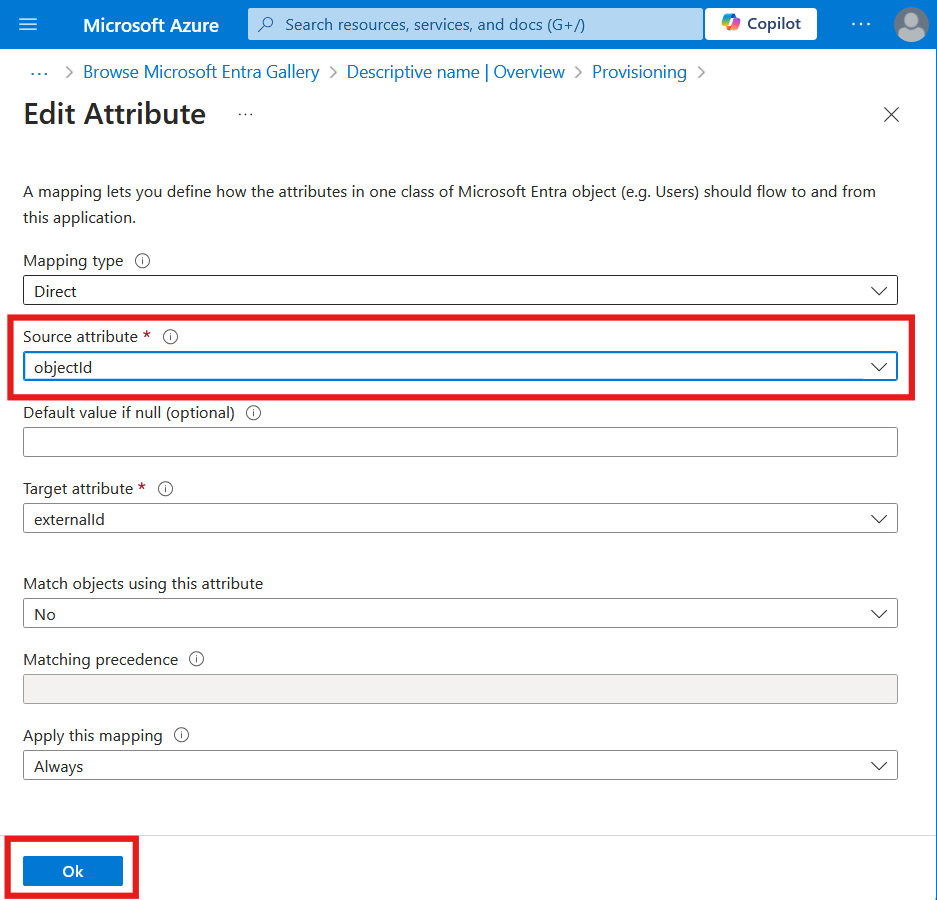
Change the Source attribute to objectId, then press OK.
Press Save and then Yes.
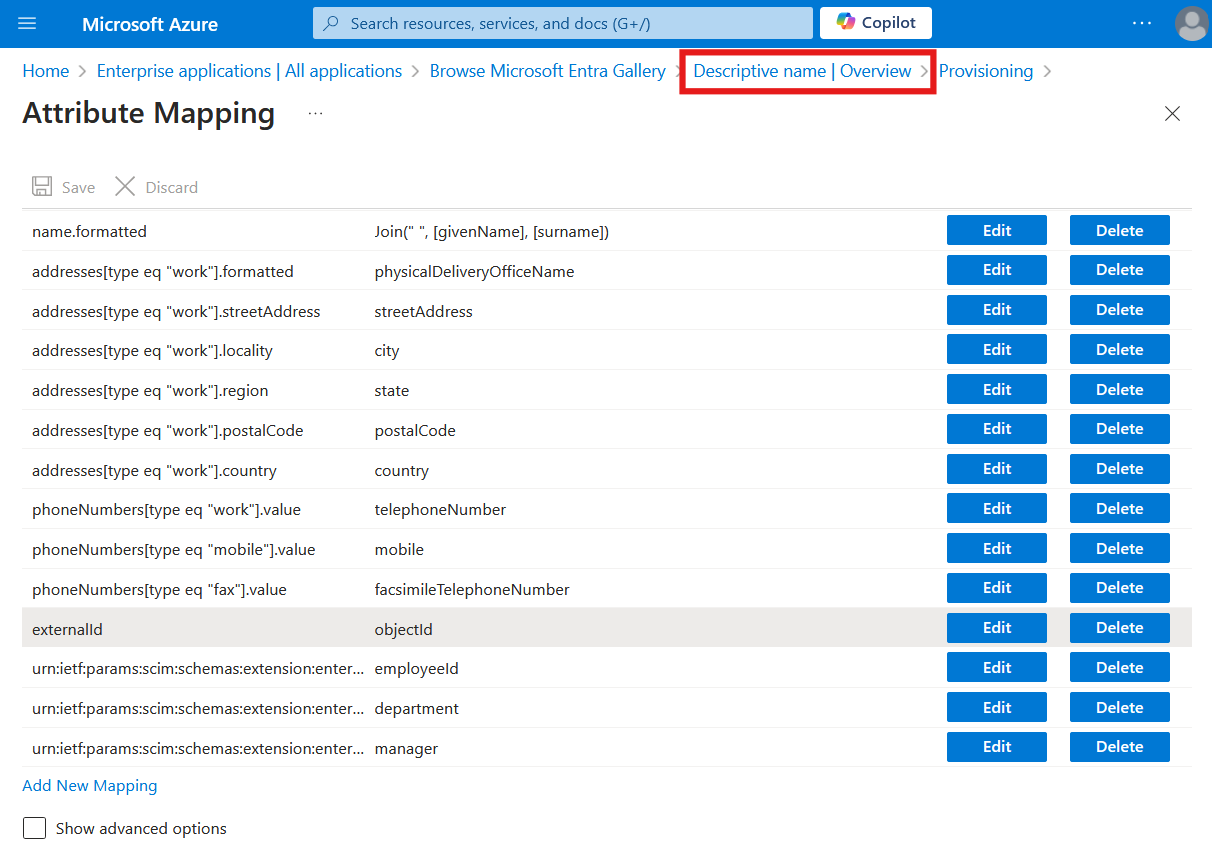
Click Overview to return to the provisioning screen in Entra.
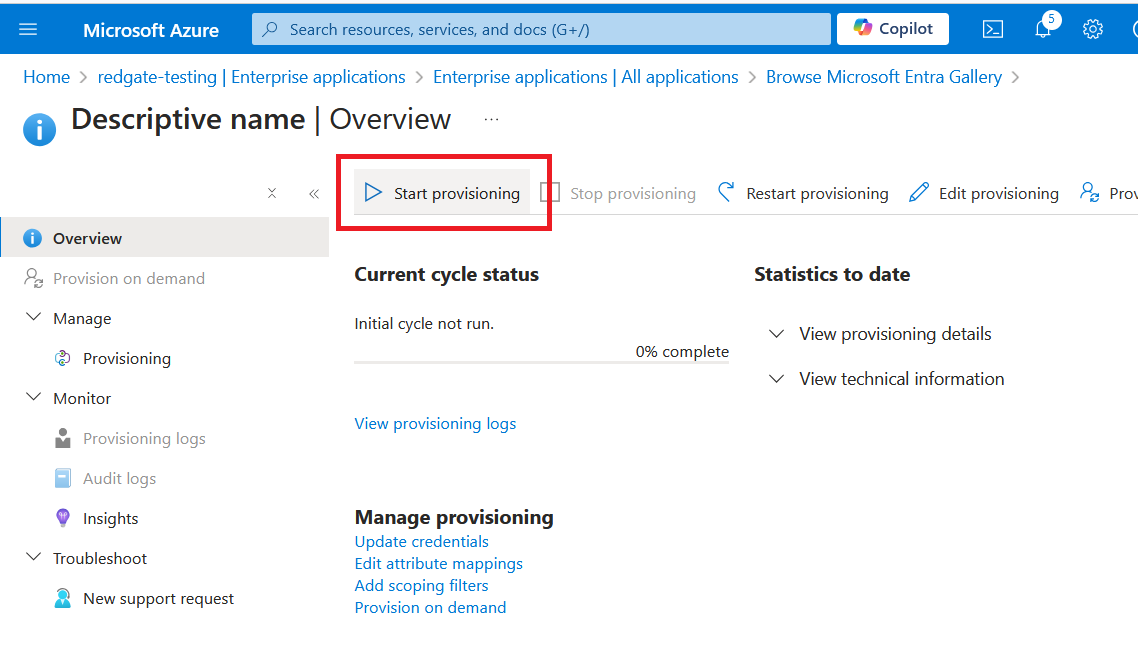
Press Start provisioning to enable SCIM.
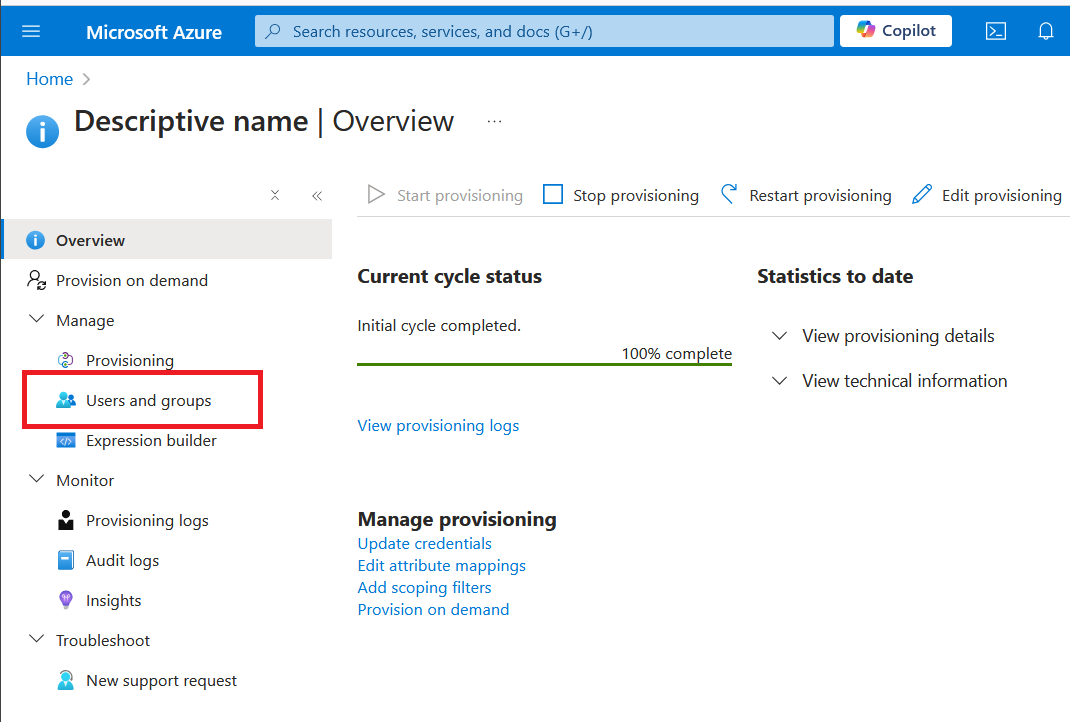
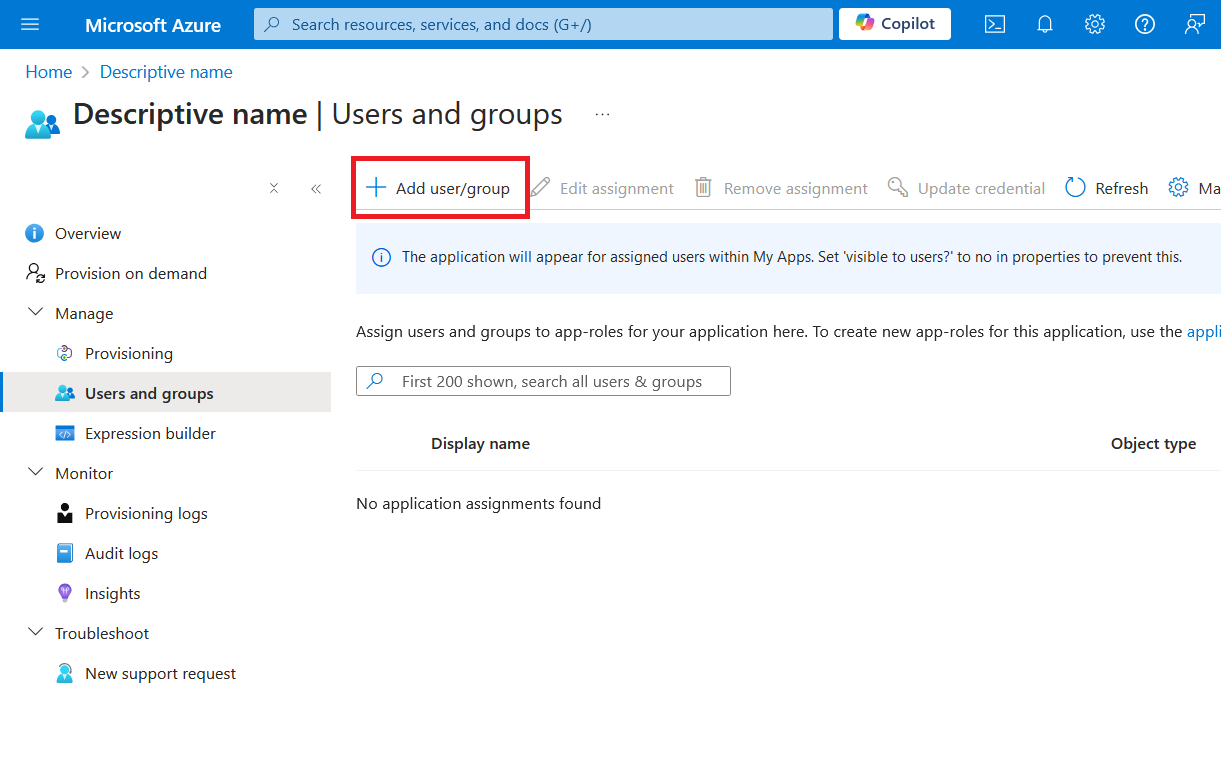
Select Users and groups in the Manage section in the menu. You might need to refresh the page to get this to appear.
Press Add user/group and add the users and groups to be synced from your IdP. We recommend only those who need to access Redgate tools are synced across.
This documentation contains proprietary information and is protected by copyright law.
Copyright © 2026 Red Gate Software Limited. All rights reserved


