How do I change a Primary Key value and all associated Foreign Keys?
Published 11 April 2018
How do I change a Primary Key value and all the Foreign Keys associated with it? What if there are key items in other tables which are in an application inferred relationship with the Primary Key?
Setting the stage
When deciding whether a PKFK must be changed the first step is to evaluate the data content of the key. If it’s a numeric value which on its own or in correlation with other items will not identify a person or disclose corporate confidential information the argument can be made to leave it as it is.
Sometimes we have no option other than to change the Primary Key and its associated Foreign Key items. This is most likely because the key value contains PII data, for instance it’s a social security number. It may, as another example, contain a family name such as “SMITH12345”.
Changing PKFK values requires detailed planning. Stating the obvious, these values are the glue which holds the application data together. It’s not unusual, however, for there to be other tables which are related to the primary table by application inference and not the database RI. It’s also not unusual to find the latter approach is implemented across the data structures and no database relationships (PKFK’s) are implemented!
In all instances we need the ability to identify each unique join value and provide a replacement for it across the tables regardless of relationship. The first step is to identify those tables and their join columns and detail them in our masking plan. The task may also call for us to span databases in the server, so we must discover and document this, as well.
When building our masking plan, it’s useful to also document row counts (as a snapshot) as well as the key value ranges in the primary table. By their nature, Primary Key values will be unique and when we replace them the safest approach is to replace them with values which are:
- Unique in their own right
- Unique to the extant data values
As an example, if the max PK value is 7654321 we could define a replacement range of 8000000 (leaving room for new keys to be allocated in the live application) and incrementing this new start-point by “1” for each key value to be replaced. At this point it is also worthwhile comparing the row count with the new range start value and the item’s maximum possible value to ensure that there will be a large enough replacement value allocation.
It is this detailed planning which will smooth the way for the rule definition and, ultimately, execution.
Method of Operation
We’ll be updating the PK with new values, replacing any row which contains a specific value with a unique replacement using the “old value” as the join operator. In pseudo-code “Update customer_table set customer_id to “new” customer_id where existing customer_id is equal to the “old” customer_id”. We’ll also be doing this for every table which has the same column content whether implied by the database RI or otherwise.
Whilst this might seem a straight-forward approach there are several steps to be taken to achieve this objective:
- Create what’s effectively a staging table where we will store the current (original) value and its planned replacement.
- Insert into that table the current values from the primary table.
- Select from other tables those column values which do not already exist in the staging table as derived from the driver table. Let’s call them “orphans” for now. Insert these into the staging table. Orphans could exist in RI implied relationships as well as those which are application inferred.
- Provide the replacement (new) values on a one-for-one basis.
- Disable the Foreign Key constraints.
- Update the tables with the new values based upon the old (current) values.
- Enable the Foreign Key constraints.
- Drop the staging table once the process has completed. After all, it contains live data!
Fortunately, if we are using Data Masker we don’t have to create SQL scripts to achieve these objectives since there’s an inbuilt technique to do it for us called the “Synchronization Manager (Sync Manager)”. This facility is easy to set up and comprehensive in its functionality.
For the purposes of this Tech Tip we’ll be using the core Data Masker demo database structures, implemented in a single database.
The starting masking set looks like:

…and we use the Column Finder to identify where our key item is in each table based upon a common column naming convention: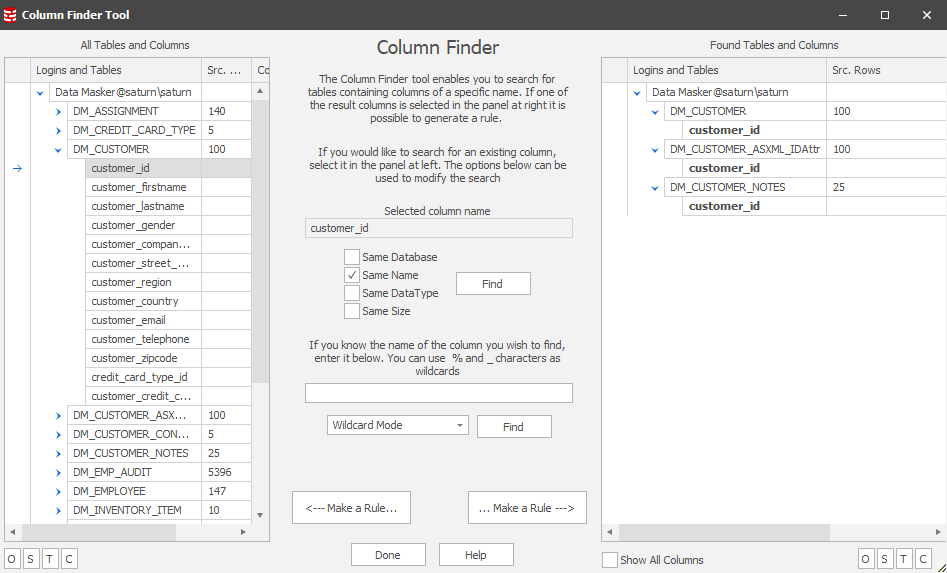
Our masking plan states that each of these items must be masked in a consistent manner so wherever there is a customer_id “1000007” we want it to be replaced throughout the databases with, for instance, “8000007”. In this Tech Tip we’ll focus on displaying the data content of the customer_id in the DM_CUSTOMER and DM_CUSTOMER_NOTES tables as well as the DM_CUSTOMER_ASXML_IDAttr table which has the same column content but is not a Foreign Key item – it’s implied by the application.
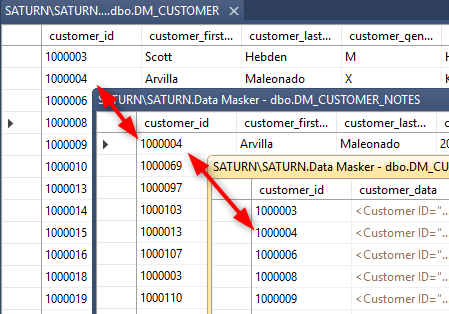
Our starting data points are therefore:
Building the Rule
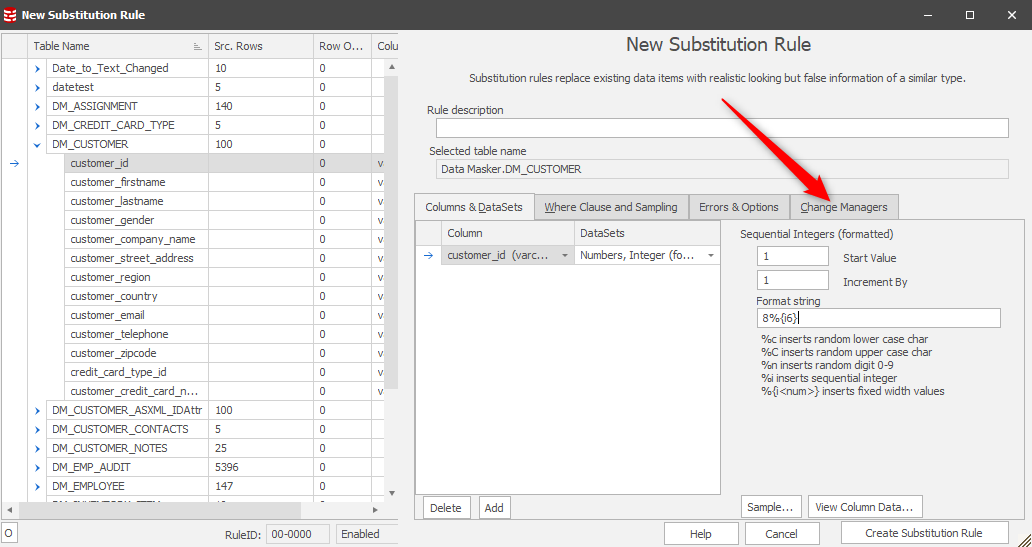
Our masking plan has detailed the discovery process discussed previously so we know that our driver table will be the foundation upon which we begin. It’s a simple substitution replacing the customer_id with a new one. In this case we’ll use a dataset which will generate a sequence for us, starting with “8”:
After this we want to invoke a Change Manager to start the Sync process:
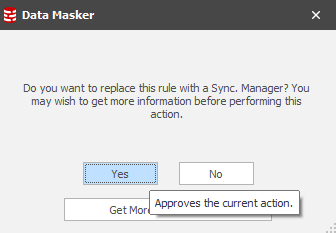
Once in this context, you’ll see:
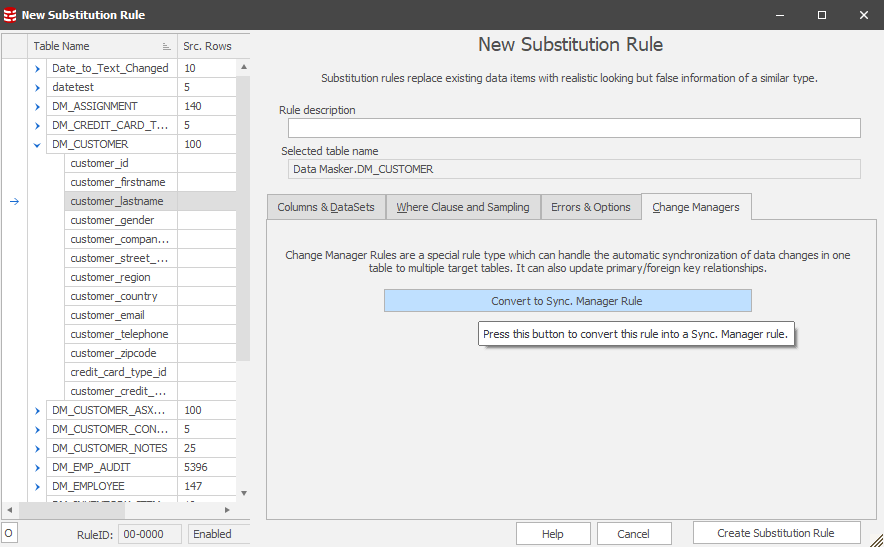
Choose this option and you’ll have the confirmation:
This simple sequence commands Data Masker to generate all the rules which are required to support the core process flow described earlier. After this one step, the Rules in Set tab will now display:
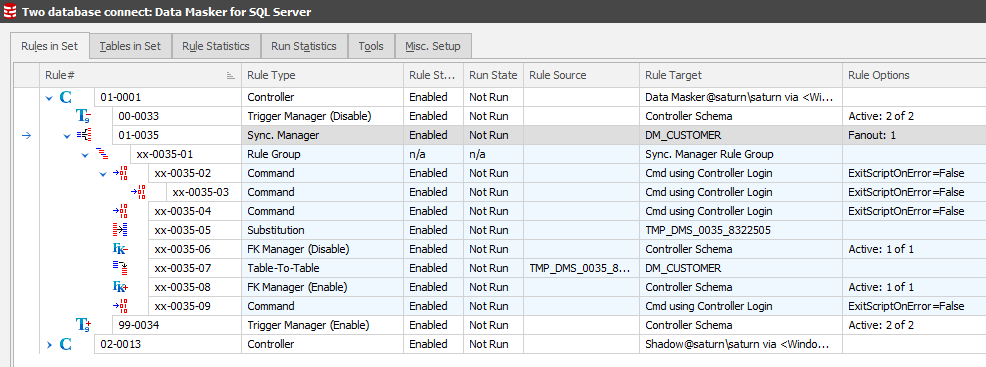
As with any other rule in Data Masker, these rules can be edited so that you can see exactly what they are doing. Only certain rules can be changed at this point, specifically the Table-to-Table rule(s).
This process achieves the consistent replacement of each distinct value in the primary table. But what about the other tables?
Bringing the other tables into the Sync process
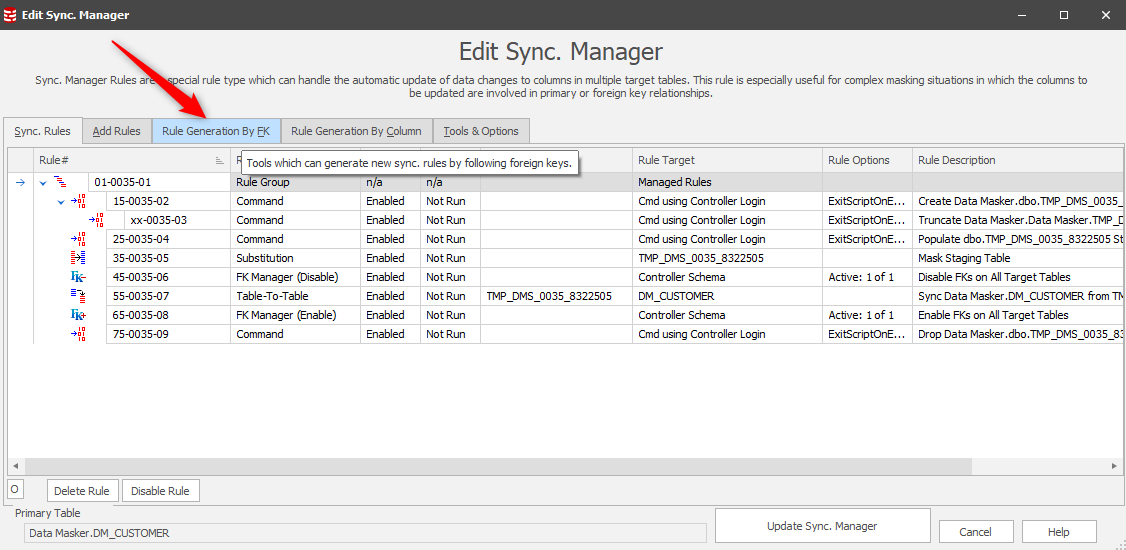
Earlier in this tip we used the Column Finder to find our columns to mask. Now that we have our core Sync Manager rule in place we can now edit it and extend its scope to these columns. The starting point is those items related as Foreign Keys:
This leads us to a panel where our workflow is to “push” the FK related tables into consideration:
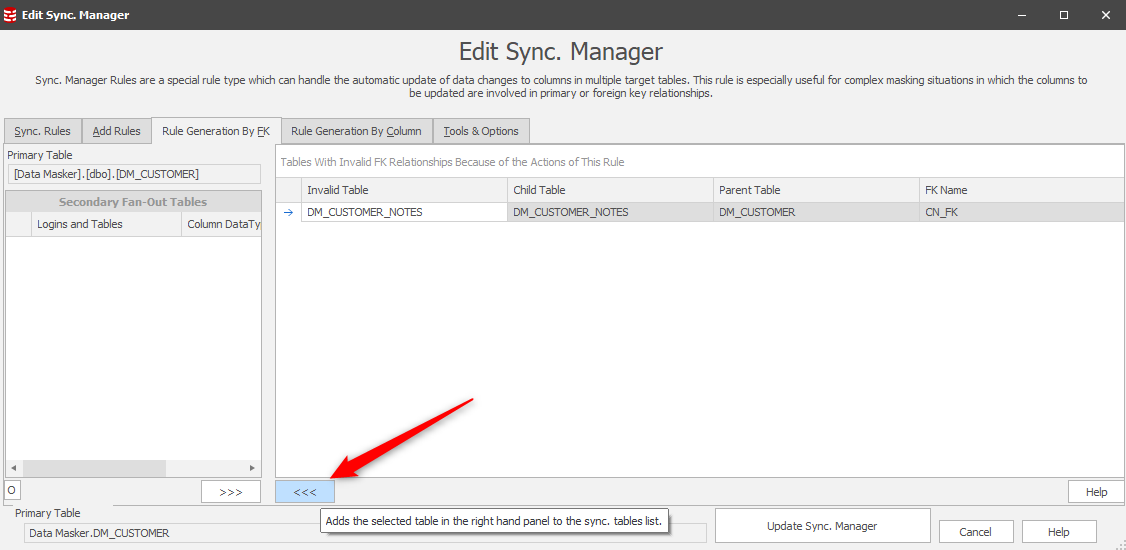
Notice that only the one table is RI driven so the other table will need to be drawn into the process individually.
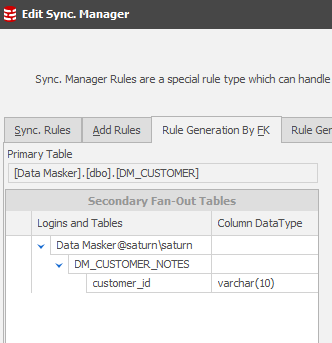
Before that, the Rule Generation by FK panel will now display the DM_CUSTOMER_NOTES table as “in play”. Data Masker refers to all tables including the Primary as “Fan-Out” tables:
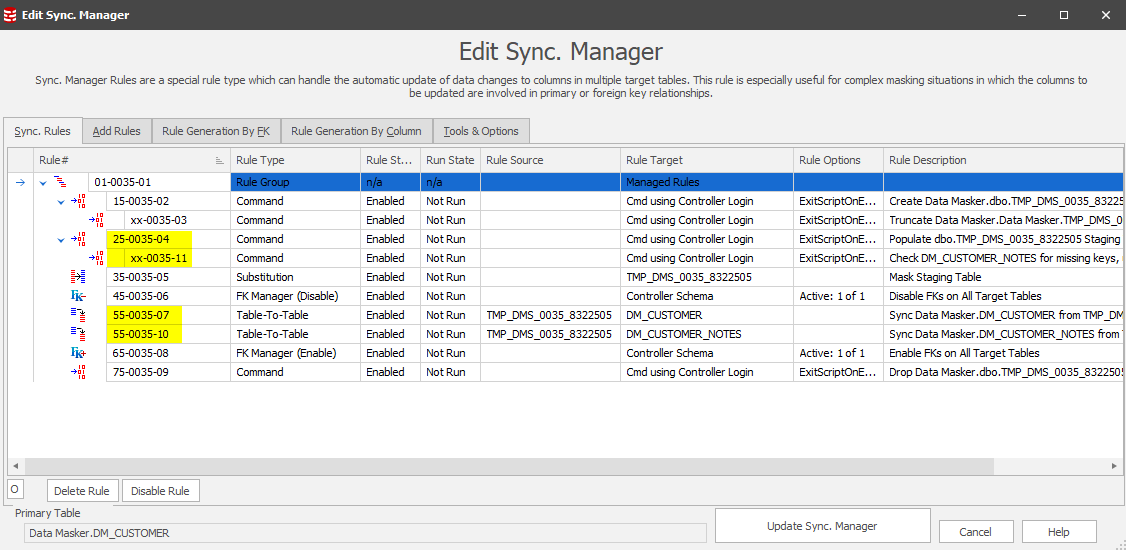
The Sync Rules tab now shows both RI related tables included:
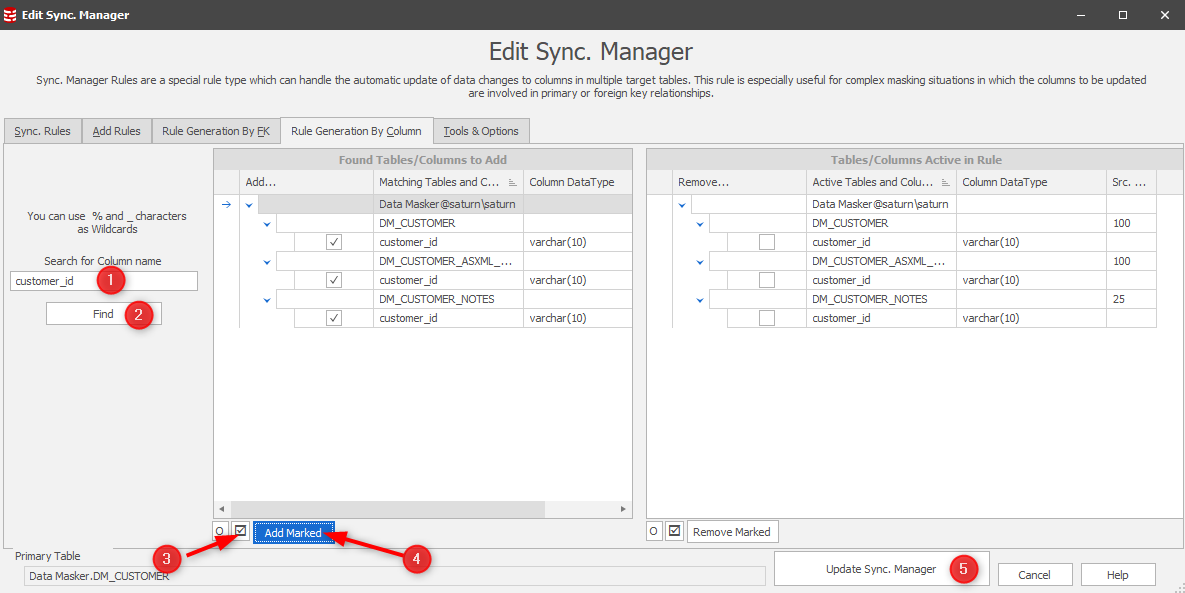
Our masking plan has determined that all content in the CUSTOMER_ID columns, wherever they may be, should be consistently masked. Recall earlier in this document that we used the Column Finder to discover these tables. We can, equally, use the Sync Manager’s “Rule Generation by Column” utility to identify these tables/columns in our current context:
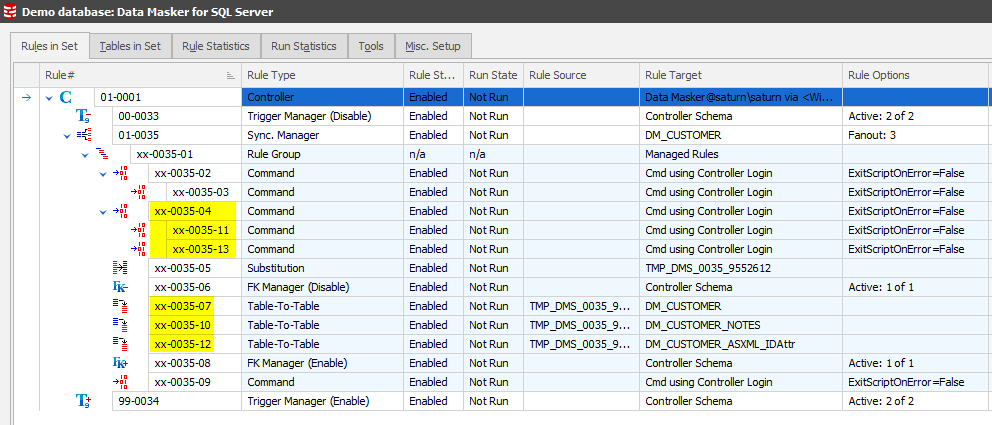
The Sync Manager rule will now display all the rules required to discover the orphan column content in the additional tables as well as those required to sync the new values back into these tables:
This implements the work flow described on the first page of this tip. It all looks good so far, but we just need to check if any of the non-RI relationship Table-To-Table sync rules are based upon indexed join conditions. If not, when we run this rule there may be performance/runtime implications!
As with all applications and utilities there are factors which affect the performance of a set of procedures. A number of Tech Tips exist to help you use Data Masker which are available here, one of which focuses upon Table-to-Table rules.
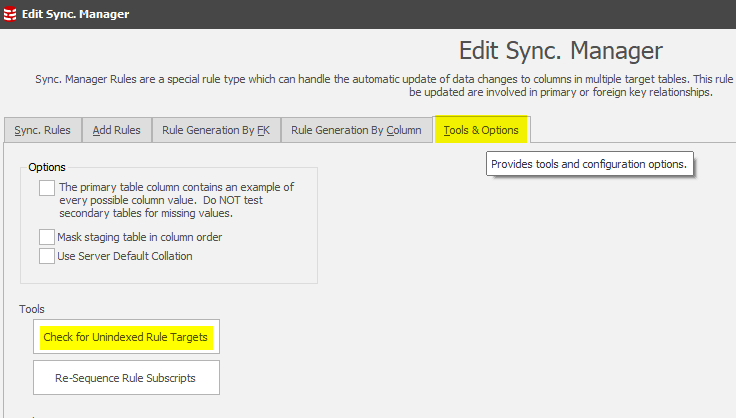
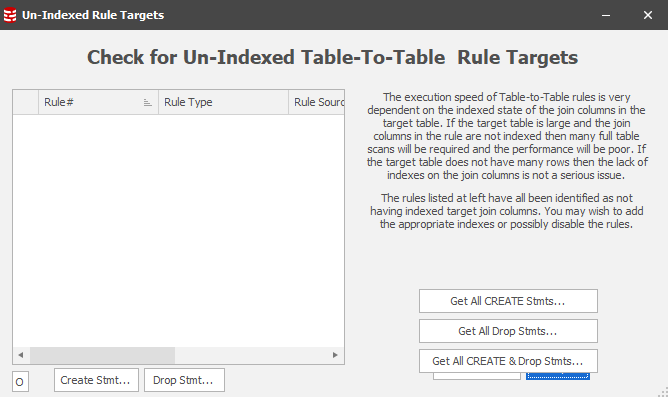
In this case we’re updating column content in a table where, at first glance, we don’t know the indexing strategy. The Sync Manager provides the answer to this question by using a tool which will check all the rules to determine whether the target table is being updated without the benefit of an index:
In this case, none of the target tables/columns are flagged as not-indexed:
Test running the rule
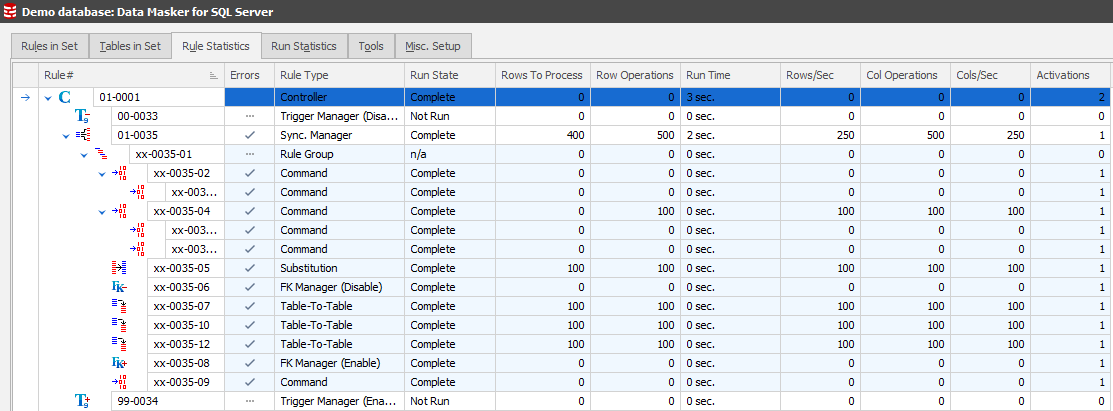
The best tab to monitor rule execution is the Rule Statistics tab. Switch to this, locate on the rule and expand each of the elements to see the work flow. Right Mouse Button / Run rule. You’ll then see the execution and corresponding stats displayed:
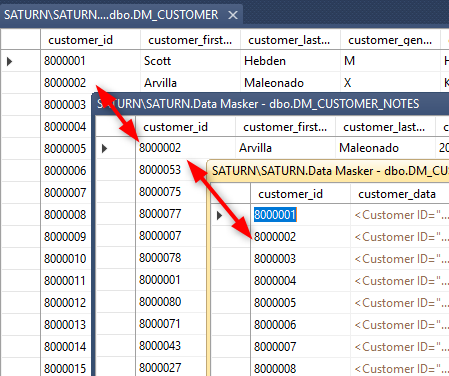
The result is that our focus client “1000004” is now “8000002” throughout the database:
This Tech Tip is published as part of a group of tips designed to help you get the most from Redgate’s Data Masker. Other tips which may be of help when addressing this topic are:
Adding more database or schema connections (Rule Controllers) to an existing masking set
Can I make a Substitution rule faster?
Can I make a Table-to-Table rule faster?
How and where does Data Masker report when you run a masking set?
About Command Line Automation
This documentation contains proprietary information and is protected by copyright law.
Copyright © 2026 Red Gate Software Limited. All rights reserved


