4. Using Flyway Autopilot: Capturing Schema
Published 09 September 2024
Now that your environments are set up and the necessary databases have been created, it's time to start working with your Flyway Autopilot project. At this stage, you’re configured to make changes to the AutoPilotDev database, track those changes using Flyway Desktop, and prepare for automated deployments through Azure DevOps or GitHub Actions which we will cover in a later step.
This section will guide you through the process of using Flyway Desktop to capture any schema changes you make in the development database, saving those changes to the schema model, and ultimately using Flyway to generate versioned migration scripts.
Step 1: Refreshing Flyway Desktop and Capturing Changes
Once the databases are created, it’s crucial to synchronize Flyway Desktop with the current state of your AutoPilotDev database. This ensures that all objects in the database that haven’t yet been saved to the schema model are identified and ready for version control.
Refresh Flyway Desktop:
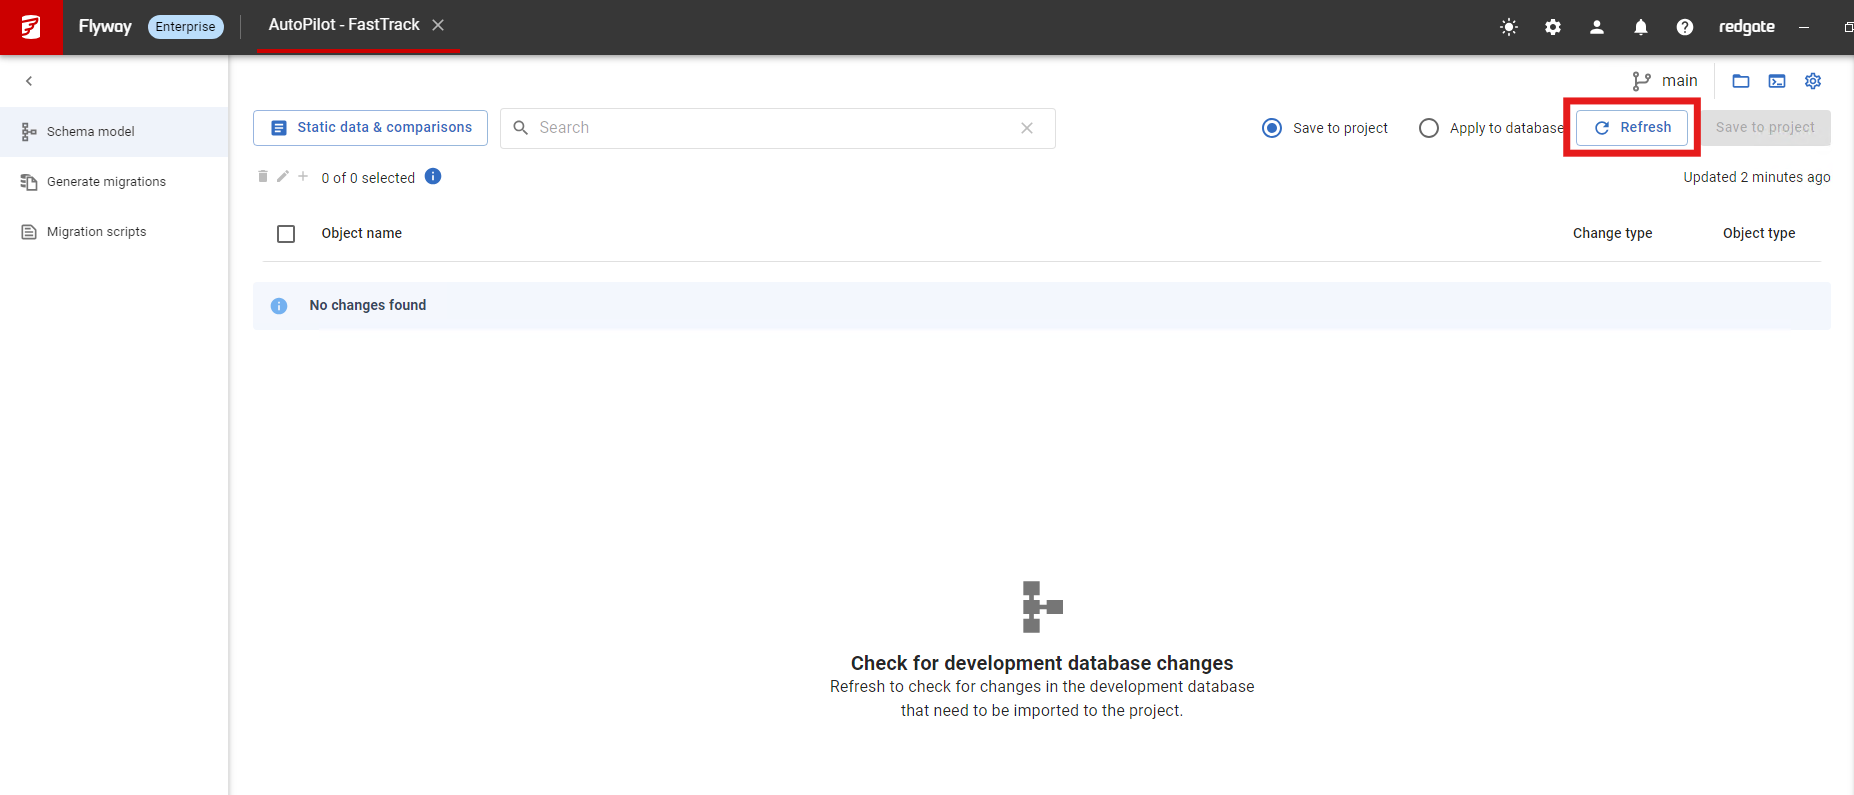
- Open Flyway Desktop, head to the Schema Model tab and click Refresh if it does not start scanning automatically. This action scans your
AutoPilotDevdatabase and displays a list of all objects (tables, views, stored procedures, etc.) that have not yet been saved to the schema model. - The schema model represents the current CREATE DDL script for each object in your development database. It acts as a snapshot of your database structure, allowing you to track how it evolves over time and revert to previous versions if necessary.
- Unless changes were made to AutoPilotDev already, Flyway Desktop should show 'No changes found' as illustrated below:
- Open Flyway Desktop, head to the Schema Model tab and click Refresh if it does not start scanning automatically. This action scans your
Make a Change and See the Results:
- Now that Flyway Desktop is connected to your
AutoPilotDevdatabase, try making a change to it using your preferred IDE (Such as SQL Server Management Studio). For example, create a new table in the database. - After making the change, click Refresh in Flyway Desktop again. You should see the new table (Or similar change) listed among the change list that Flyway has detected.
- Now that Flyway Desktop is connected to your
This step completes the initial synchronization of your development environment. You are now ready to capture any changes you make in the AutoPilotDev database and save them into your schema model.
Step 2: Saving Your Changes to the Schema Model
With the changes detected by Flyway Desktop, the next step is to save these changes to your schema model. This process involves selecting the changes you’ve made and committing them to your Flyway project. Doing so ensures that all modifications are tracked in version control, allowing you to manage your database schema as part of your overall project.
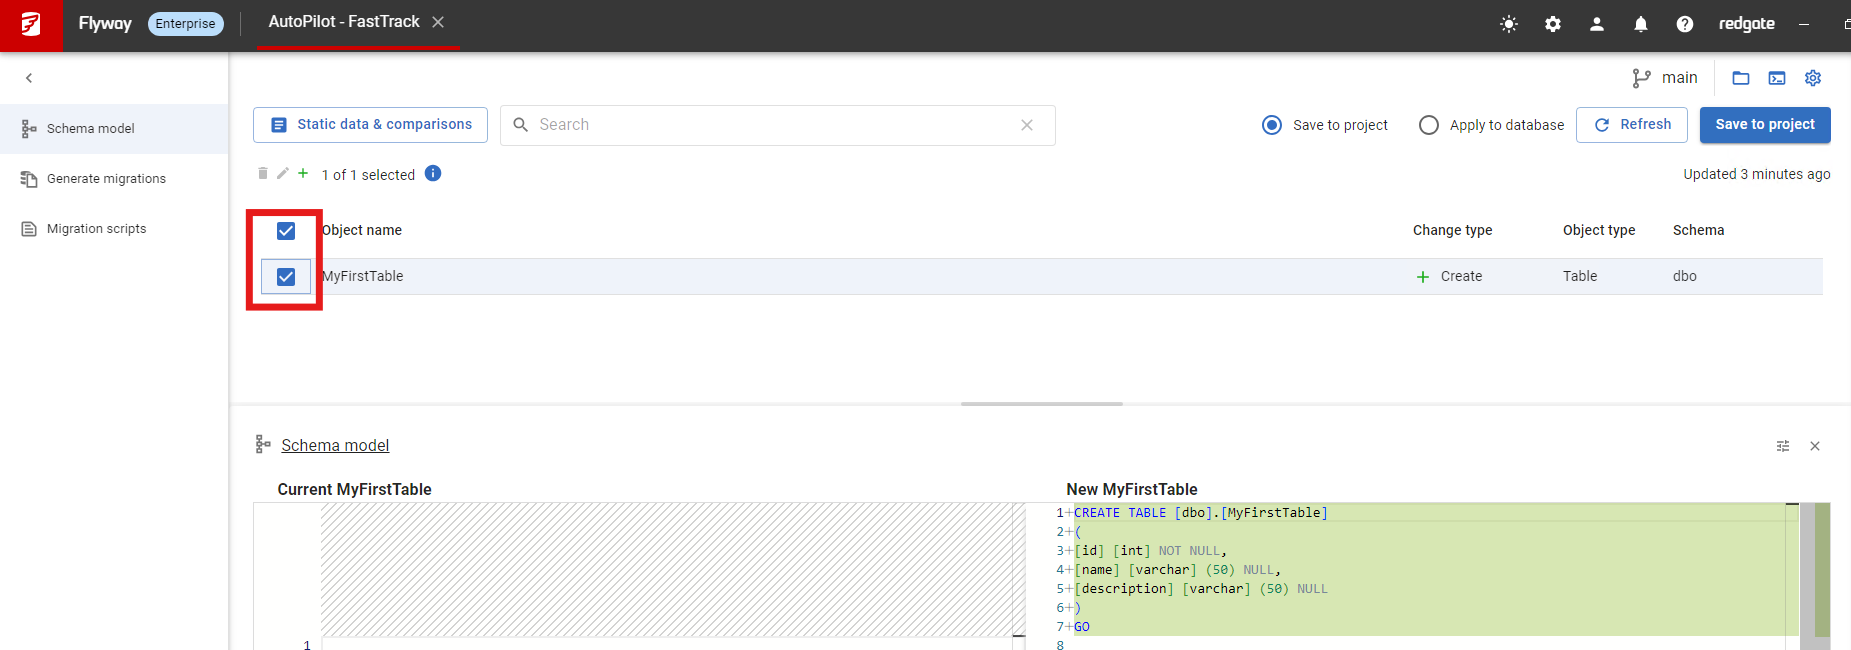
Select and Save Changes:
- In Flyway Desktop, check the box next to the change you just made (e.g., the new table you created).
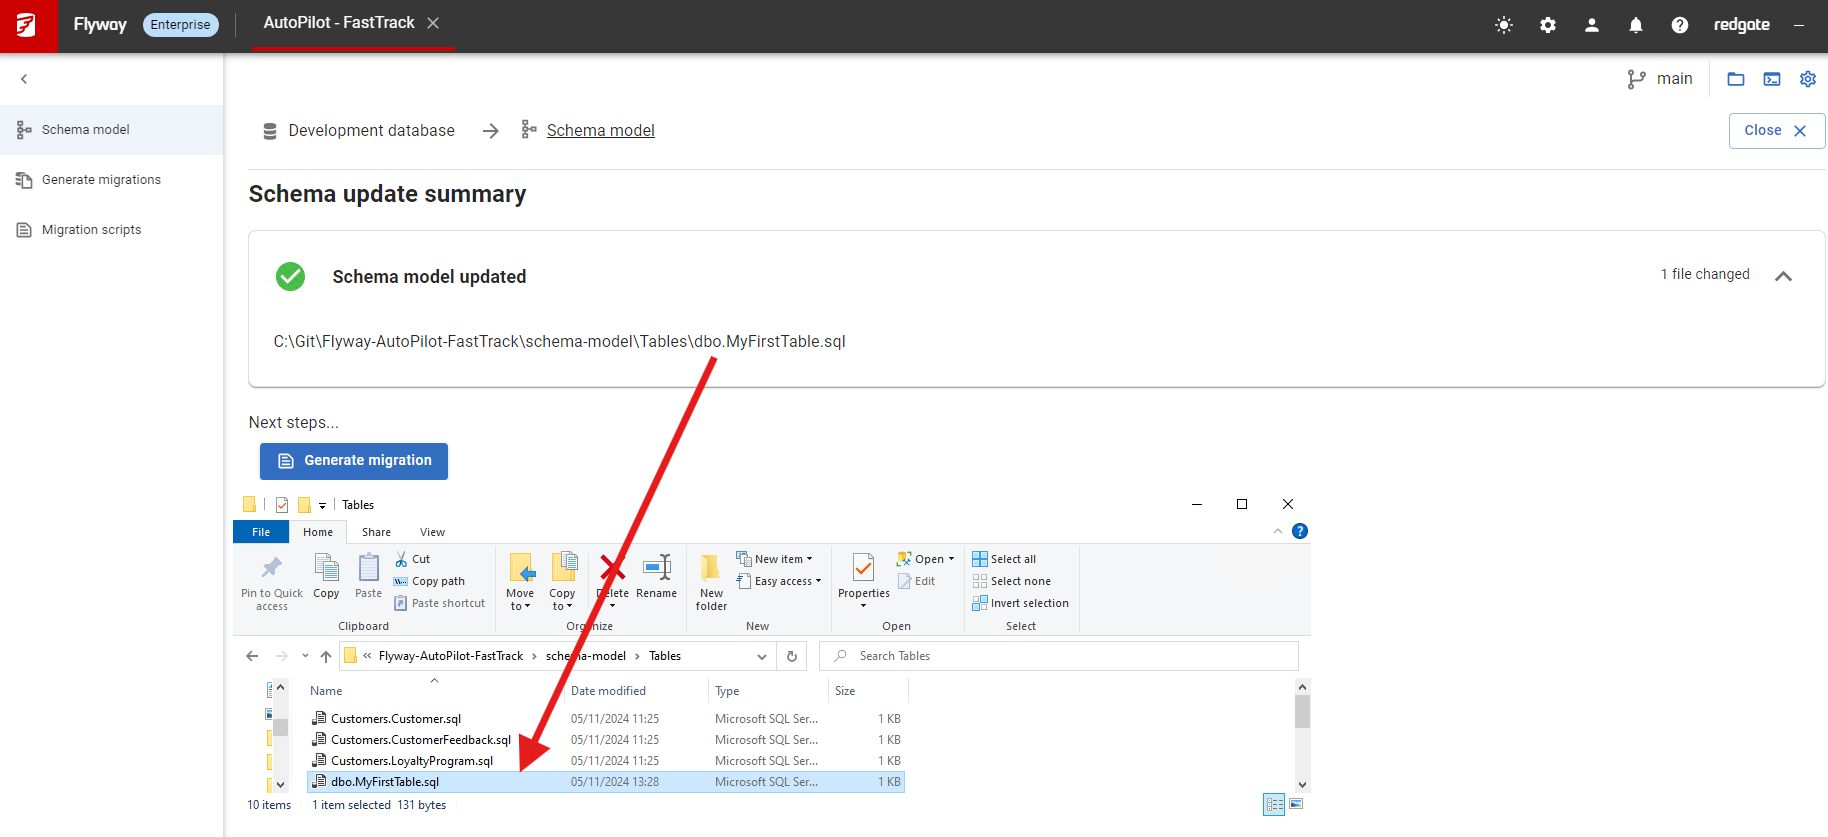
- Click Save to Project. This action saves the CREATE DDL for the object to the schema model on disk.
Commit to Version Control:
- After saving the changes to the schema model, commit these changes to your Git repository. This ensures that your schema model is versioned, enabling you to track changes over time and collaborate with your team more effectively.
- In the Uncommitted Changes panel (accessible from the right hand side Version Control sidebar), you should see the generated schema model scripts and any related changes, such as the
flyway.tomlproject settings file if you updated connection details. - Select all the changes, enter a commit message, and click Commit and Push (or Commit and then Push Changes as two separate actions if needed).
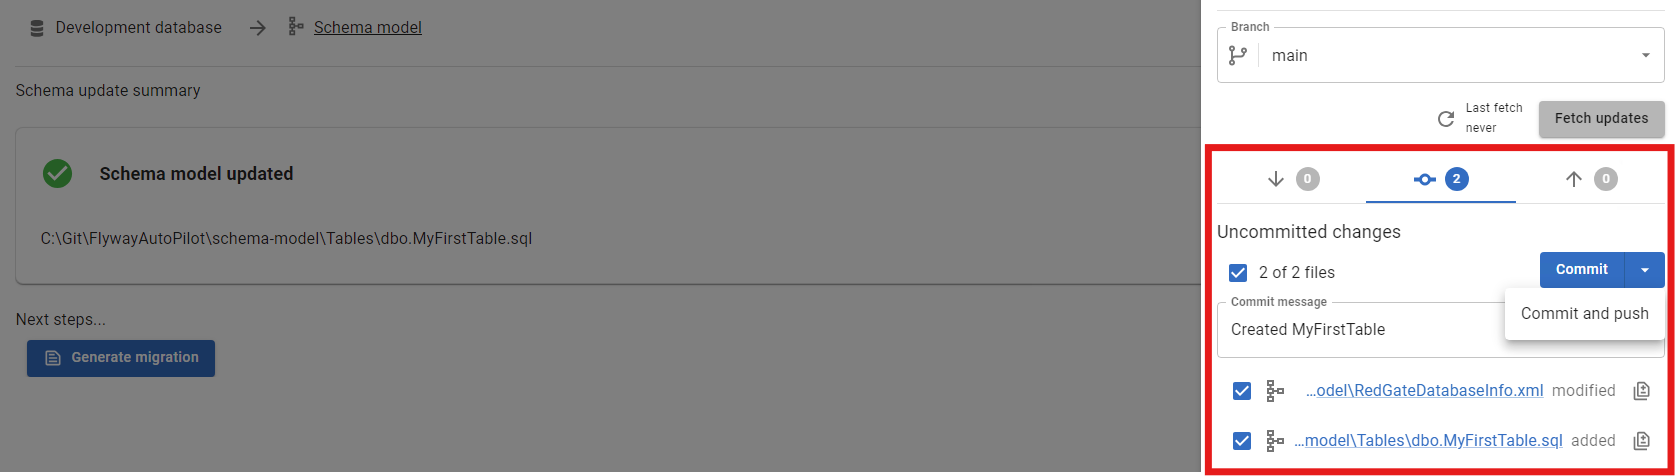
- If 'RedGateDatabaseInfo.xml' shows are an uncommitted change, this is expected behaviour. The reason for this is due to it containing technical metadata around the database version in use, to assist Flyway with script generation.
What’s Next?
With your changes saved to the schema model and committed to version control, your Flyway Autopilot project is now ready for the final step: generating versioned migration scripts and setting up automated deployments through Azure DevOps or GitHub Actions. This final stage will complete your continuous integration and deployment pipeline, allowing you to automatically deploy database changes across environments with confidence.
Next step > Generating Migration Script
This documentation contains proprietary information and is protected by copyright law.
Copyright © 2026 Red Gate Software Limited. All rights reserved


