5. Generating Migrations Script
Published 09 September 2024
Generating Versioned Migration Scripts
Now that your changes are saved to the schema model, it's time to generate versioned migration scripts. These scripts will allow you to apply the changes to other environments as part of your CI/CD pipeline. Flyway Autopilot simplifies this process by automatically detecting changes that haven’t been deployed yet, helping you stay in sync with your database environments.
This guide will walk you through testing the script generation, reviewing the changes, and pushing your scripts to version control.
Step 1: Generate Migration Scripts
Flyway Autopilot compares your current Schema Model (This includes all the changes made in the previous step) with all migration scripts the Flyway Project currently has (In our case, this is one baseline script that details all objects we had in AutoPilotDev when we started the repo). By doing this, Flyway can then easily work out which changes have yet been captured as a migration script. So that it can help automatically write you the next perfect migration script, which you will deploy to your Test and Production environments in a later step.
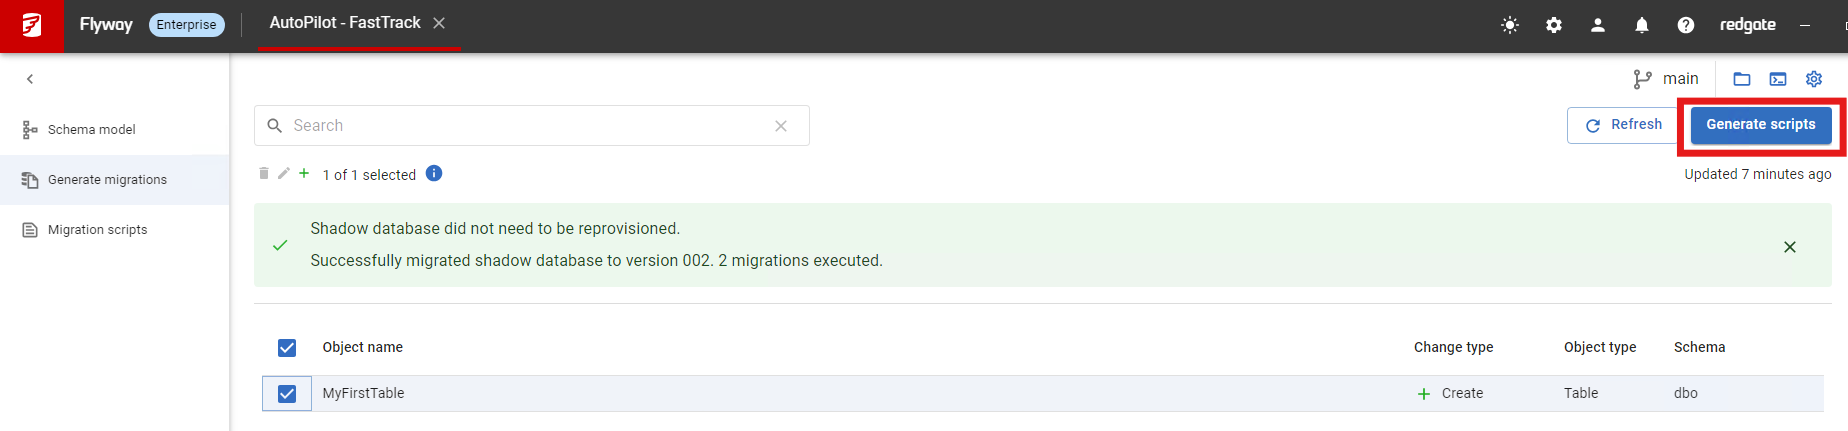
- Generate Migration:
Click on Generate Migration in Flyway Desktop. This will display all changes that have been captured into the project but do not yet have a migration script for deployment.
Flyway will prompt you to review the detected changes and generate the necessary scripts to apply these updates across your pipeline.
Note: If your databases aren’t on
localhost:1433, and you're seeing connection errors, click the Edit Connection button to update the Shadow Database connection details. This ensures that Flyway connects correctly to the right environment.
Step 2: Select and Generate Scripts
Select Changes:
- In the list of detected changes, select the checkbox next to the object(s) you want to include in the migration. Typically, you’d choose the object(s) you recently modified, but Flyway allows you to select a subset of changes if needed.
- Once selected, click Generate scripts.
Review and Customize:
Flyway generates the migration script based on your selected changes. Review the script to ensure it accurately represents your changes. You can also rename the script to make it more descriptive, if desired.
Flyway automatically assigns a version number by incrementing the latest versioned migration script number in your project. It also adds a timestamp to ensure uniqueness, especially in collaborative environments where multiple developers might be creating scripts simultaneously.
Tip: Flyway Autopilot is configured to create Undo scripts as well. You can find these at the bottom of the generated migration script. Undo scripts help reverse changes if needed.
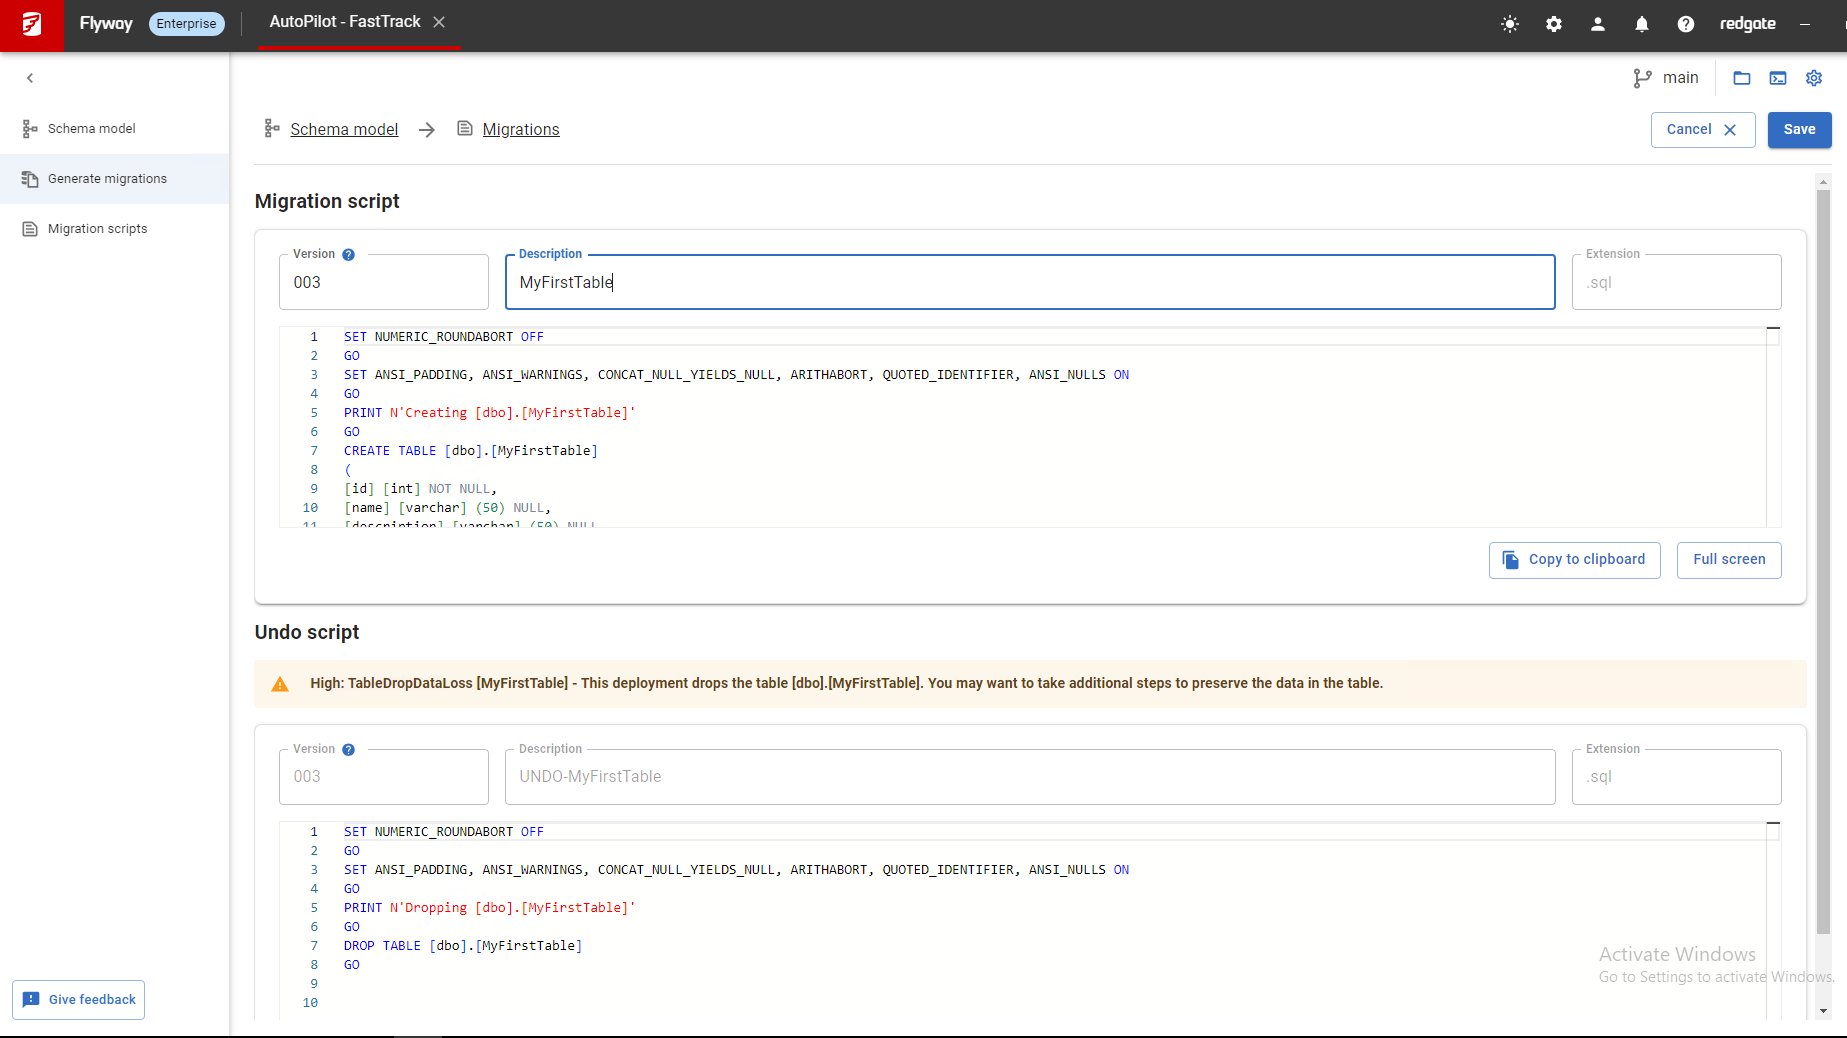
Save the Script:
- After reviewing and making any necessary adjustments, click Save to add the migration script to your project.
Step 3: Verify and Commit Changes
Now that the migration script is generated, it’s important to verify its accuracy and then commit the changes to version control.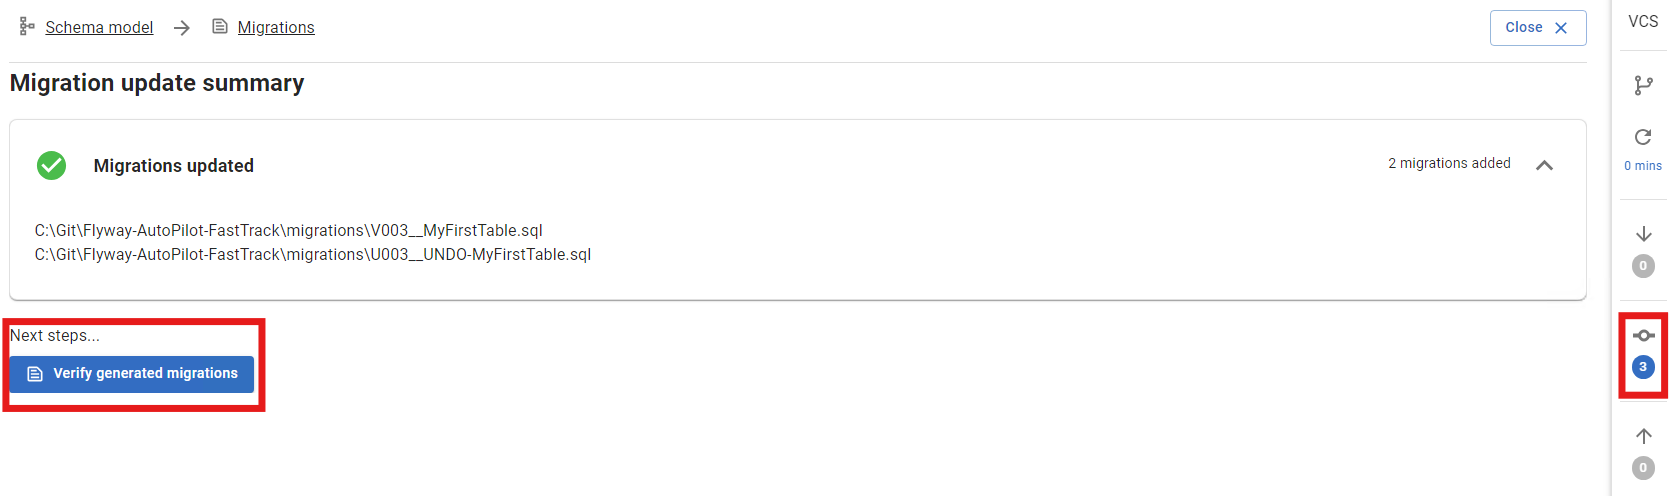
Verify the Generated Migration (Optional):
- Before committing the script, you can choose to verify it by clicking Verify Generated Migrations. This runs the migration against the Shadow Database to ensure there are no syntax or dependency errors. This step is especially helpful if you manually edited the script.
- Once verified, return to the Version Control tab to proceed with committing the changes.
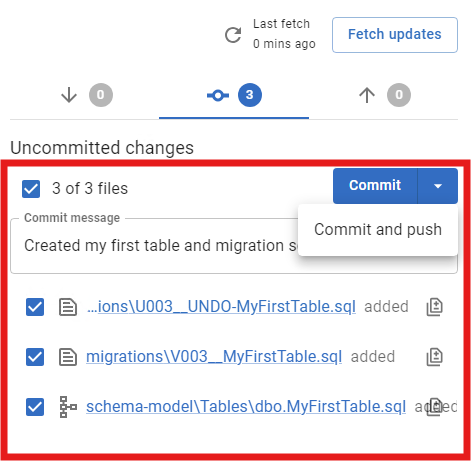
Commit and Push Changes:
- In the Uncommitted Changes panel (accessible from the Version Control sidebar), you should see the generated migration scripts and any related changes, such as the
flyway.tomlproject settings file if you updated connection details. - Select all the changes, enter a commit message, and click Commit and Push (or Commit and then Push Changes as two separate actions if needed).
- In the Uncommitted Changes panel (accessible from the Version Control sidebar), you should see the generated migration scripts and any related changes, such as the
This process ensures that all changes made to your development database are accurately captured, versioned, and prepared for deployment across your environments. Now that your migration scripts are generated and committed, you're ready to move on to the final step of configuring your CI/CD pipeline using Azure DevOps or GitHub Actions.
Next step > Deploying Via CI/CD Platforms
This documentation contains proprietary information and is protected by copyright law.
Copyright © 2026 Red Gate Software Limited. All rights reserved


