Tutorial - Generate migrations from the schema model using a shadow database
Published 21 January 2025
- Make changes to your development database
In this example below, we are adding a new table called `SocialMedia` and adding a new column called `Twitter` to the Customers table. - In Flyway Desktop, save the changes to your schema model
- Navigate to the Generate migrations tab
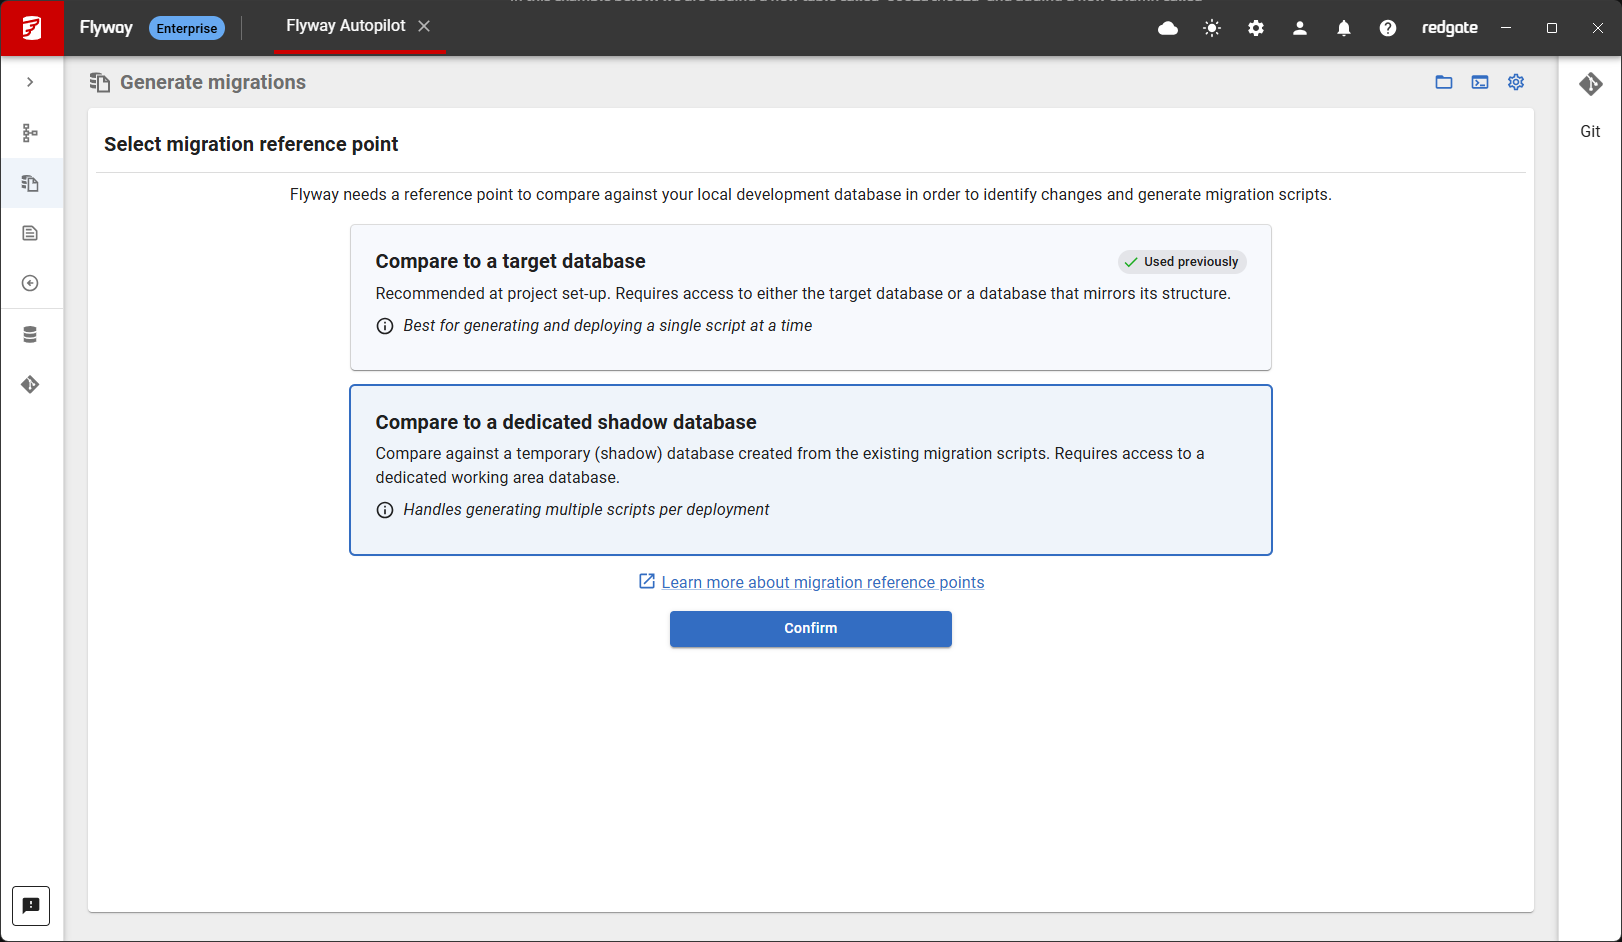
In the connection dialog, specify your shadow database connection details, check the box to confirm it's ok to erase the data and objects in this database, and click Test and save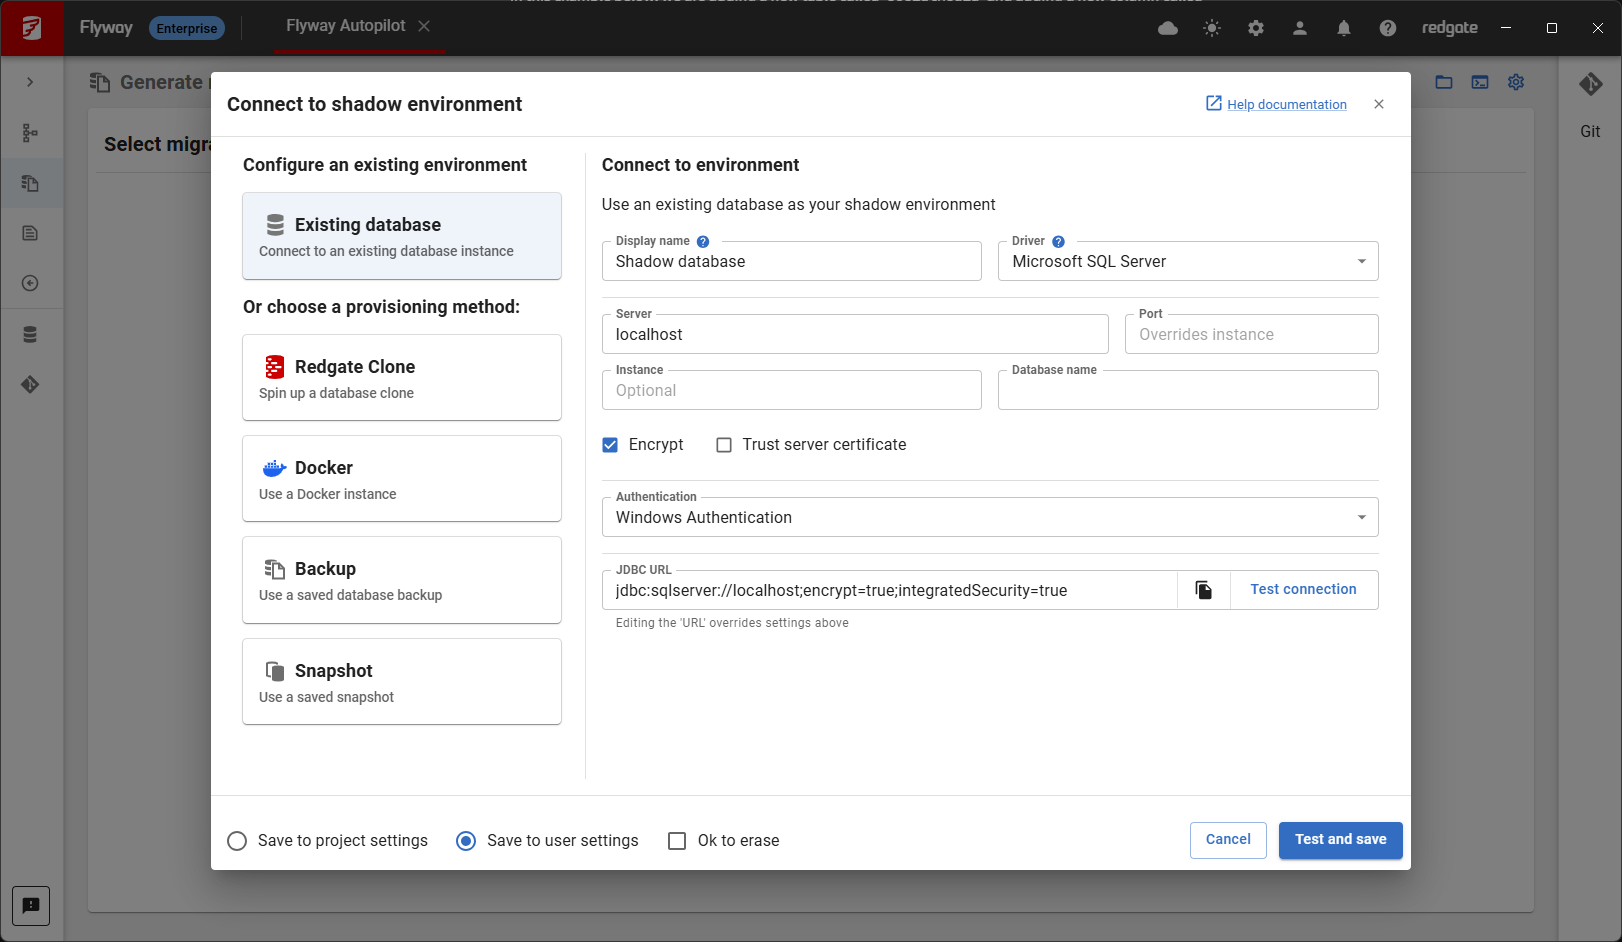
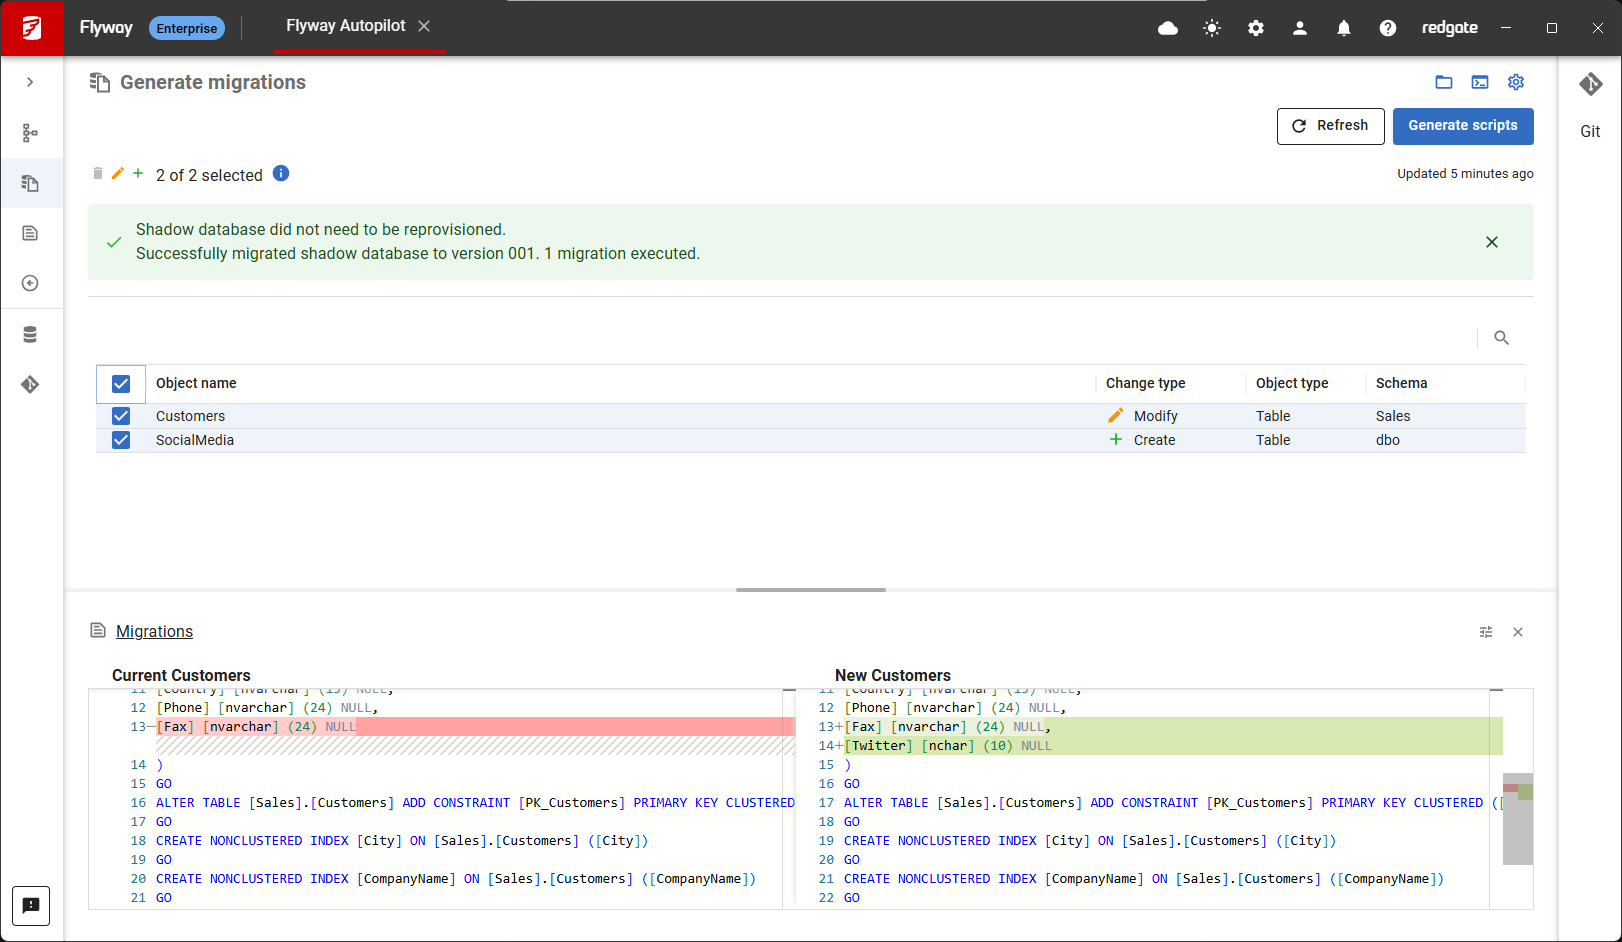
- In the top left there is information on how long ago the project was refreshed
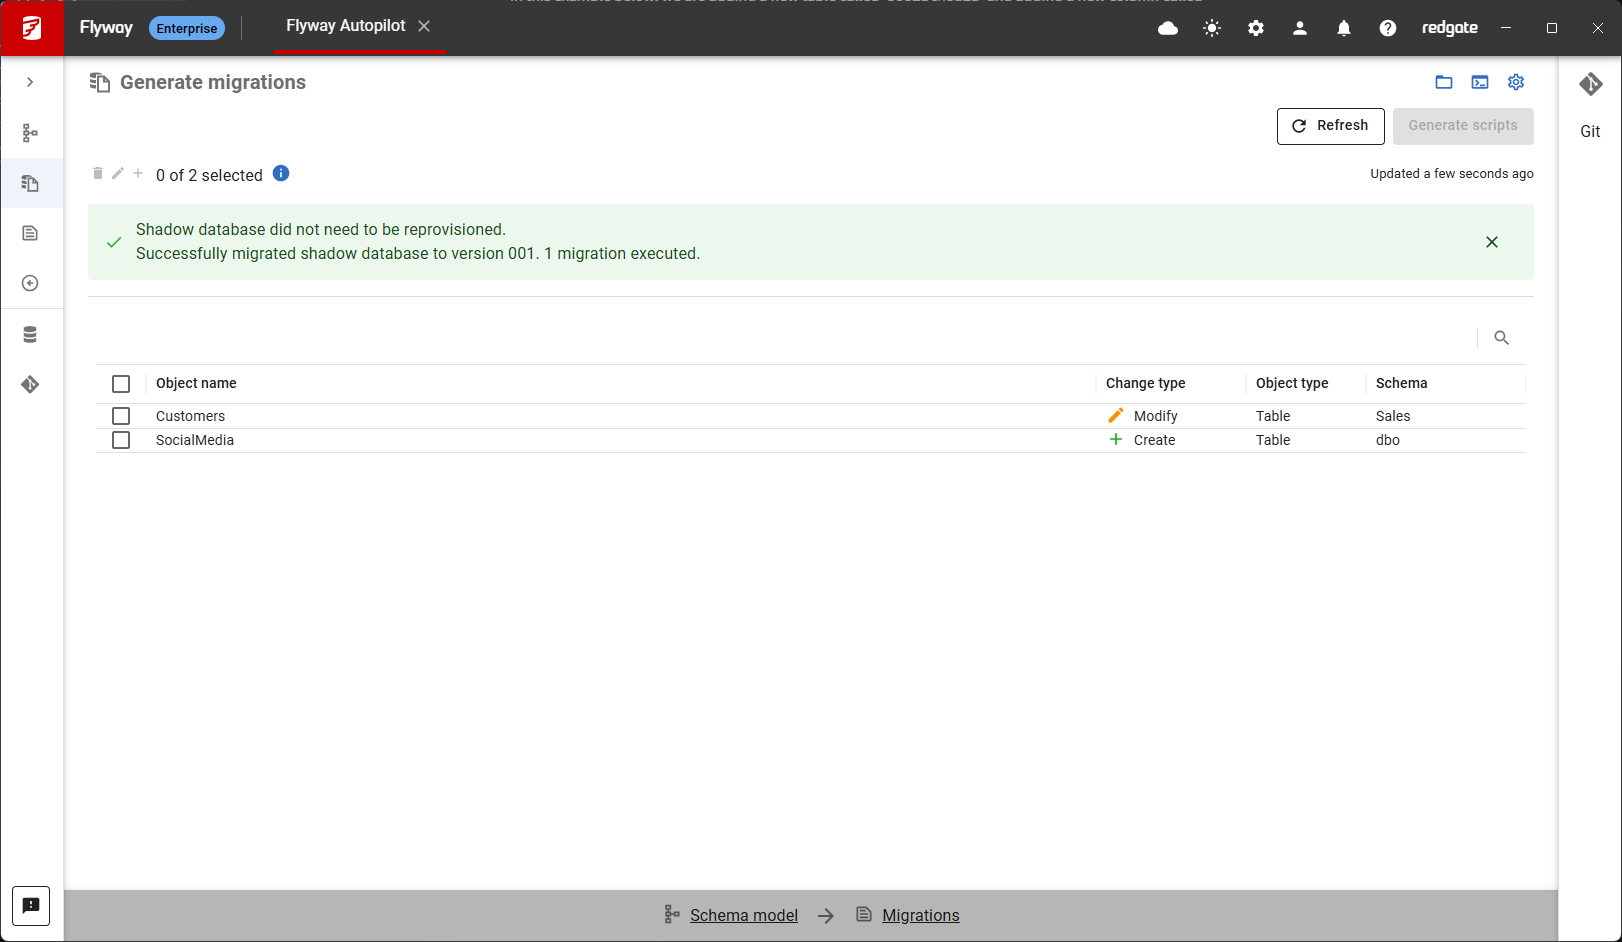
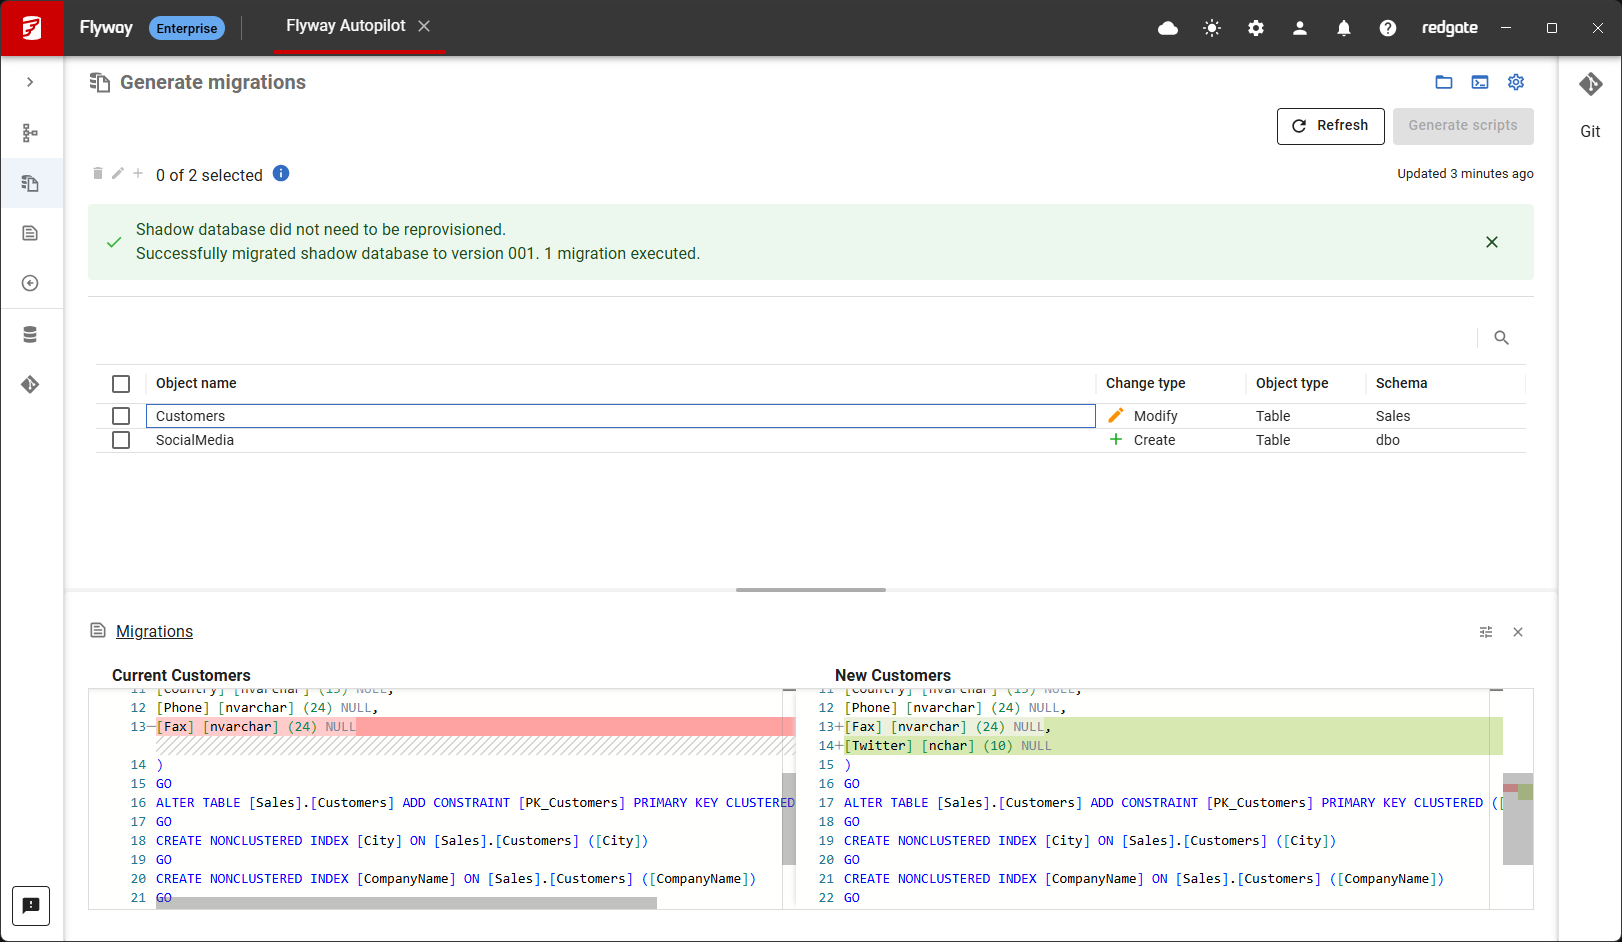
5. Click on the objects in the top list to show the differences for that object at the bottom. This allows you to see exactly how each object will change. You can also sort the columns by clicking on the different column headers
6. Generate scripts for the selected objects by clicking on the checkboxes for changes you wish to include and then clicking the Generate scripts button in the top right of the screen
You can multi select objects using Shift + Click
Make sure that only your changes are selected if your team is using a shared development database
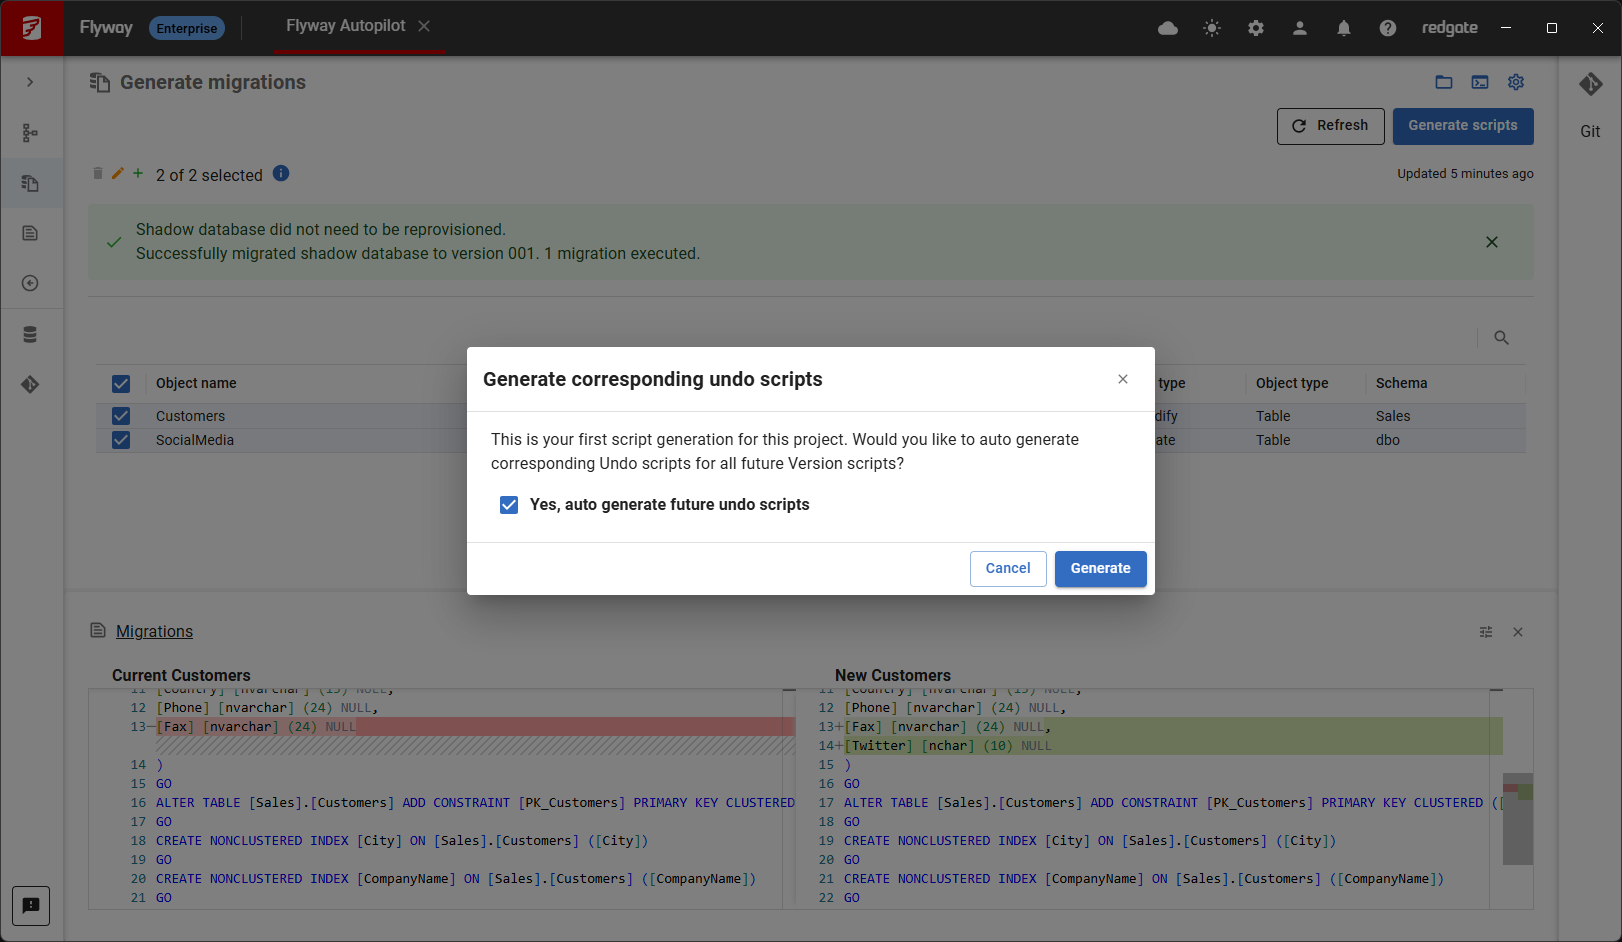
7. Decide if you wish to generate undo scripts for your changes. Undo scripts will be created for all future Versioned migrations if selected here
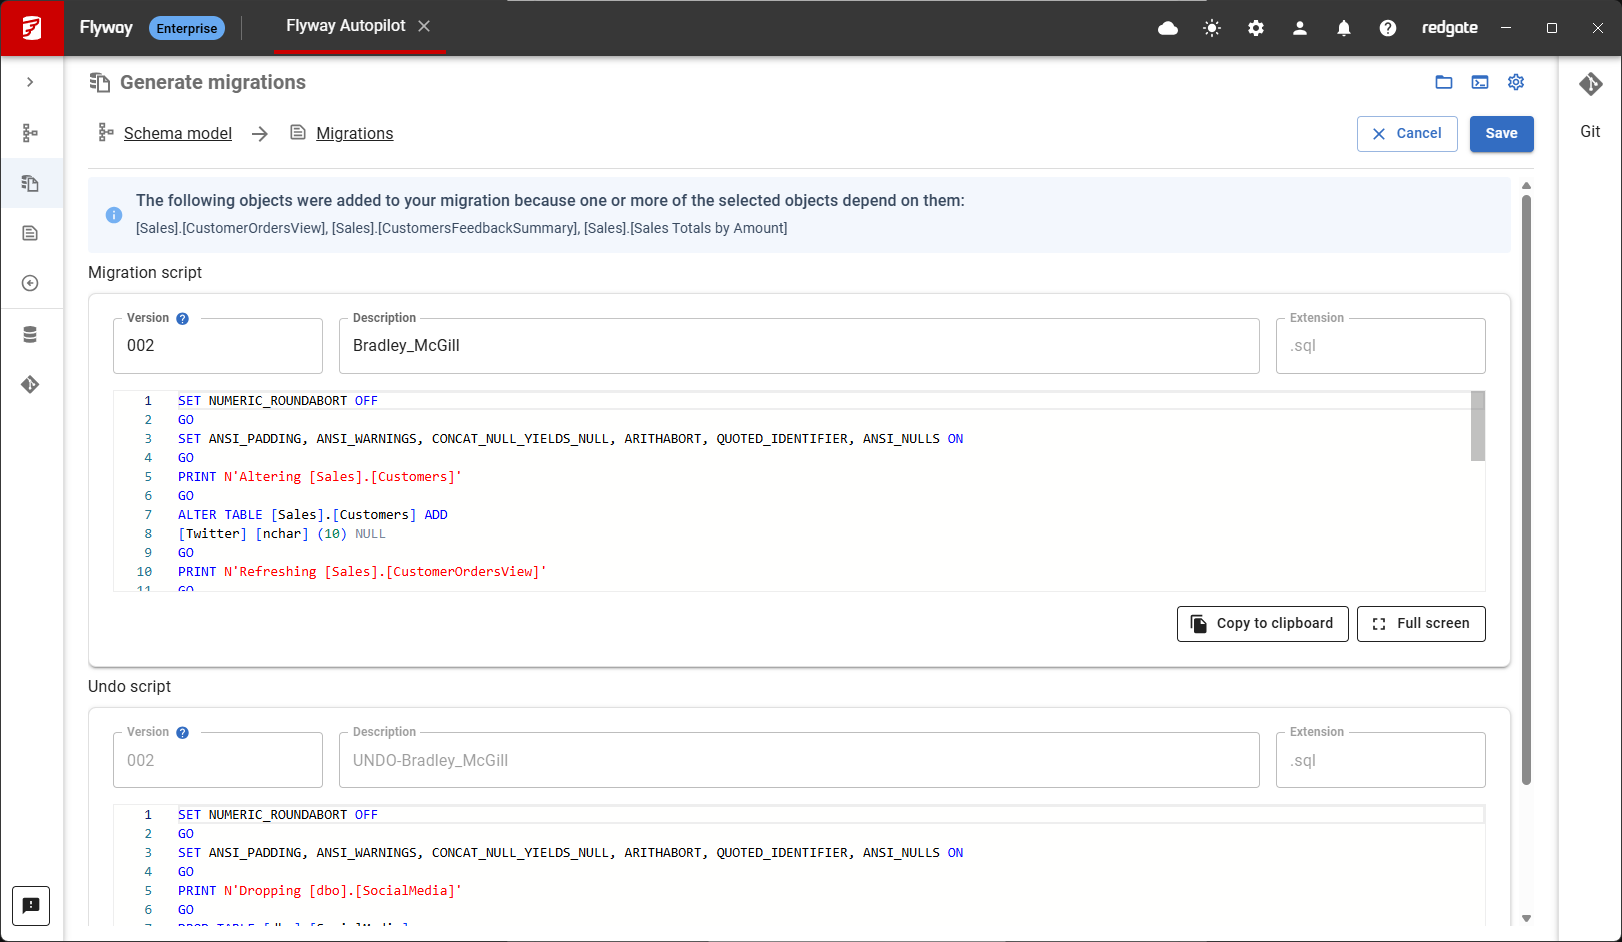
8. Review dependencies (if any)
If there are any objects which weren't selected which selected objects have dependencies on, you will be prompted to select these dependencies at this point, though you can choose to deselect them. If there are no unselected dependencies this step won't happen.
9. Review scripts and update the version and descriptions
This next page allows you to review the generated scripts. If your changes involve an object that stores data, such as a table, then a versioned migration script will be created. The version number will automatically incremented, and a timestamp will be included to minimize the chance of merge conflicts
Timestamps are included in versioned migration filenames by default. Flyway Desktop cannot apply two migrations with the same version number, which can happen when multiple developers are merging parallel migrations. The sequential timestamp ensures that even identical version numbers are still able to be applied to a database, since their timestamps will almost certainly differ
You can specify your own version number (e.g., maybe this is the next major version, V2.0). You can also provide a clearer description, which is the second part of the filename, so it's more obvious what change is contained in the script. You can also customize the generated versioned migration script. An example of this is if a new NOT NULL column is added without a default, and an initial value needs to be set for existing records
See an example about setting your own versioning numbers
You can learn more about the different migration scripts in our Concepts documentation
Flyway Desktop will not permit saving migrations that do not conform to the migration naming convention specified in your config. The defaults can be found here
Once you're happy with your changes, click Save. This will write the scripts on the screen to your project folder on disk
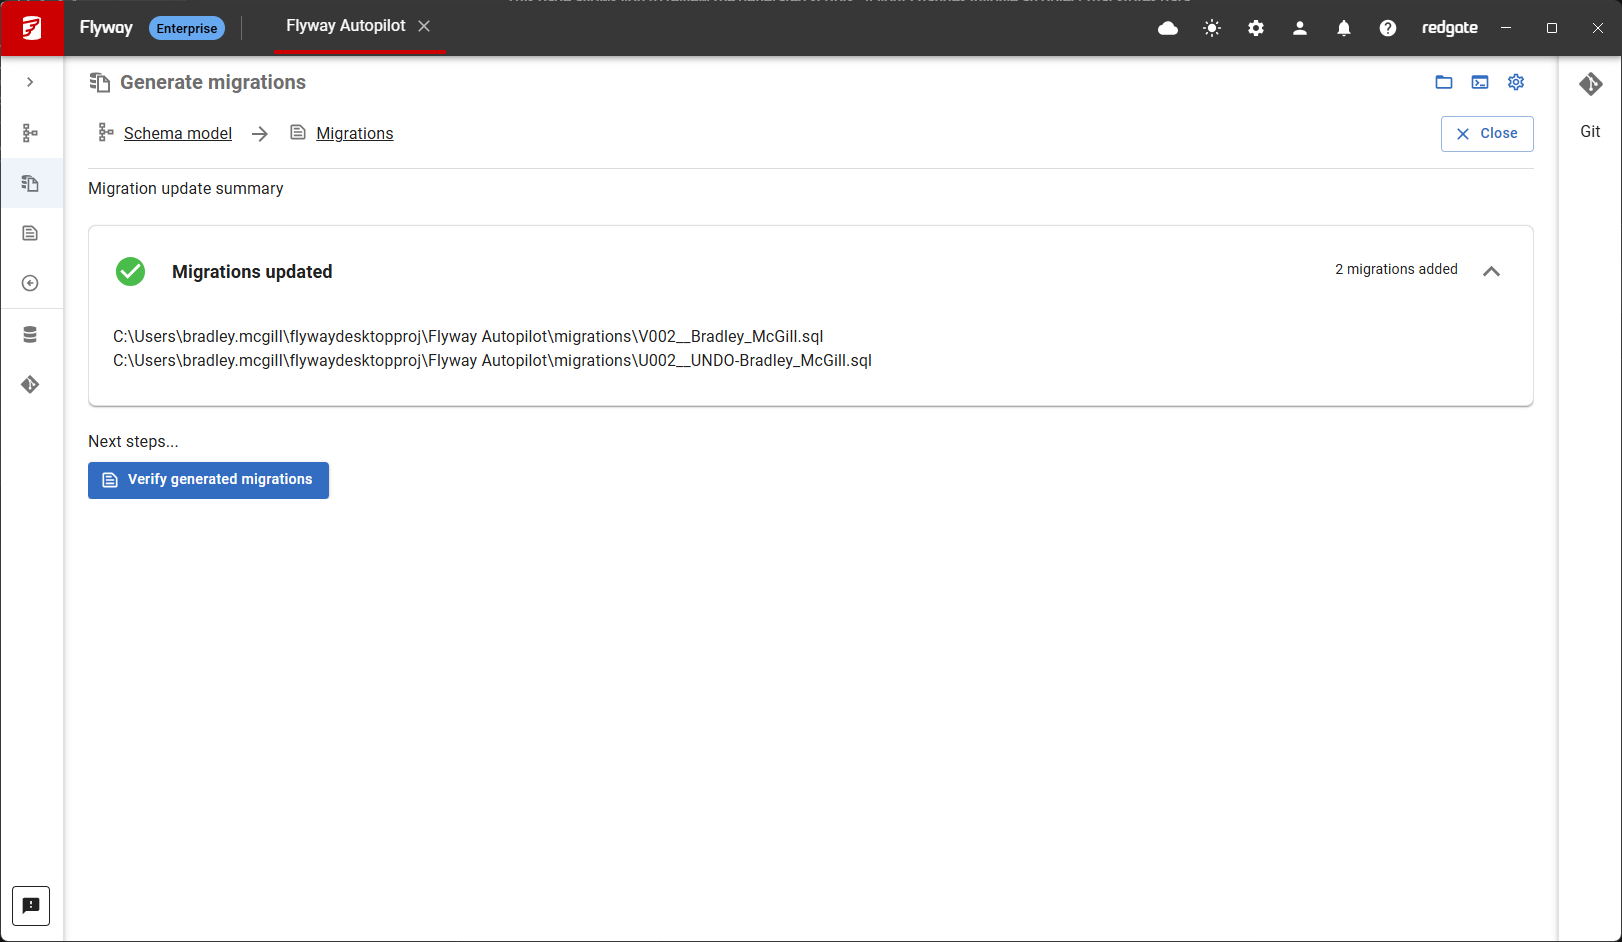
10. Review the resulting summary. This confirms which scripts were created and their names
11. Finally click verify migrations. This will ensure that your migrations are syntactically valid by running them in your shadow database
This example follows on from Use the CLI to save database changes to the Schema Model. In this example, we'll capture all the changes in the Schema Model that haven't been included in a migration script for deployment in a migration script. We'll also generate the corresponding undo script for these changes.
Setup
- Complete the Use the CLI to save database changes to the Schema Model how-to guide. Or, you can use the below as a guide to create your own script.
Generating migration scripts for Schema Model changes
- Link your shadow database.
Your flyway.user.toml file will look like (with your own server/instance name):[environments.development] url = "jdbc:sqlserver://localhost;instanceName=SQLExpress;databaseName=AutoPilotDev;encrypt=true;integratedSecurity=true;trustServerCertificate=true" displayName = "Development database" [environments.shadow] url = "jdbc:sqlserver://localhost;instanceName=SQLExpress;databaseName=AutoPilotShadow;encrypt=true;integratedSecurity=true;trustServerCertificate=true" displayName = "Shadow database" provisioner = "clean"
- In a command prompt at your project folder, run the following command to see all the differences between your SchemaModel and the result of running all your existing migration scripts on the Shadow Database. In this example, we expect two changes:
1. A new MiddleName column added to the Customer.Customers table
2. A new stored procedure to get Customer information by last nameflyway diff -source=schemaModel -target=migrations -buildEnvironment=shadow
The output will be a diff artifact, which looks like:
Nothing has been written to disk yet. - Optional, see more details about how each object in the diff artifact has changed.
flyway diffText
The output will look like: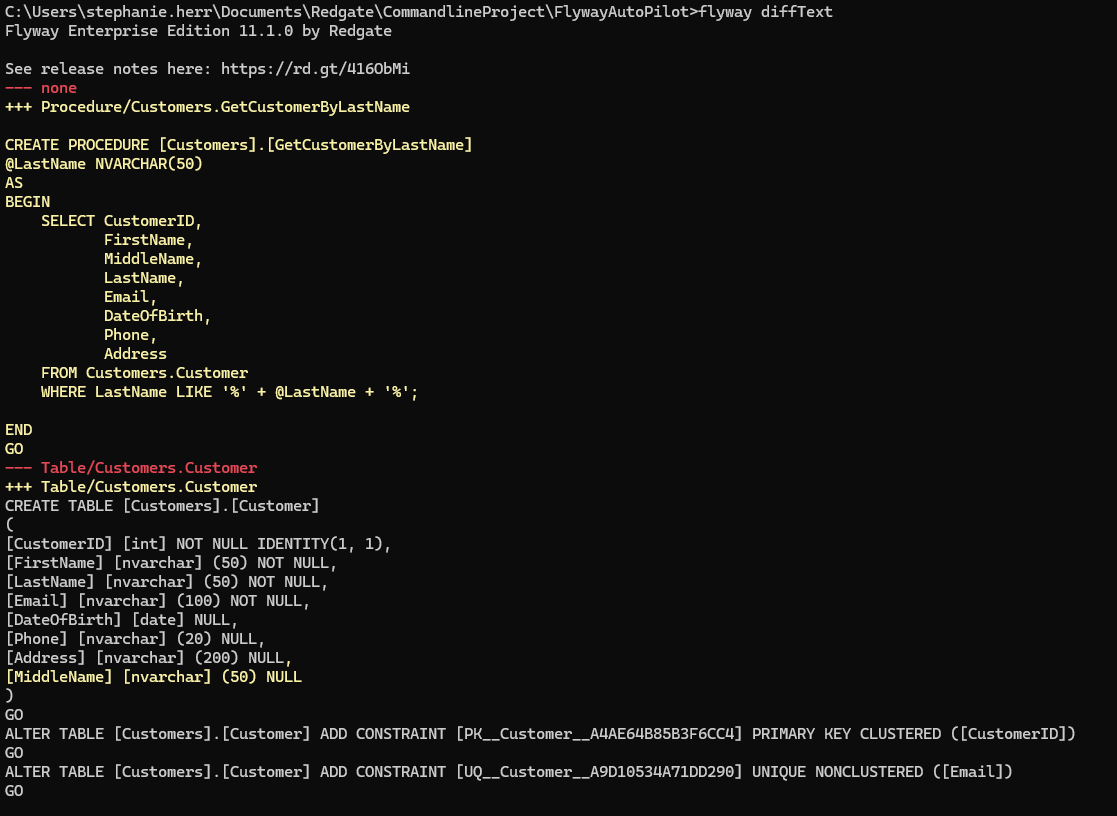
- Generate the next versioned and undo scripts for these changes.
flyway generate -types=versioned,undo -description=Added-Customers-MiddleName
The output will look like: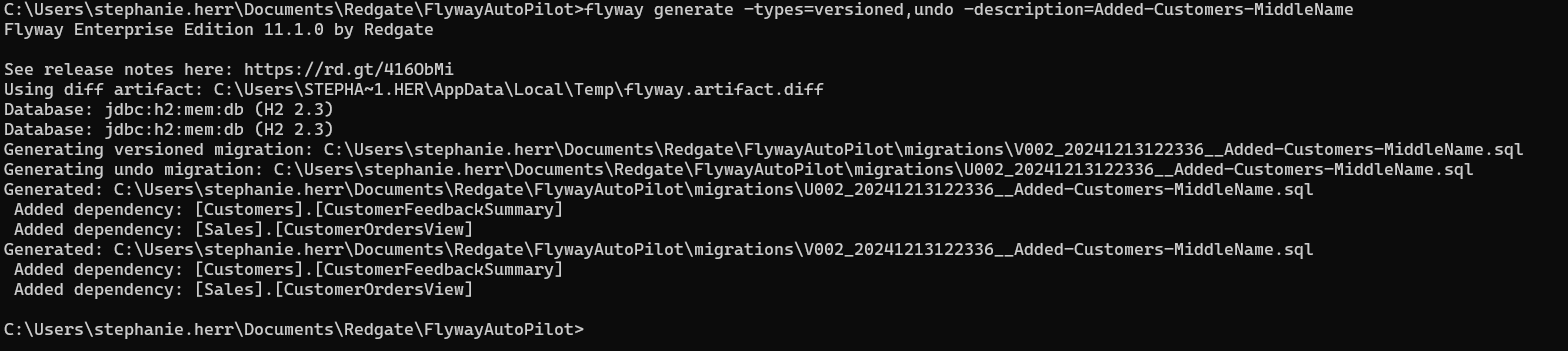
These files are saved to the migrations folder.
Next steps
Optionally save your new project to Version Control:
Then pick one of the following:
- Continue making changes in your development environment, saving them to the schema model. and generating more migrations
- Manually deploy your migrations to a database
- Configure your CI/DC pipeline to validate and deploy your changes whenever you push to Version Control
This documentation contains proprietary information and is protected by copyright law.
Copyright © 2026 Red Gate Software Limited. All rights reserved


