Tutorial - Resolve merge conflicts
Published 20 January 2025
In this example, you and your teammate have both changed the same table. Flyway Desktop will show you if merge conflicts are detected. Let's see what happens:
- Conflicting changes made
- You made a change to your development database. You added a new column - dbo.Employees.LinkedInID. You used Flyway Desktop to save this to disk and commit it locally.
- Your teammate made a change to their development database. They added a new column - dbo.Employees.TwitterID. They used Flyway Desktop to save to disk, commit, and then pushed it to the remote repository.
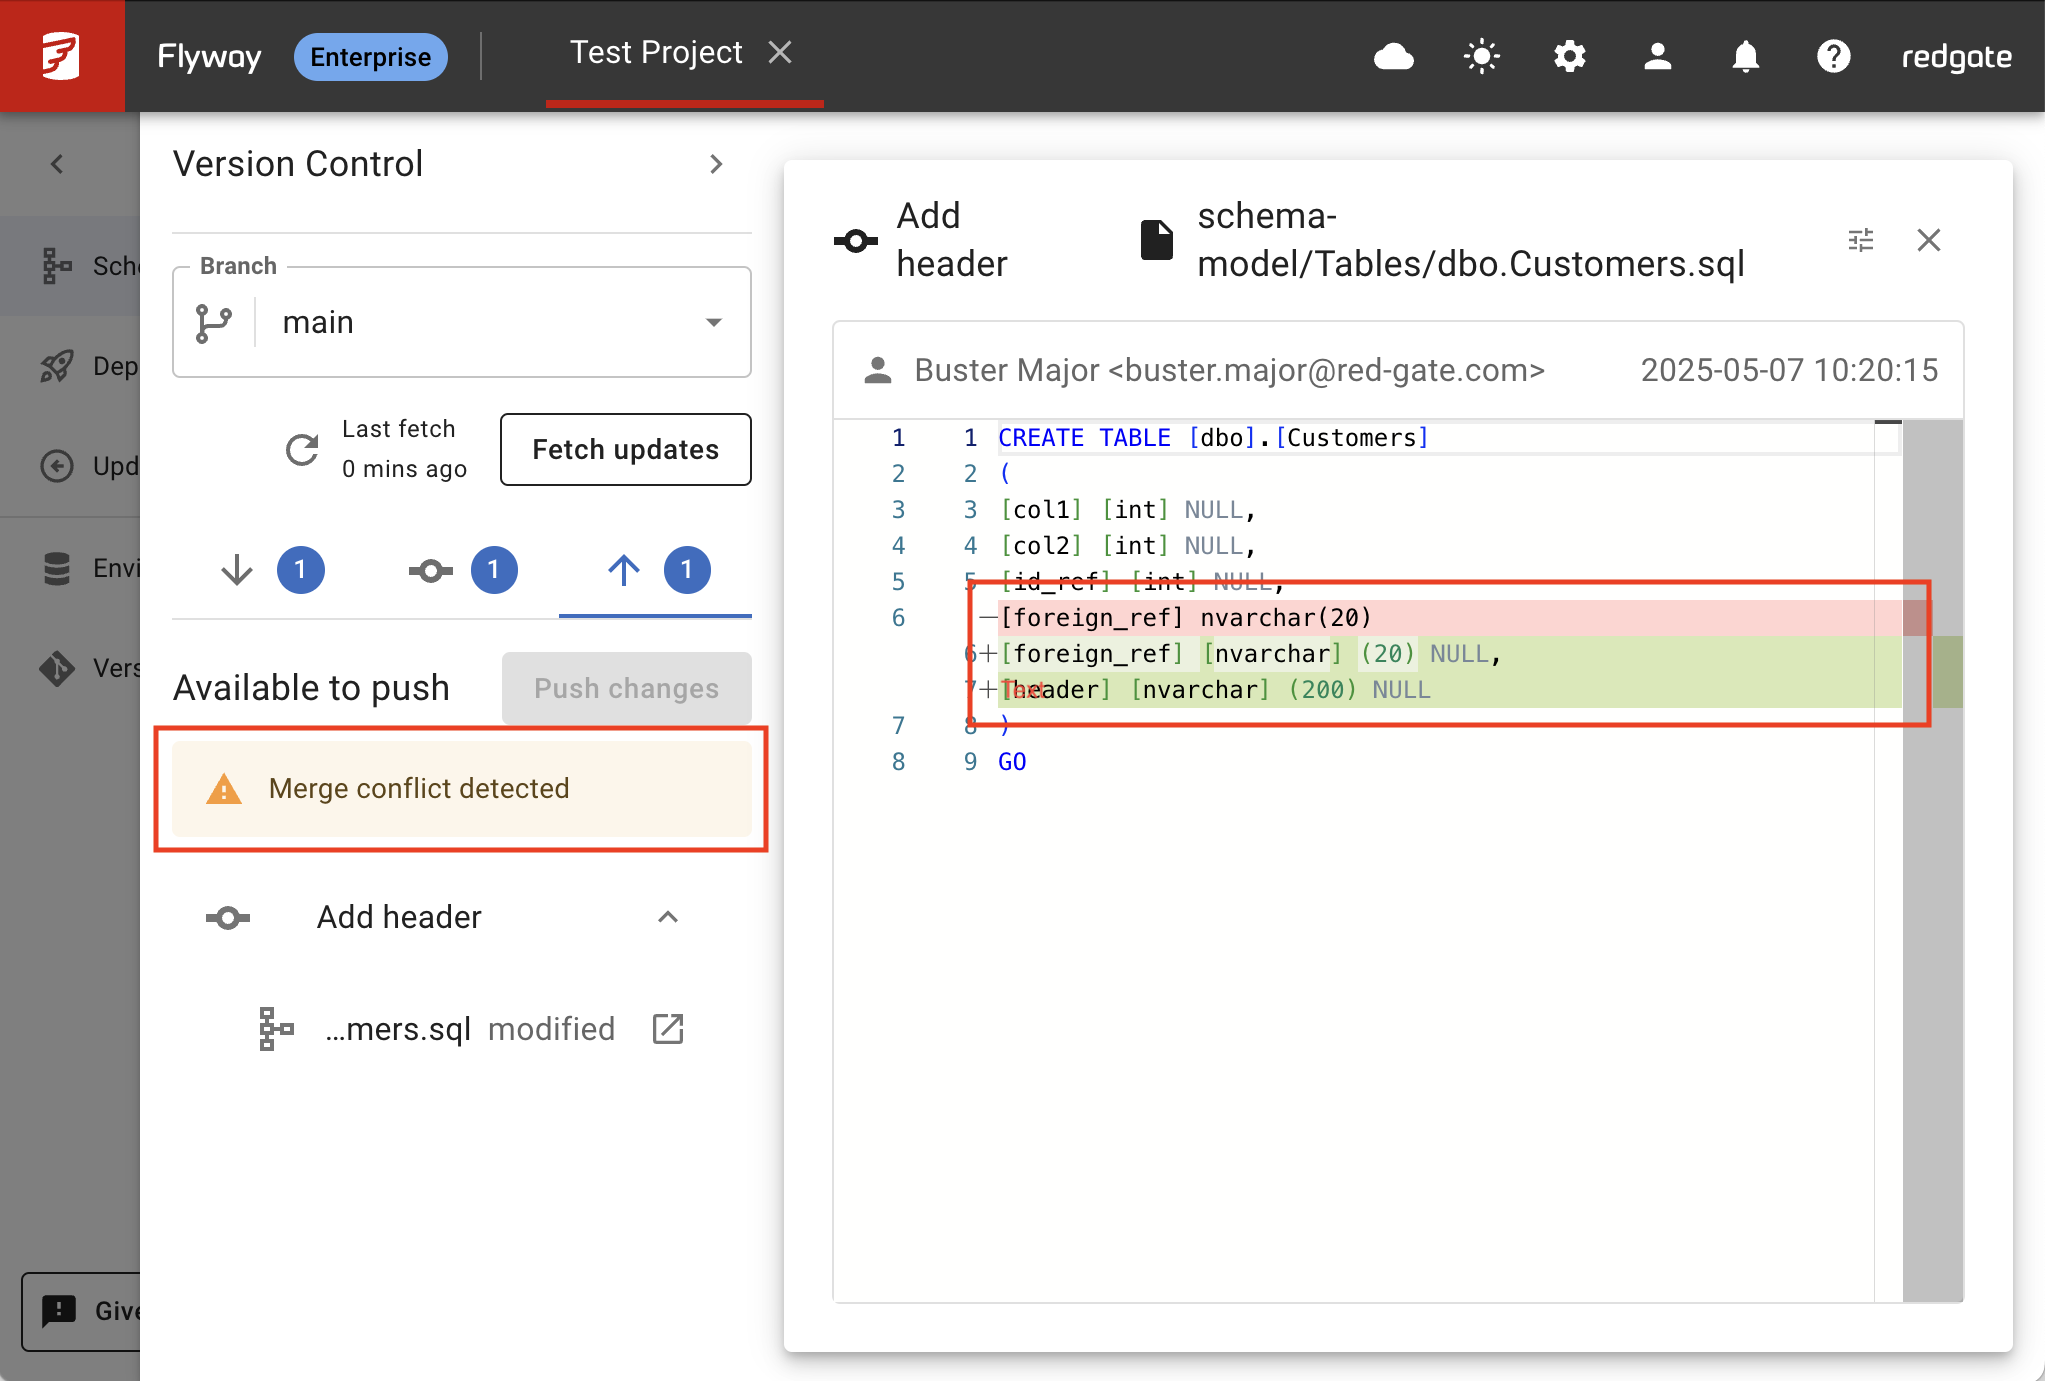
- In Flyway Desktop, when you try to push your changes, you will get a Merge conflict and you will not be able to Push/Pull any changes until the conflict is resolved. You can click on the object in the Pull/Push list to see the differences.
- Go to the Uncommitted changes in the center. Click Resolve next to the merge conflict indicator in the list
 to open this file in your editor.
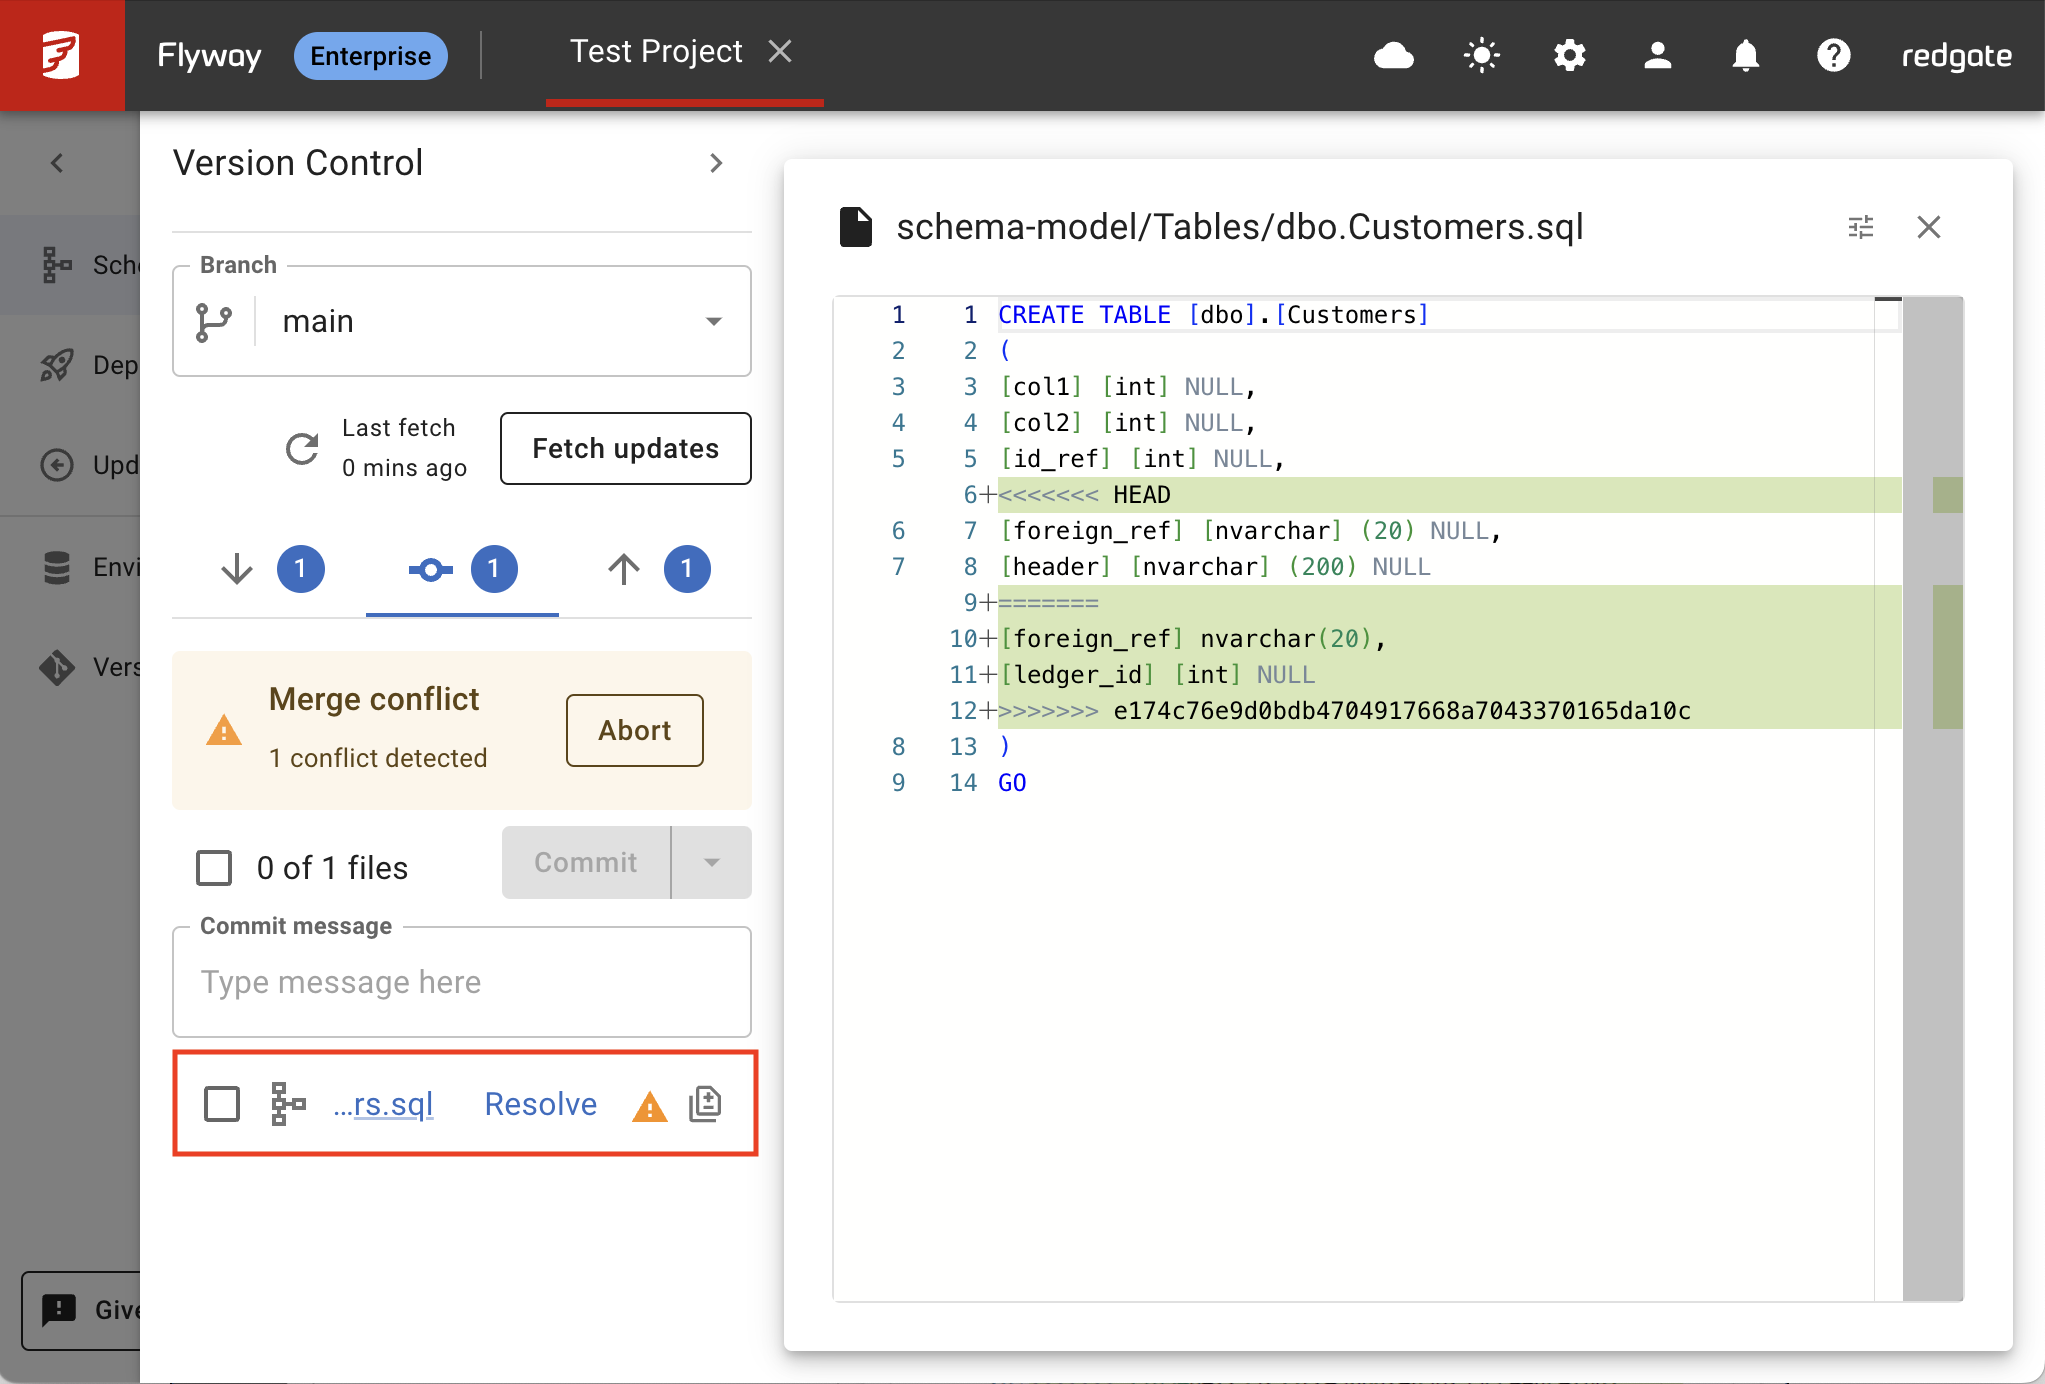
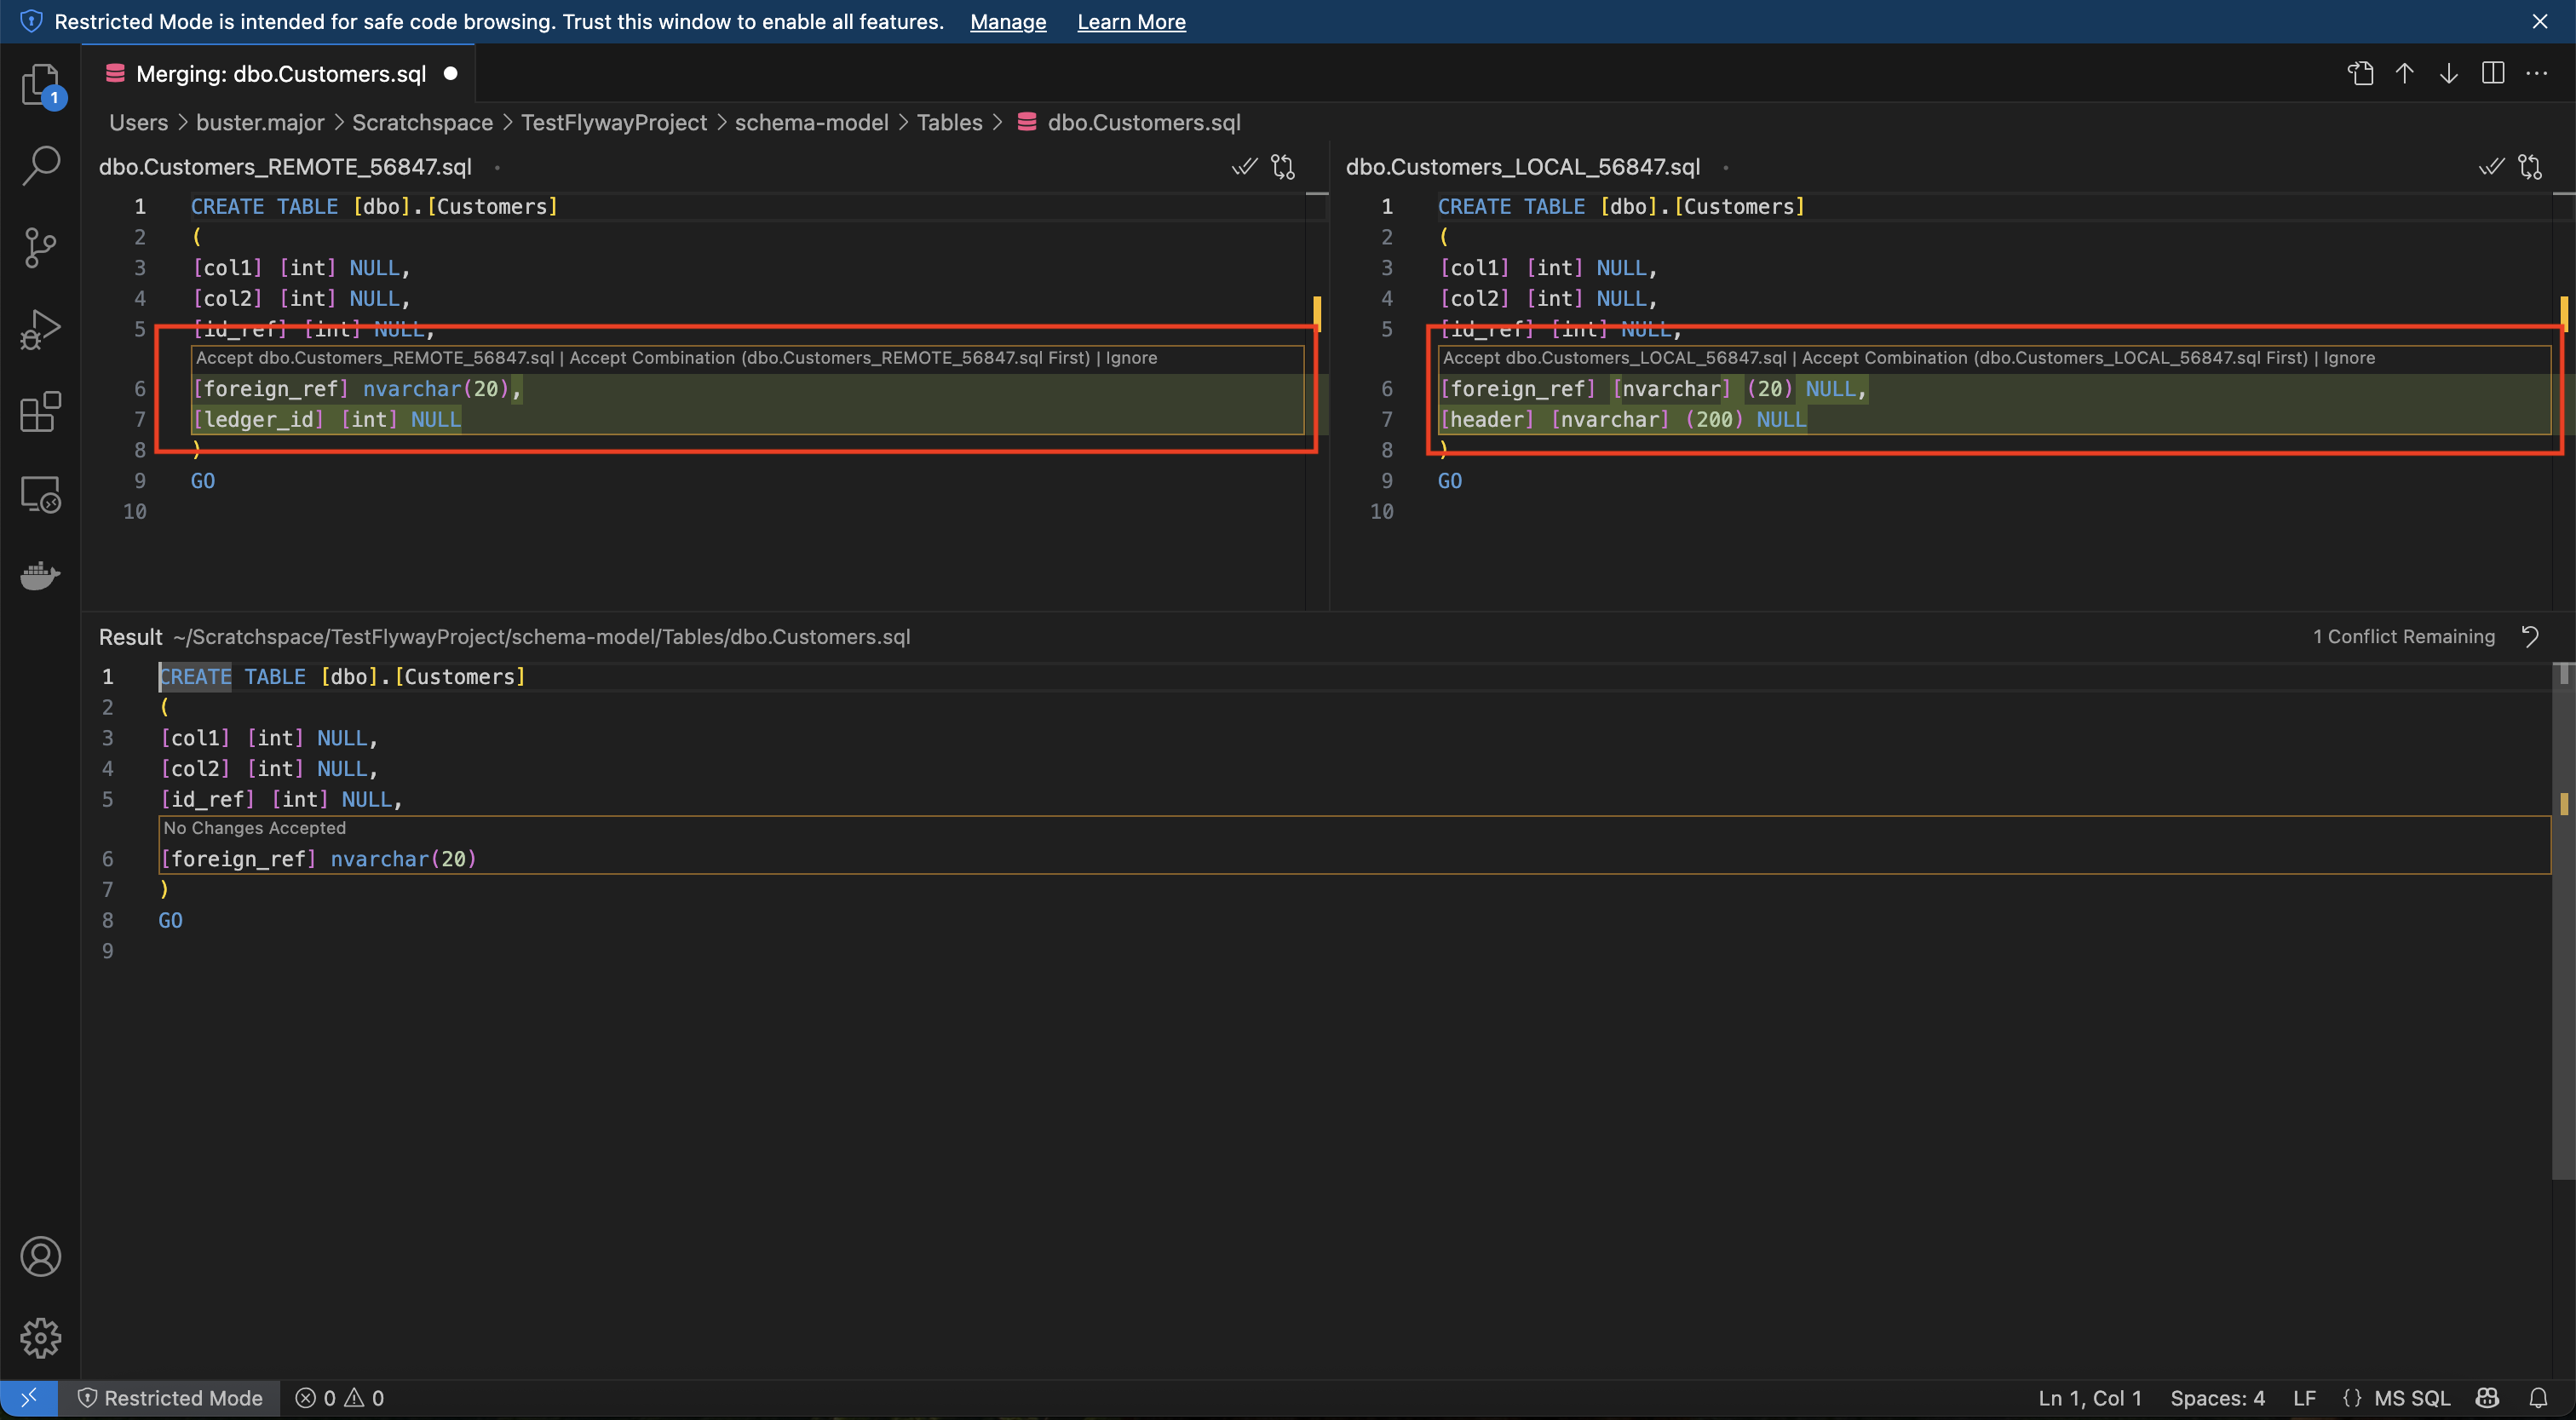
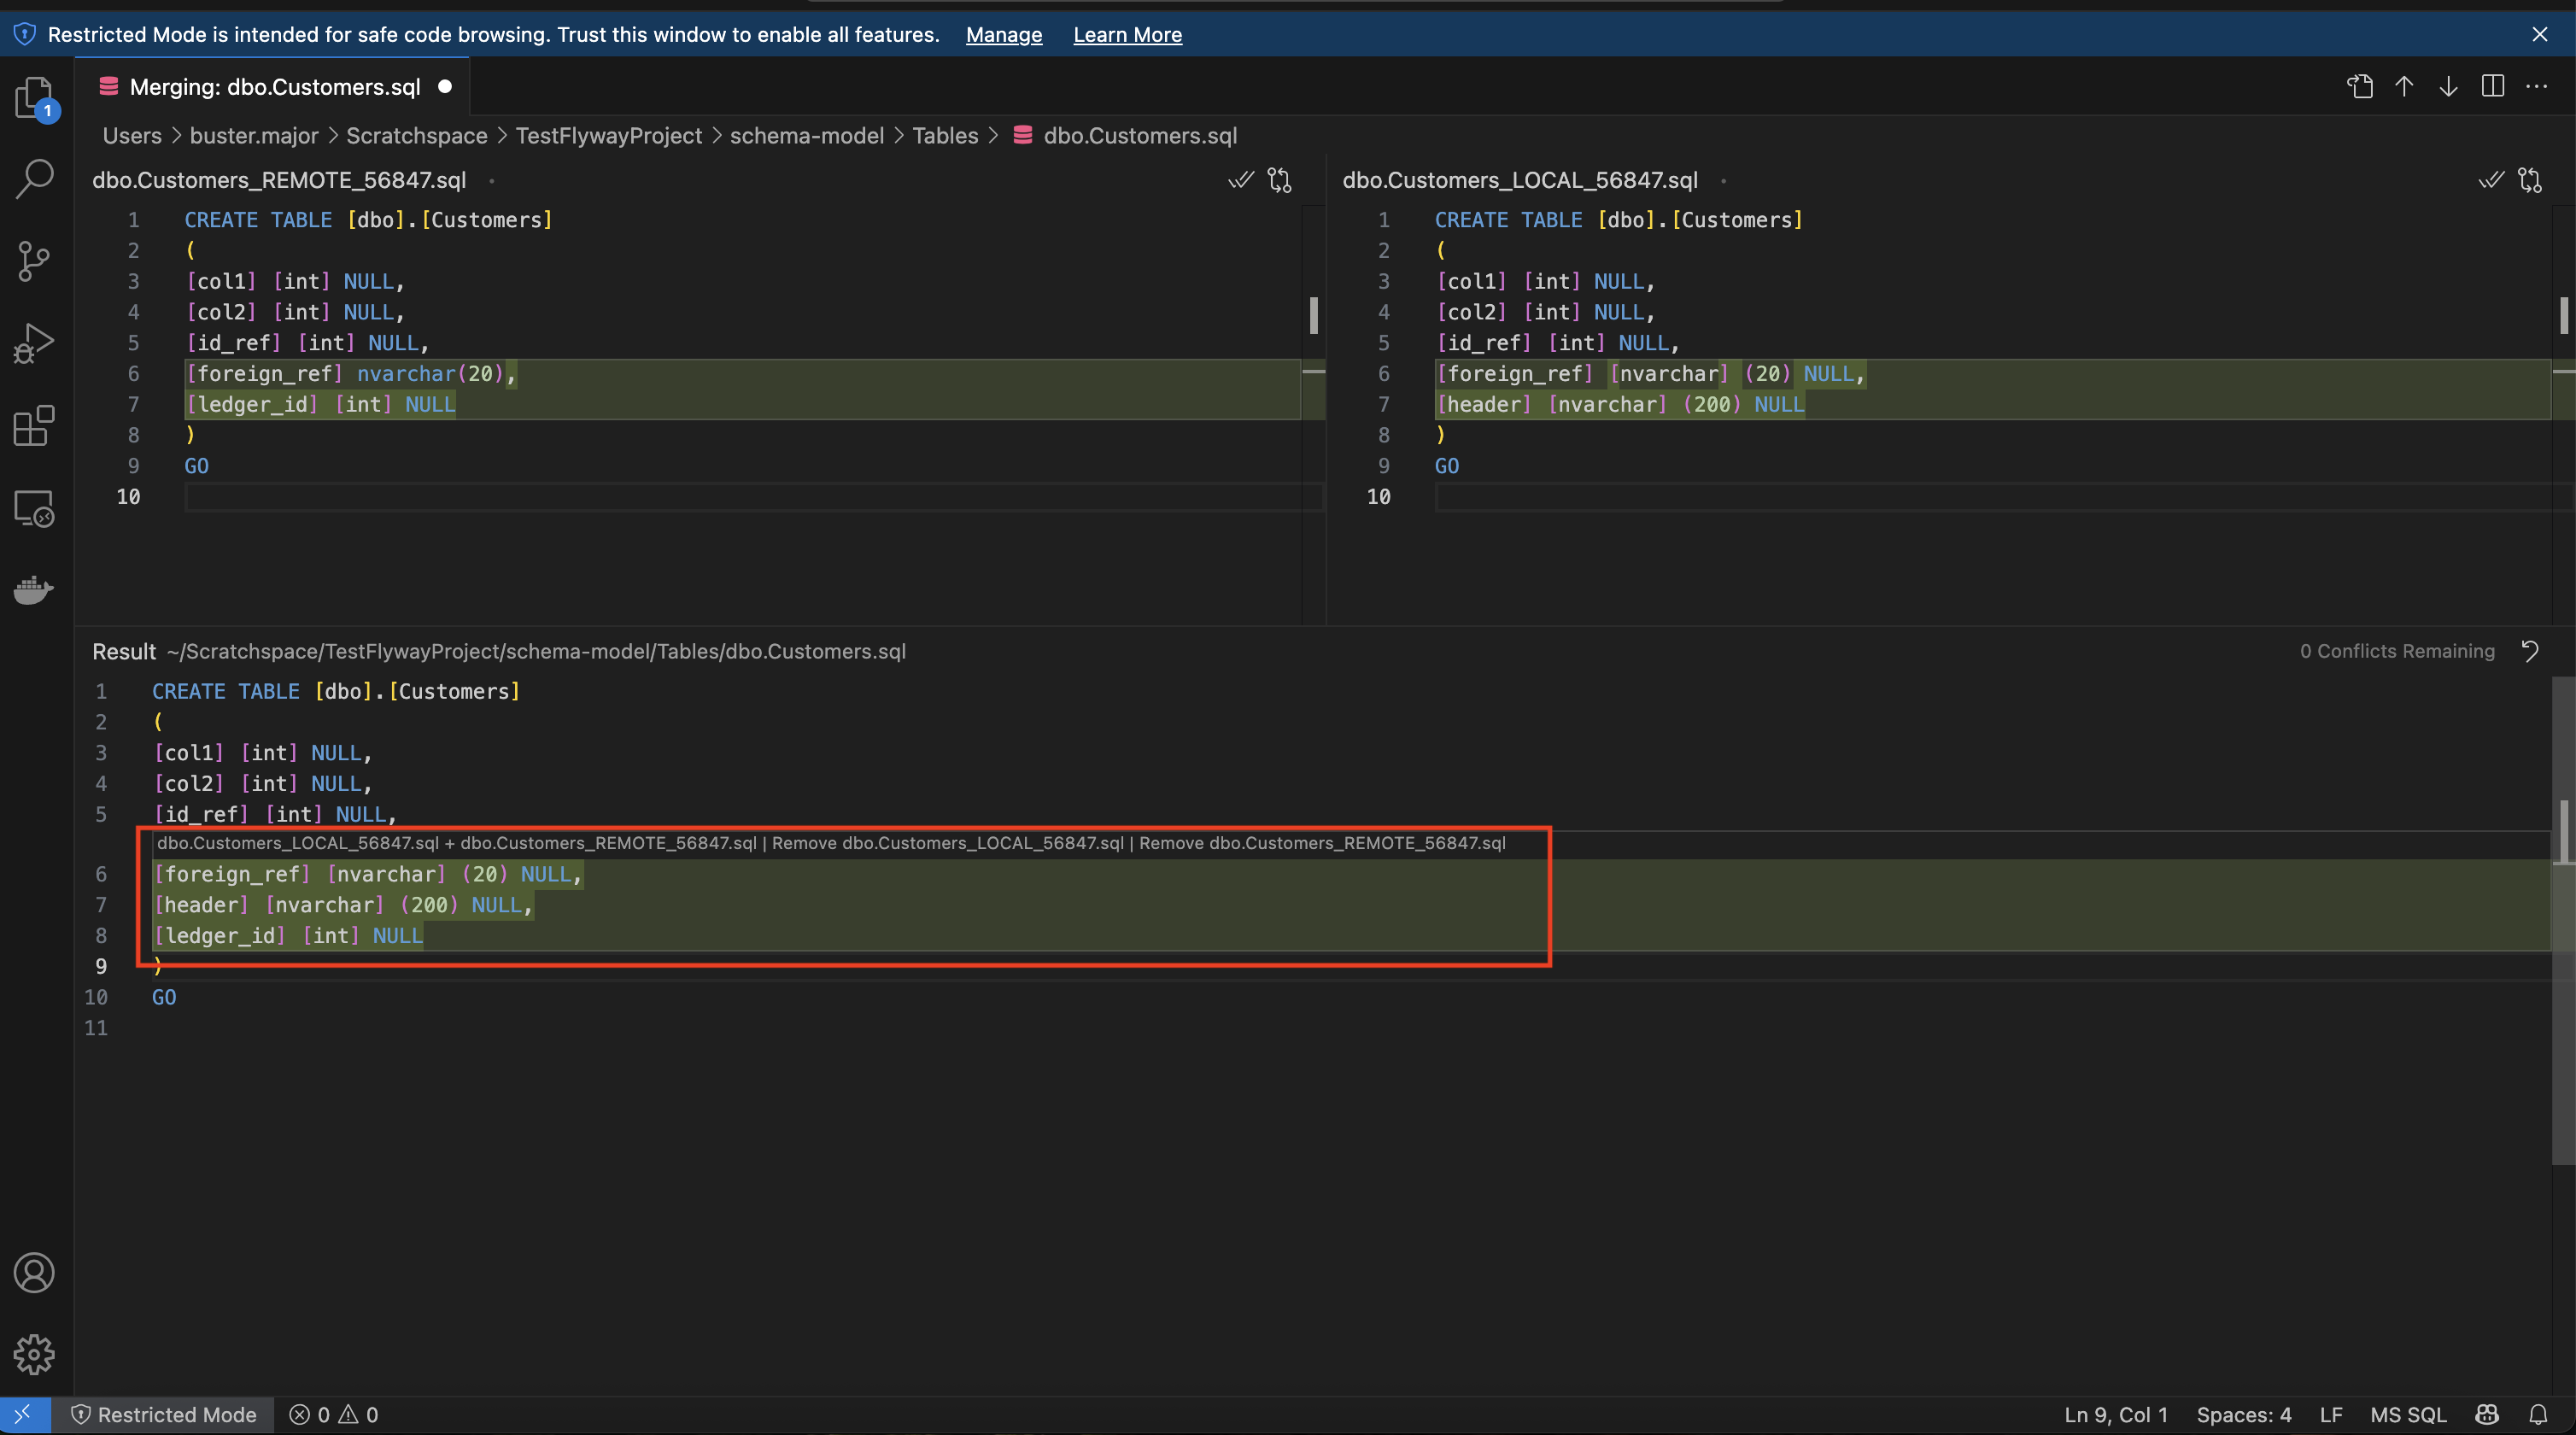
- In this example, we're using VS Code. Your editor should know this file is in a conflicted state and give you options to resolve the conflict. In this case, you "Accept Both Changes." You may also need to edit the file to fix any SQL syntax, as needed. In this case, you would also need to add a comma after the second to the last column to make the syntax correct. You can then Save your file and close this editor.
Note: Flyway Desktop calls the git mergetool command under the hood which can sometimes leave behind unwanted backup files after resolving. You can run the following command to prevent this:git config --global mergetool.keepBackup false
 →
→ 
- Back in Flyway Desktop, the tool denotes no more conflicts detected. Note - You may need to close and re-open the differences view to reflect the latest changes in the script.

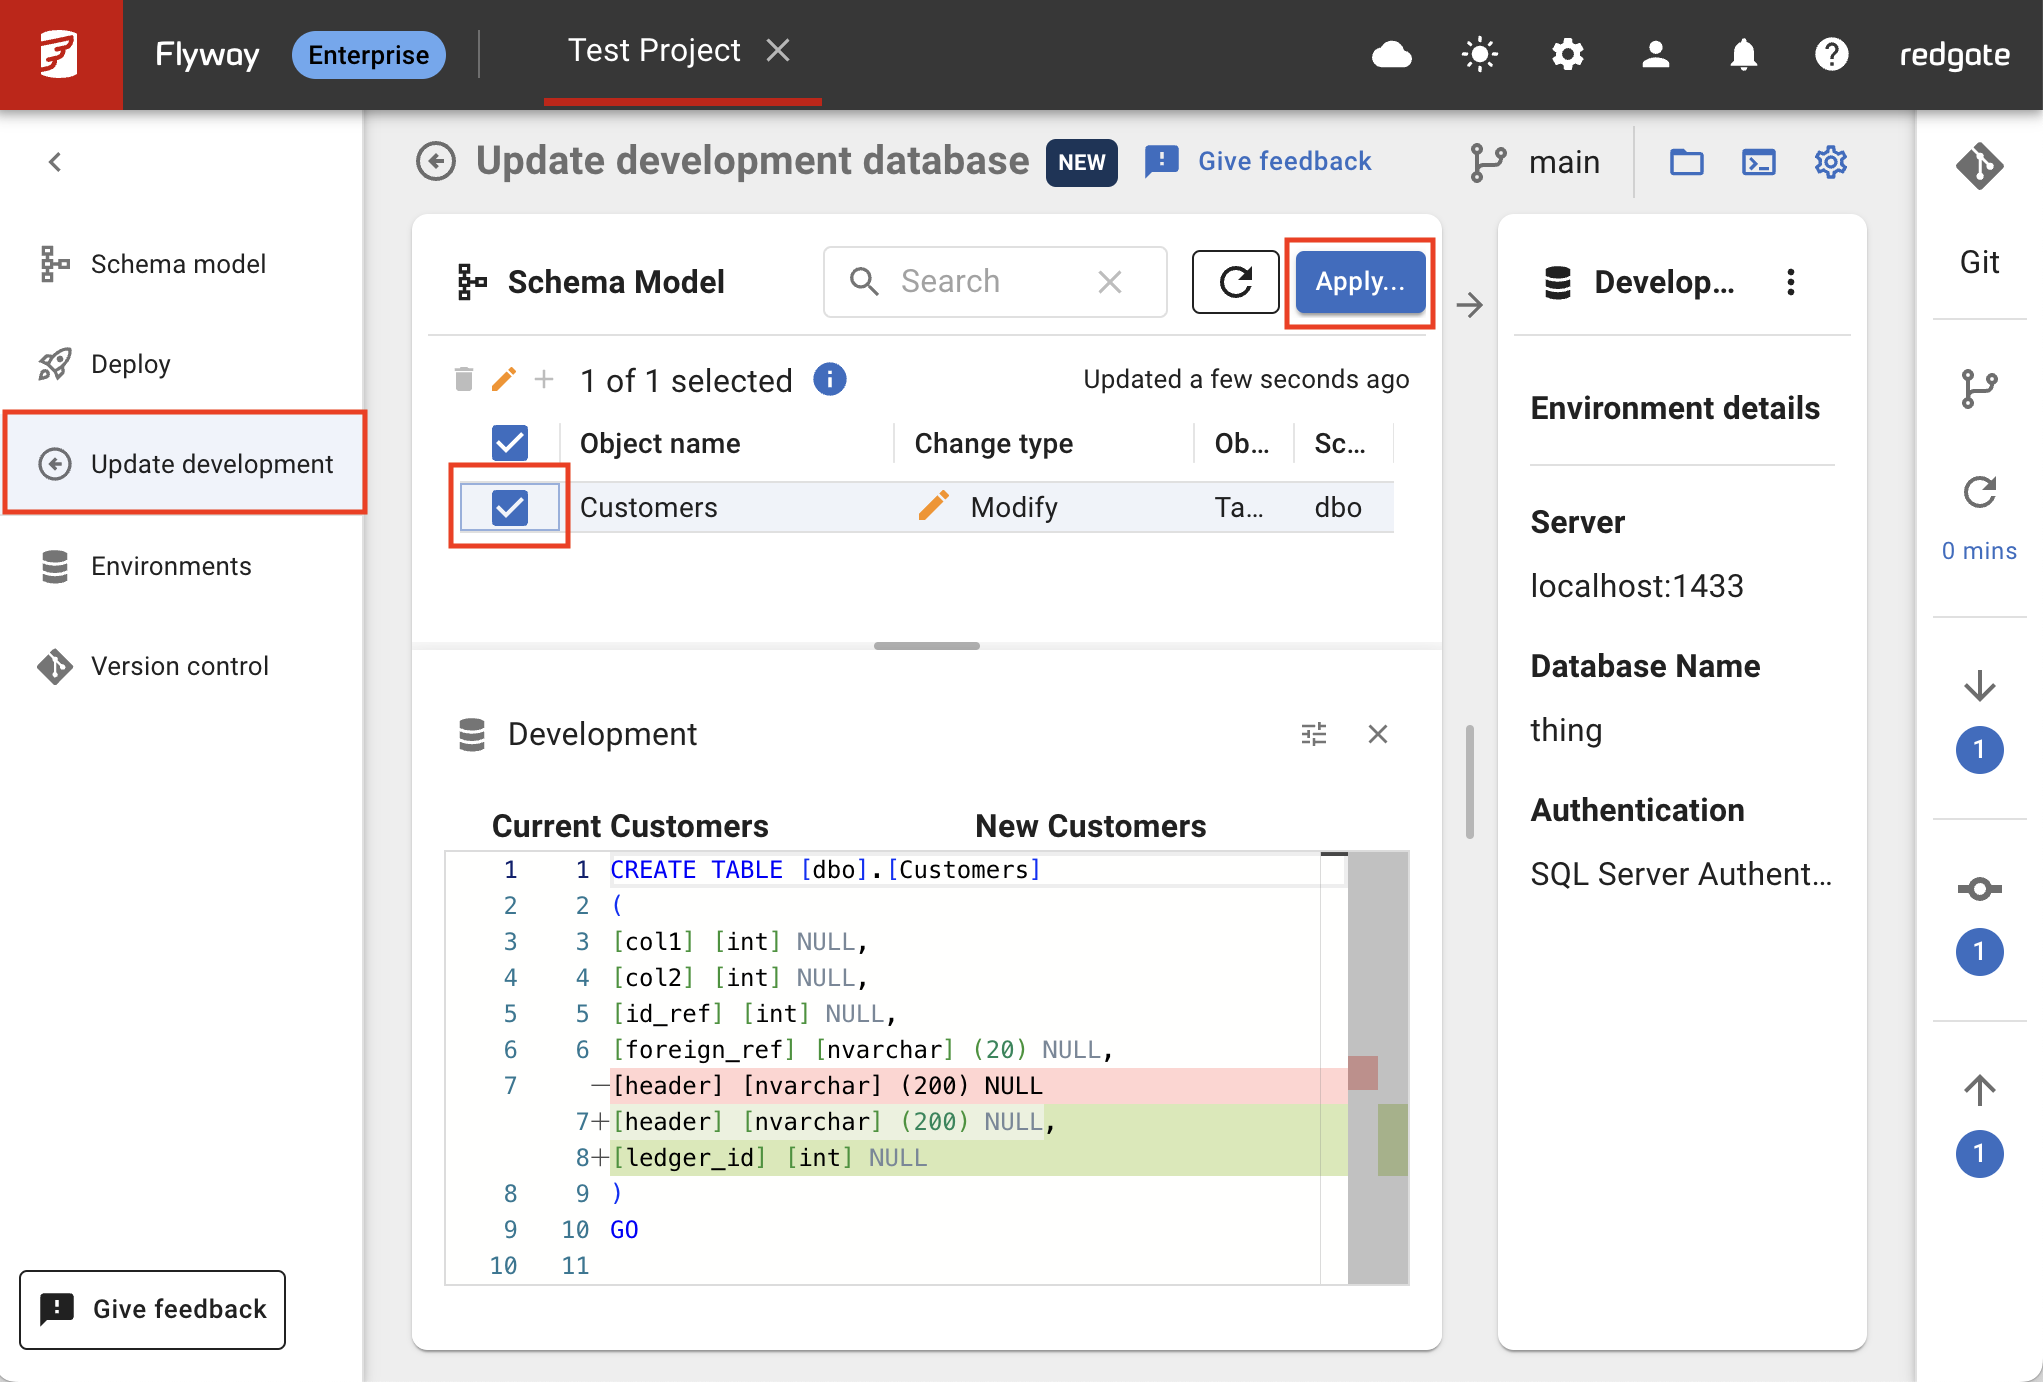
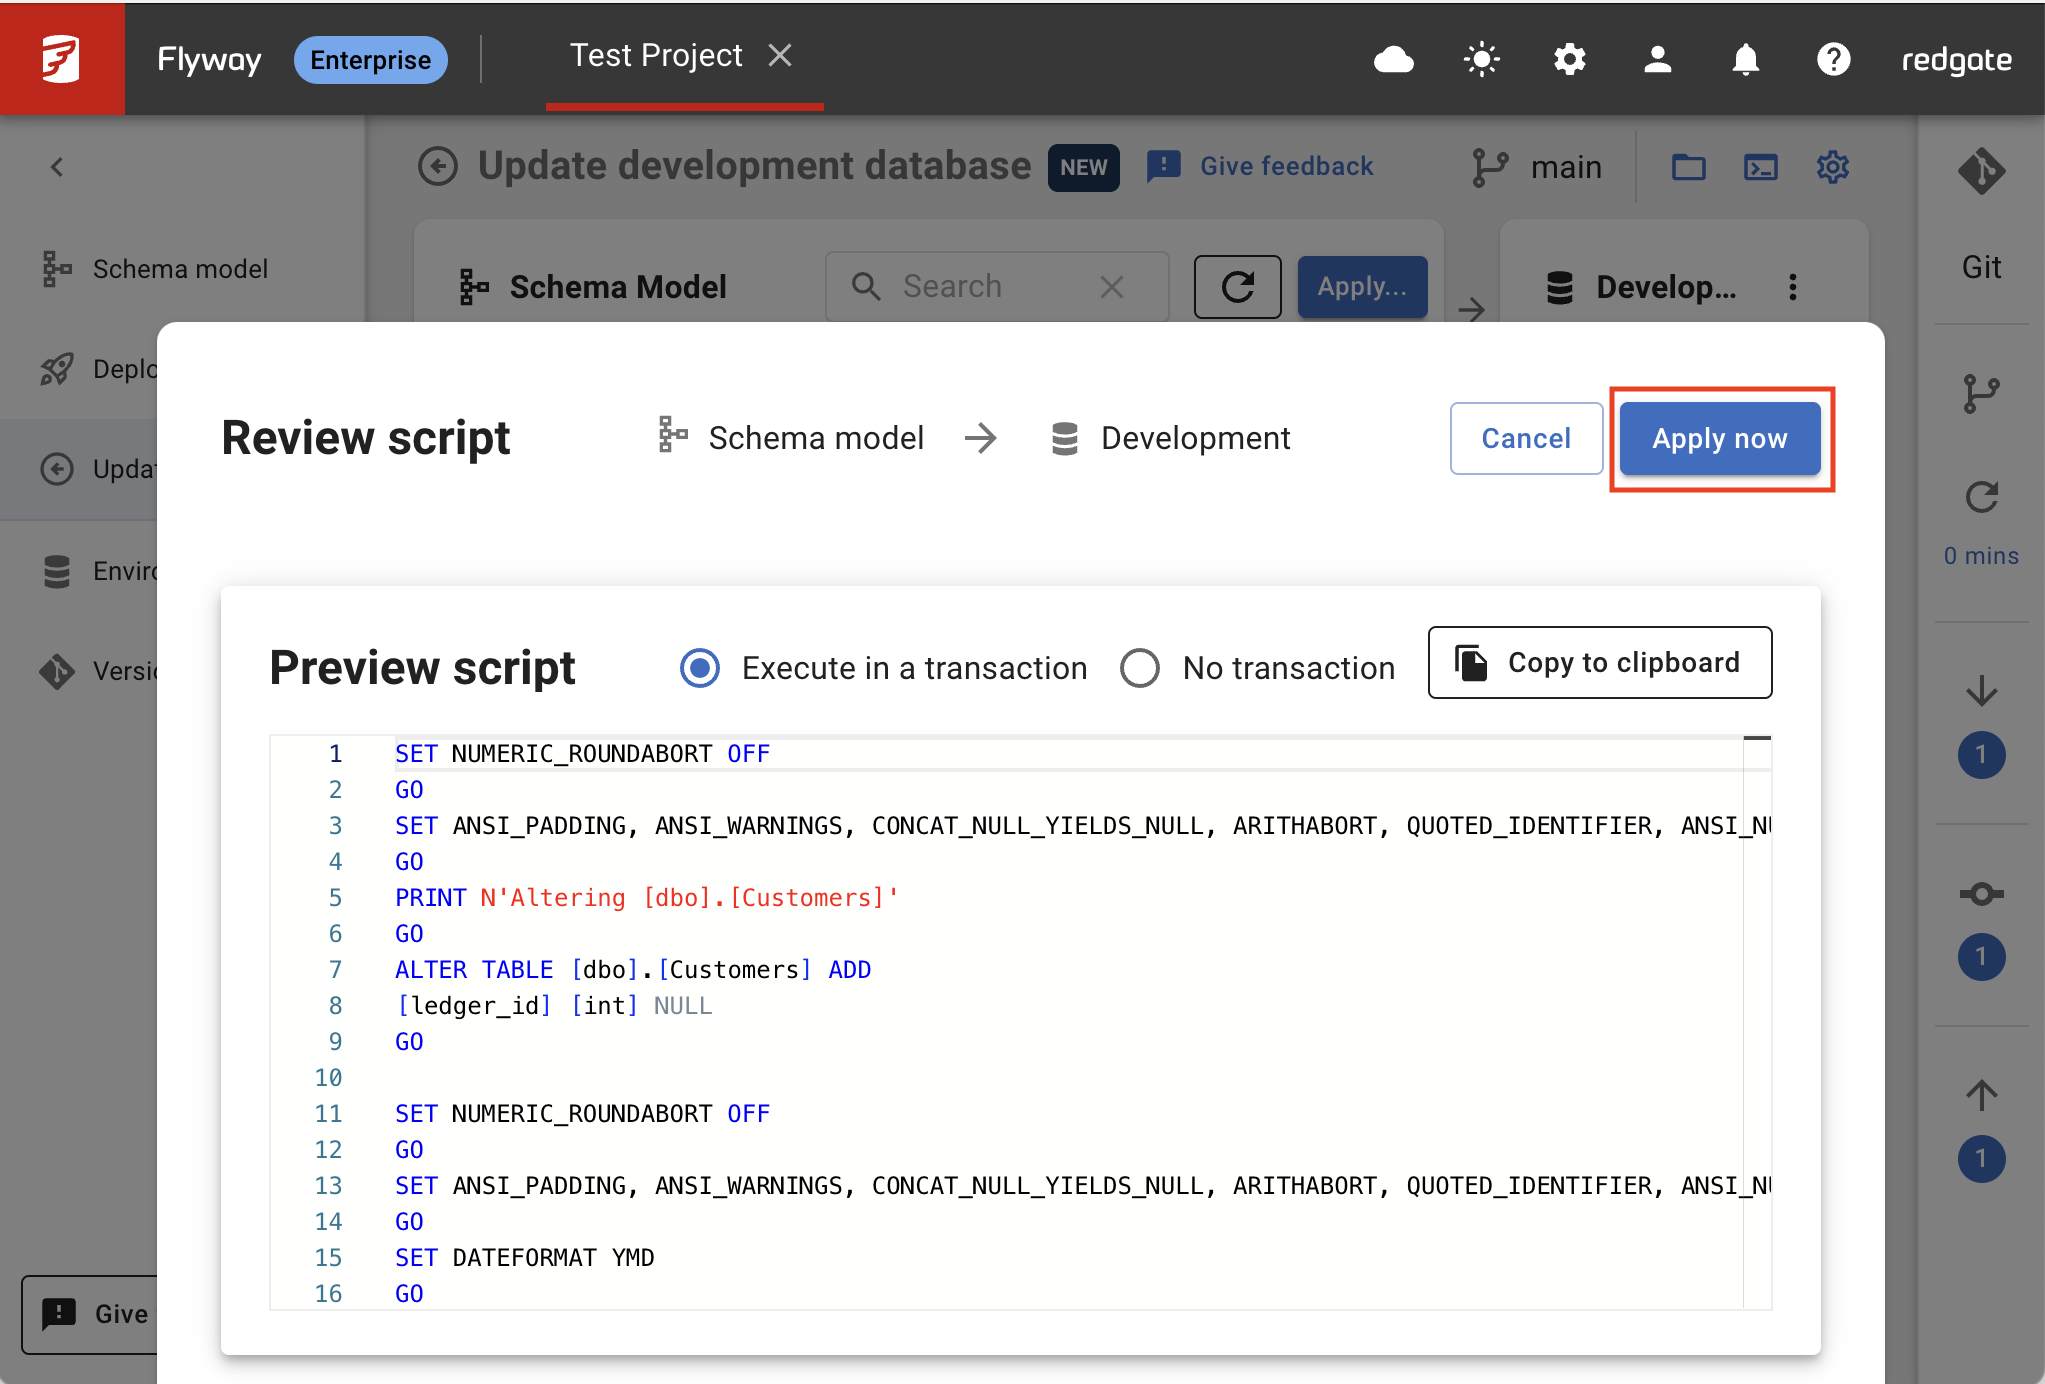
- If you resolved a conflict on an object in the Schema model, you'll want to go to the Update development view and apply these changes to your database. On the Update development view, click Refresh and select the object in the list and click Apply. Click Apply now to confirm you're happy to apply these changes to your development database.
 →
→ 
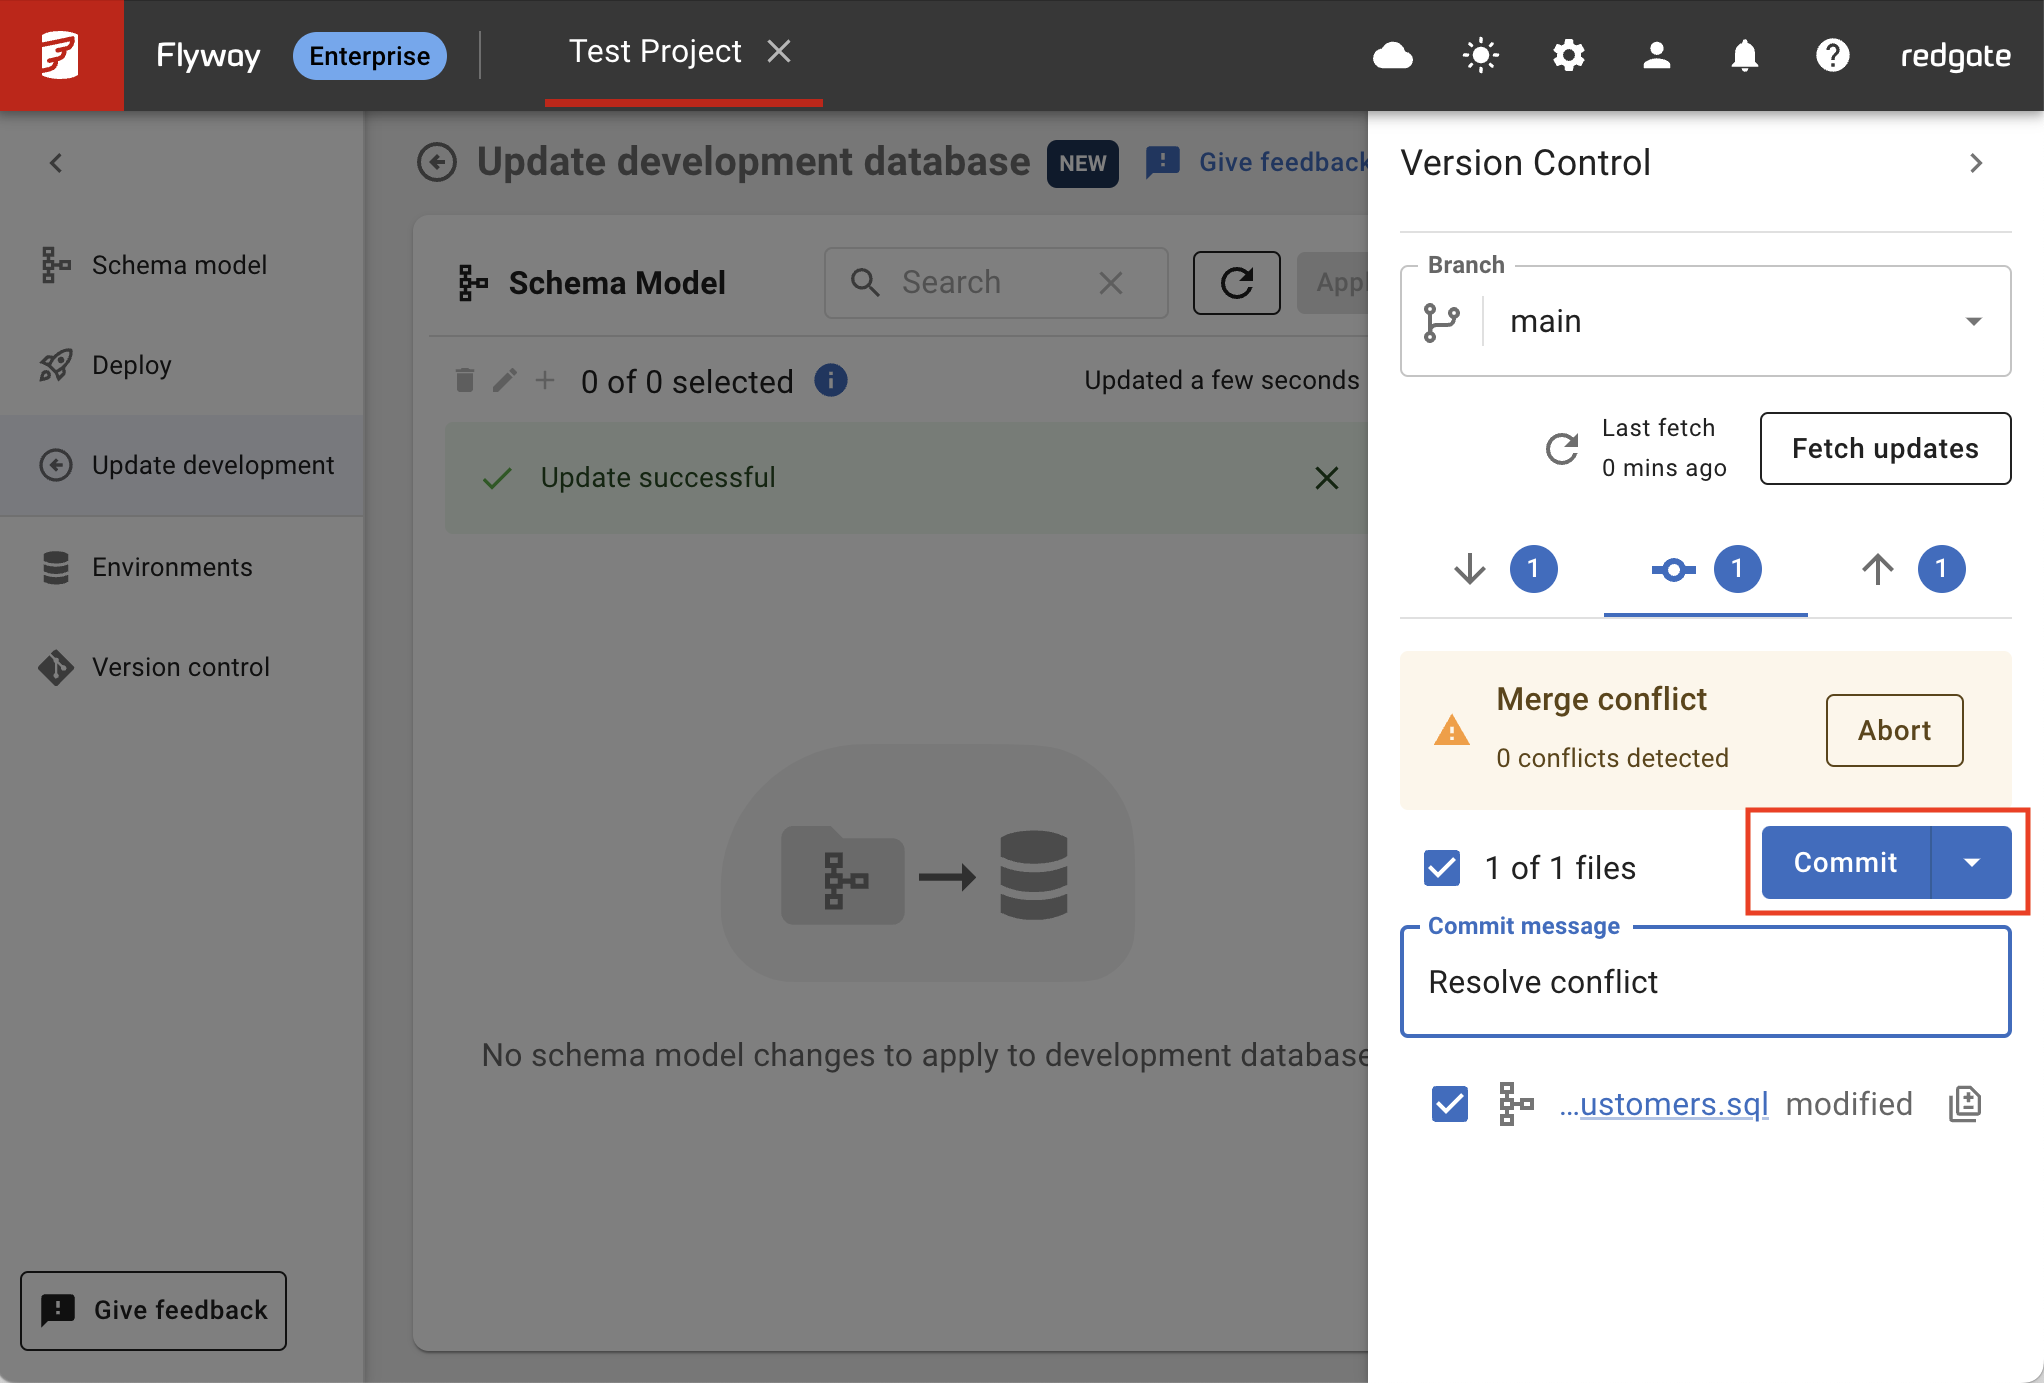
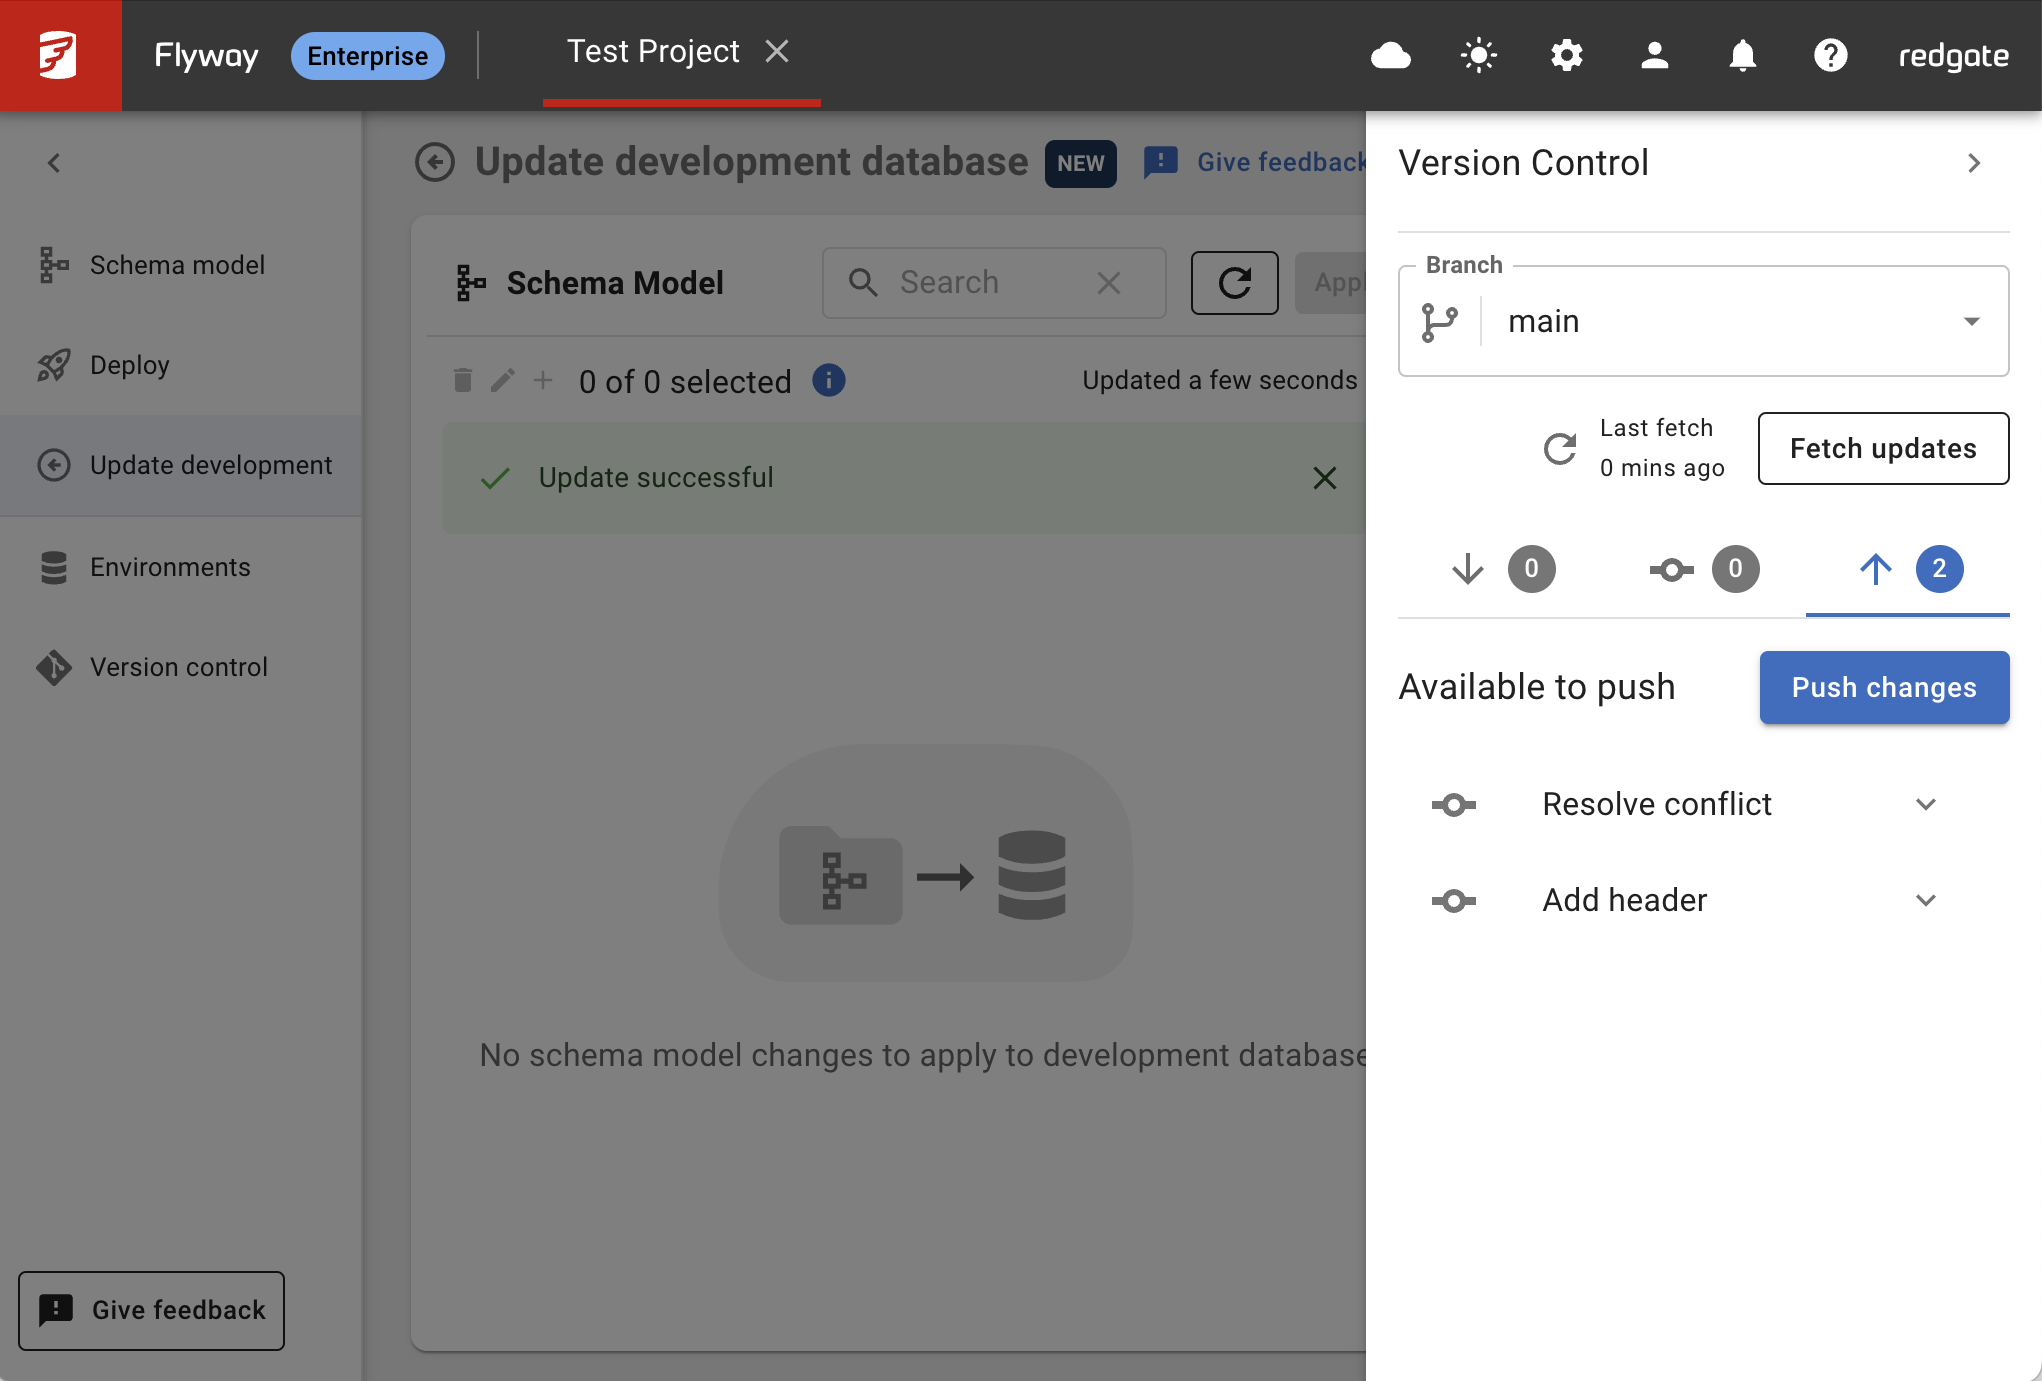
- Click back on the Version Control side panel to commit these changes. Select the files, enter a Commit message, and click Commit. You can now Push your change to the remote repository to share with the rest of your team.
 →
→ 
This documentation contains proprietary information and is protected by copyright law.
Copyright © 2026 Red Gate Software Limited. All rights reserved


