Backing up to Cloud Storage Settings
Published 22 November 2018
Backing up to AWS storage is only available in SQL Backup Pro 9.0 and later. Backup up to custom S3 or Azure hosted storage is only available in SQL Backup Pro 10.0 and later.
Creating and linking a Bucket
In order to upload backups to hosted storage, you need to:
- Create a bucket in your chosen hosted storage.
For each SQL Server you want to upload backups from, link the server to your account. You can do this when creating a backup job, on step 3 of the Back Up wizard (step 4 of the Schedule Backup Jobs wizard). Under Hosted storage, click Link Account. Enter the required fields for your chosen storage type and click Link Account.

Alternatively, you can link to a Hosted Storage Bucket through the Tools menu.
For SQL Backup agents 9.1 or greater, if you are uploading to AWS Hosted Storage and wish to use the local AWS S3 configuration on the machine that is running the SQL Backup Agent, enter * in the AWS Access Key Id and AWS Secret Key.
If you have multiple SQL Server instances, you will need to link each one to an account. This can be the same account, or a different account for each server.
Once your bucket is linked, you can copy backups to the bucket using either the SQL Backup Pro wizards, or a SQL Backup Pro script.
Using the wizards
On step 3 of the Back Up wizard (step 4 of the Schedule Back Up Jobs wizard), select Copy backup to hosted storage.
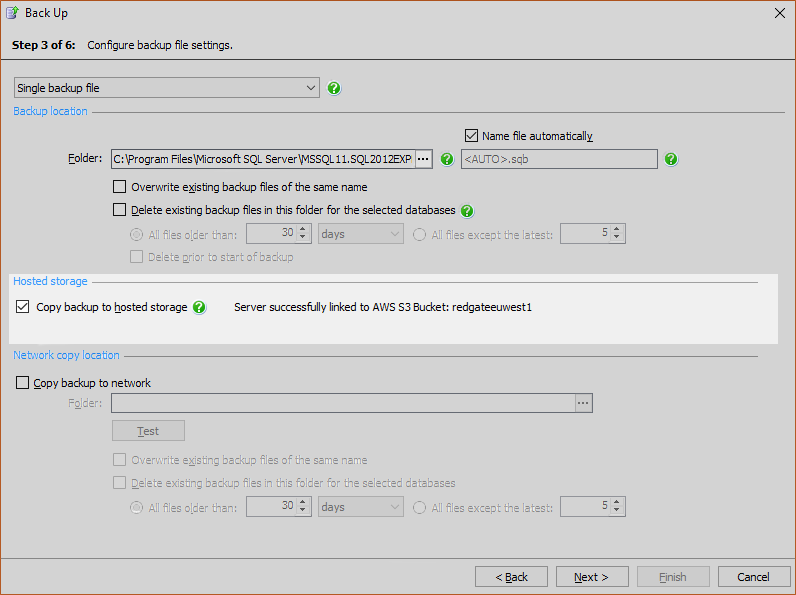
Complete the wizard to create the backup or schedule the job. All other backup options, including copying to a network share, encryption, and compression, are available when backing up to hosted storage.
Once the backup has been written to disk, SQL Backup Pro starts uploading a copy of the backup to hosted storage. See Viewing the progress of uploads to hosted storage below.
Writing a backup script
To copy a backup to hosted storage, add COPYTO_HOSTED to the WITH clause of a backup script, and run it from the command line or extended stored procedure.
For example, using the extended stored procedure:
EXECUTE master..sqlbackup '-SQL "BACKUP DATABASE [pubs] TO DISK = ''C:\Backups\pubs.sqb'' WITH COPYTO_HOSTED " '
Using the command line:
-SQL "BACKUP DATABASE [pubs] TO DISK ='C:\Backups\pubs.sqb' WITH COPYTO_HOSTED
The other backup options in SQL Backup Pro, including COPYTO = <network location>, KEYSIZE = 128|256, and COMPRESSION = 1|2|3|4, can be used in conjunction with COPYTO_HOSTED.
For more details, see The BACKUP command.
Editing an existing job to copy to hosted storage
If you already have backup jobs set up, you can edit them to copy the backups to hosted storage as part of the job.
- In the SQL Backup Pro GUI, open the Jobs tab and double-click the backup job you want to edit. The Edit Backup Job wizard is displayed.
- Go to step 3 and select Copy backup to hosted storage.
- Continue through the wizard and click Finish to save your changes to the job.
Alternatively, edit the job in SQL Server Management Studio, adding WITH COPYTO_HOSTED to the SQL Backup job step.
Backing up multiple files
When backing up to hosted storage, you can both split backups into multiple files and back up multiple databases at the same time.
- If you split a backup into multiple files, all files will be written to disk before SQL Backup Pro starts uploading a copy of the first file.
- If you back up multiple databases at the same time, each backup is written in sequence. SQL Backup Pro will start uploading the first backup as soon as it has been written to disk.
For more information on backing up multiple databases, see Backing up all databases on an instance.
Viewing the progress of uploads to hosted storage
Once the backup has been written to the disk location you specified, SQL Backup Pro starts uploading a copy of the backup to your Hosted Storage account.
You can view the status of the upload from the In Progress tab:
- Each file is listed as
 Pending when it is added to the upload queue.
 - Each file is listed as
 Uploading during upload attempts.
The backup is listed in the Activity History as ![]() Successful (awaiting copy to hosted storage) while the upload is in progress. Right-click the row and select Properties to view the status of each file. Once the upload has completed, the backup is listed as
Successful (awaiting copy to hosted storage) while the upload is in progress. Right-click the row and select Properties to view the status of each file. Once the upload has completed, the backup is listed as ![]() Successful.
Successful.
To cancel an upload that is in progress, open the In Progress tab, right-click the row and select Cancel. This will not affect the backup written to local disk. It is not possible to restart an upload after it has been cancelled.
Retrying after a failed upload
If an upload attempt fails, for example because the network connection was interrupted, SQL Backup Pro will attempt to upload the file again at regular intervals. In between attempts, files will be listed in the In Progress tab as ![]() Pending. For information about the cause of the failure, right-click the row and select Show Log, or in the Activity History, right-click and select Properties.
Pending. For information about the cause of the failure, right-click the row and select Show Log, or in the Activity History, right-click and select Properties.
SQL Backup Pro will continue retrying the upload at increasing intervals for 24 hours.
- Attempt 1: immediately
- Attempt 2: 2 minutes after attempt 1 failed
- Attempt 3: 4 minutes after attempt 2 failed
- Attempt 4: 6 minutes after attempt 3 failed
- Attempt 5: 8 minutes after attempt 4 failed
- All subsequent attempts: 10 minutes after the preceding attempt failed
To prevent any further upload attempts, open the In Progress tab, right-click the upload and select Cancel. This will not affect the backup written to local disk.
If the backup fails to upload after 24 hours, or the upload is cancelled, the backup will display in the Activity History as ![]() Successful (with warnings). Right-click and select Properties to see details of the problem.
Successful (with warnings). Right-click and select Properties to see details of the problem.
To try uploading again, take a new backup of the database and select Copy backup to hosted storage. Alternatively, use SQBHostedStorageClient.exe to upload the backup manually. For more information, see SQBHostedStorageClient.exe.
For more about the upload schedule and changing the behavior of it, see The In Progress tab.
Managing your backups in hosted storage
You can manage your backups using the retention policy in your hosted storage.
Restoring a backup from hosted storage
To restore a database from a backup in hosted storage:
- Download the backup file you want to restore from your hosted storage.
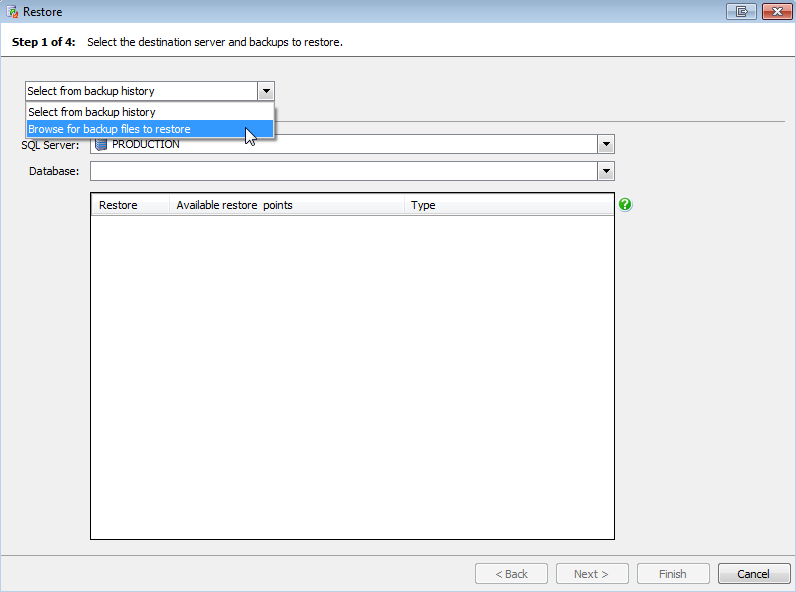
In SQL Backup Pro, open the Restore wizard. On step 1, from the drop-down list, select Browse for backup files to restore.
- Click Add Files and select the backup file you downloaded.
- Continue through the wizard to restore the database from the backup file.
This documentation contains proprietary information and is protected by copyright law.
Copyright © 2026 Red Gate Software Limited. All rights reserved


