Working with existing Flyway configurations
Published 07 December 2019
Deployment Suite for Oracle has been replaced by Redgate Deploy - Oracle. This page is therefore no longer being updated. For the latest documentation, please click here.
- If you’re using an existing Flyway configuration file (flyway.conf), you will need to make sure the following are set:
- Update the following to specify your development database details:
- flyway.url=jdbc:oracle:thin:@//<host>:<port>/<service>
- flyway.user=<username>
- flyway.password=<password>
- Add the following extra parameters for the Shadow Database:
- redgate.shadowUrl=jdbc:oracle:thin:@//<host>:<port>/<service>
- redgate.shadowUser=<username>
- redgate.shadowPassword=<password>
- Update the following to specify your development database details:
Warning: Passwords are in plain text. If you are storing passwords, make sure these are just for a Proof of Concept and be careful. It's better to not specify the username and password and then you will be prompted for them by Redgate Change Control and the password will be encrypted.
- Set flyway.locations to the relative path from this flyway.conf to the folder containing your migration scripts. For example, if your folder contains flyway.conf at the root and also has a sql folder that contains your migration scripts, then you would set flyway.locations=filesystem:./sql
- Set flyway.schemas to the schemas you want to track changes against. This is a comma-separated list. The first schema you specify will be used to store the redgate_schema_history table, which tracks the migrations that have been applied to the database. Note that the schema names here are case-sensitive.
- Set flyway.locations to the relative path from this flyway.conf to the folder containing your migration scripts. For example, if your folder contains flyway.conf at the root and also has a sql folder that contains your migration scripts, then you would set flyway.locations=filesystem:./sql
Note:
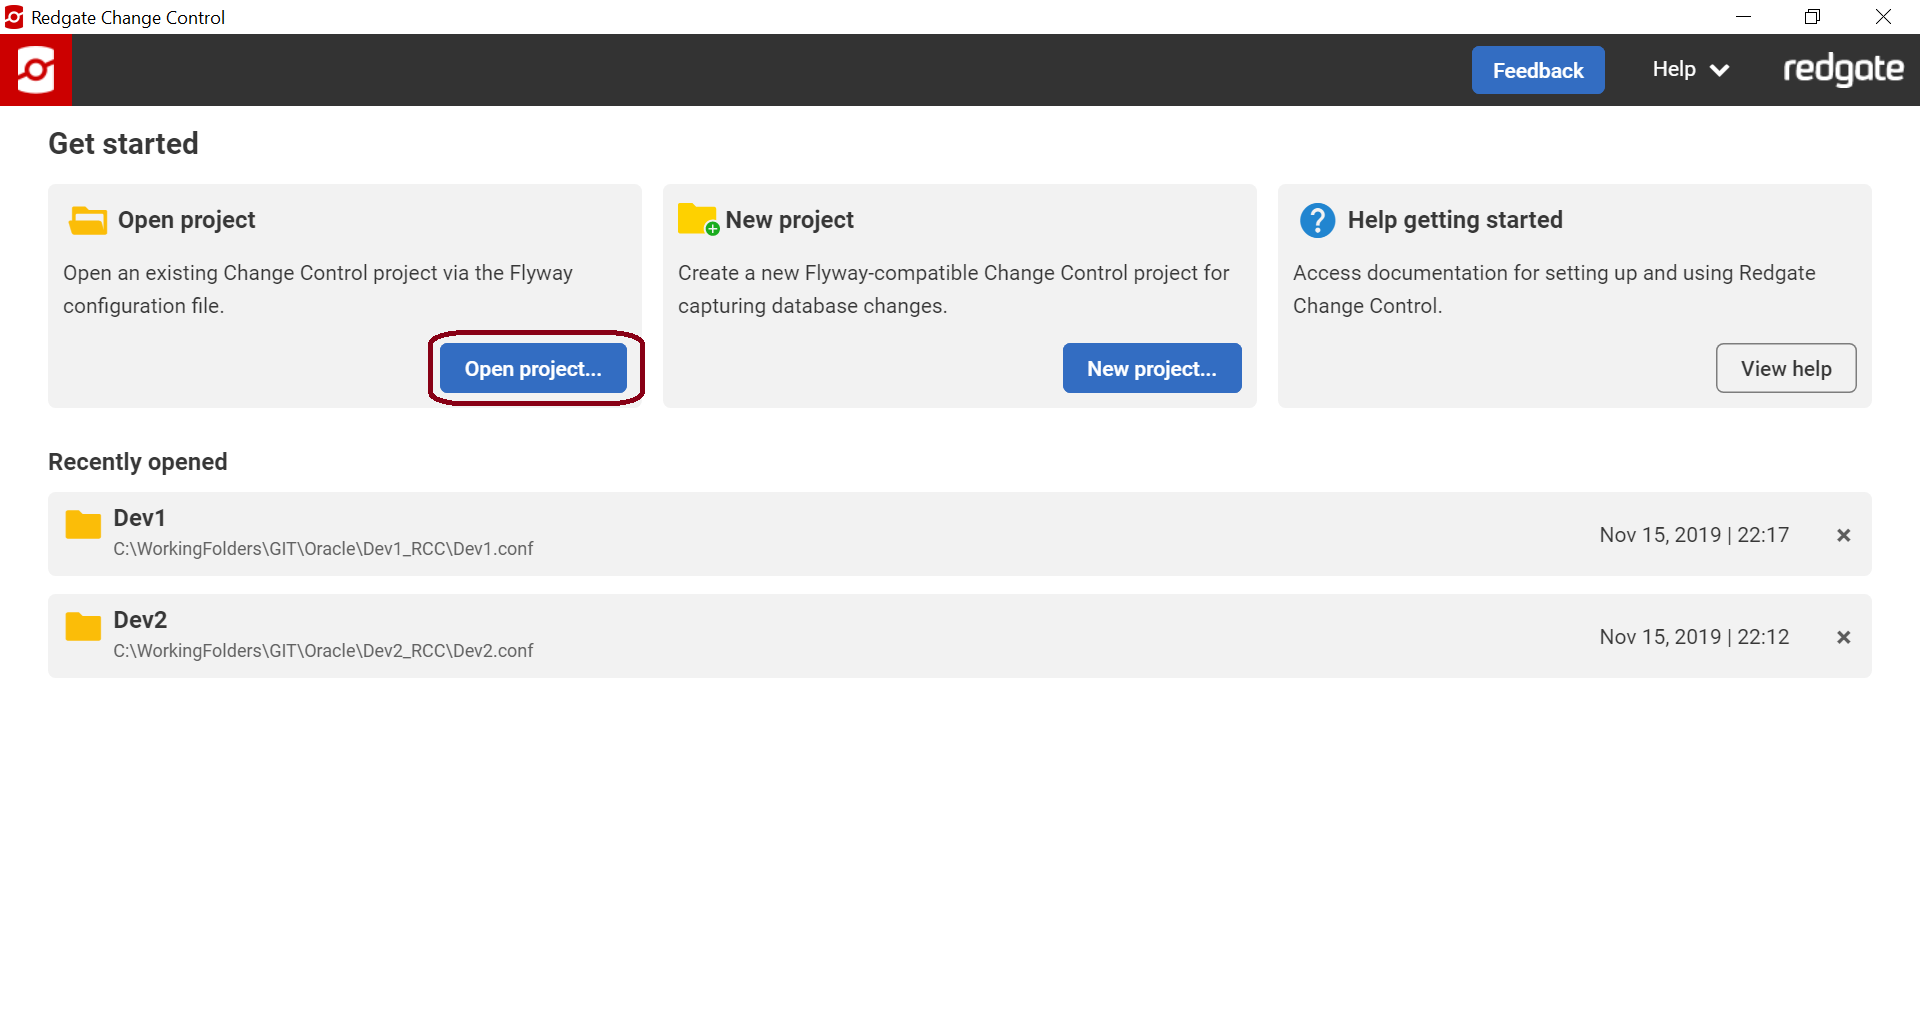
- Launch Redgate Change Control from the start menu and click Open project...
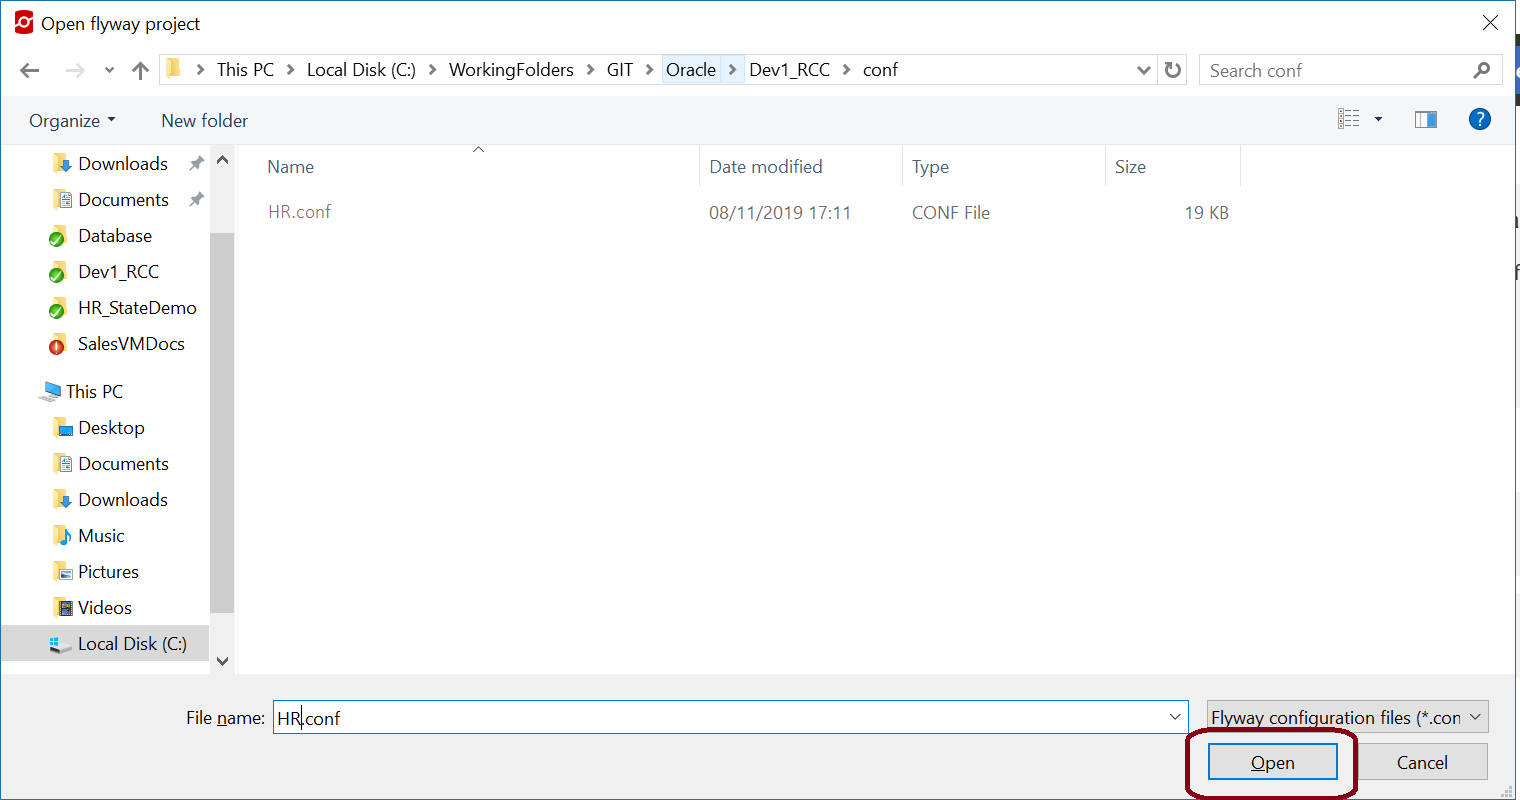
- Navigate to your existing Flyway configuration and click Open
- If you did not set up the extra parameters required in step 1, then you will get the following error:
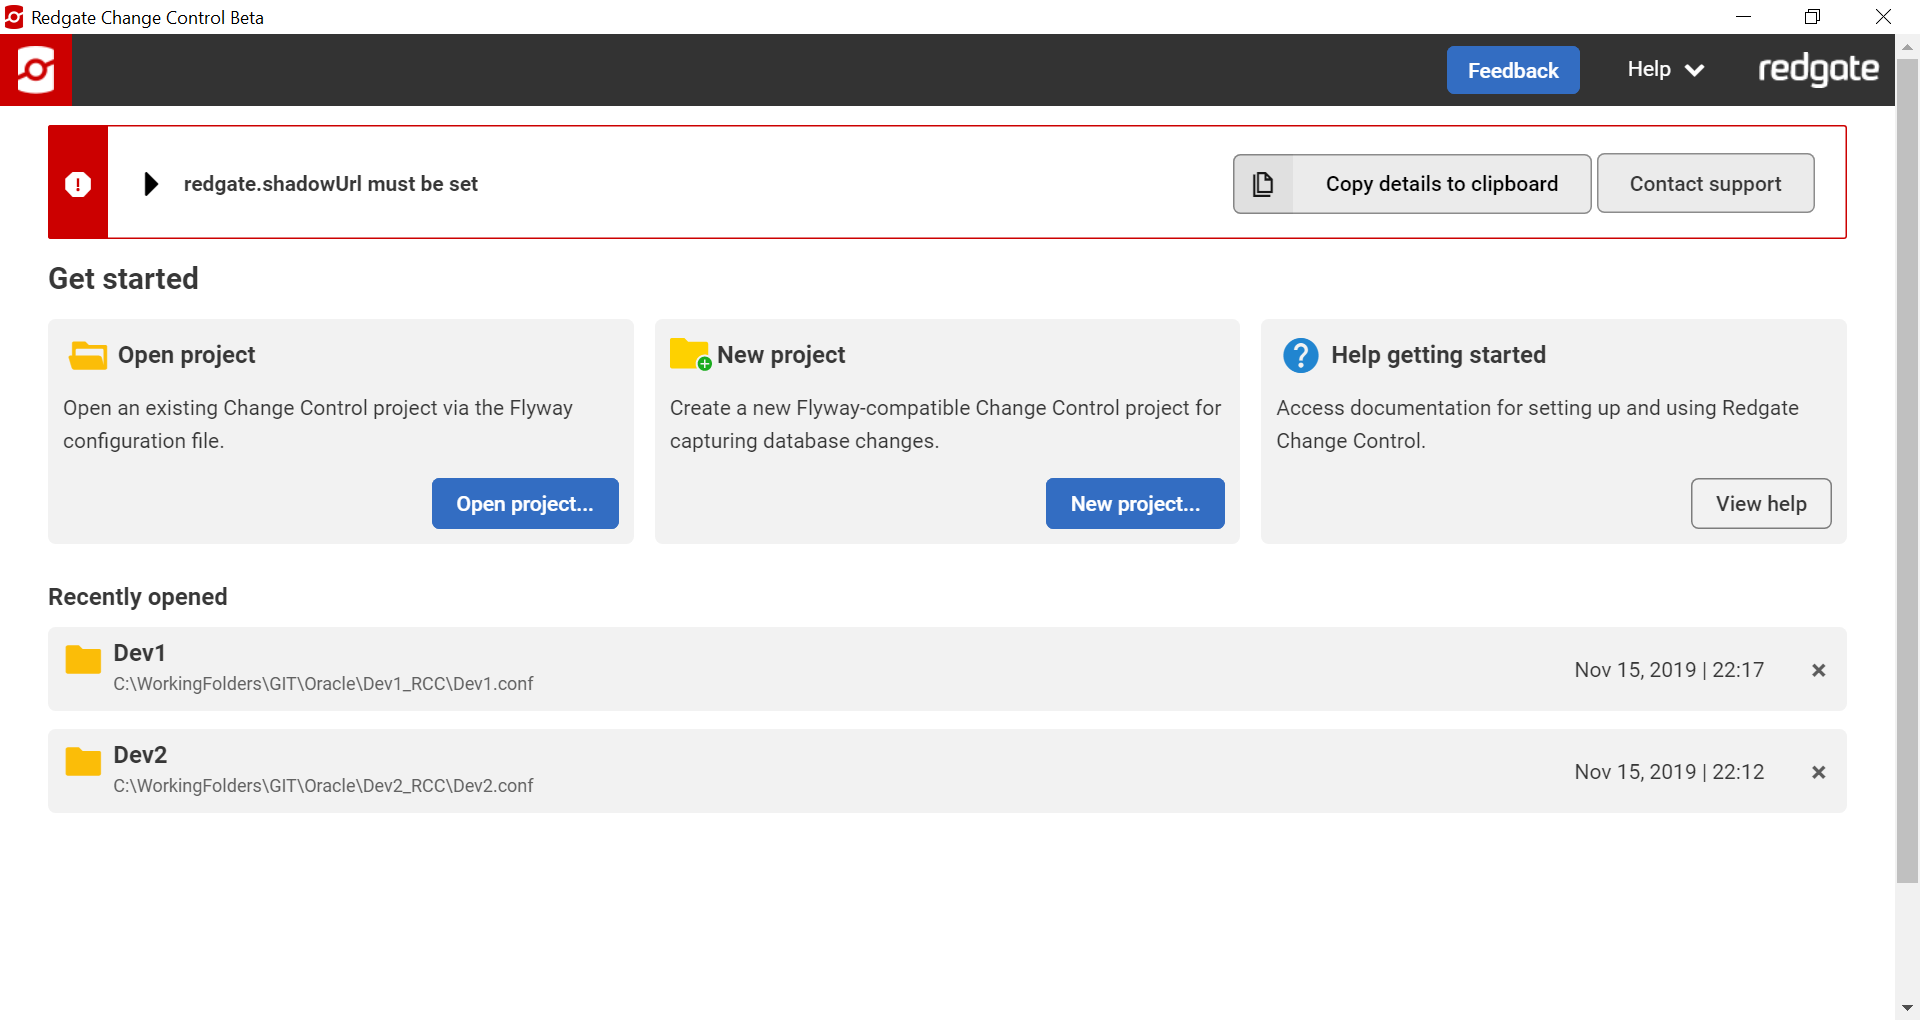
Add the parameter specified to your Flyway configuration file and then Open project... again. If you have any issues, use the Contact support button
- If you did not set up the extra parameters required in step 1, then you will get the following error:
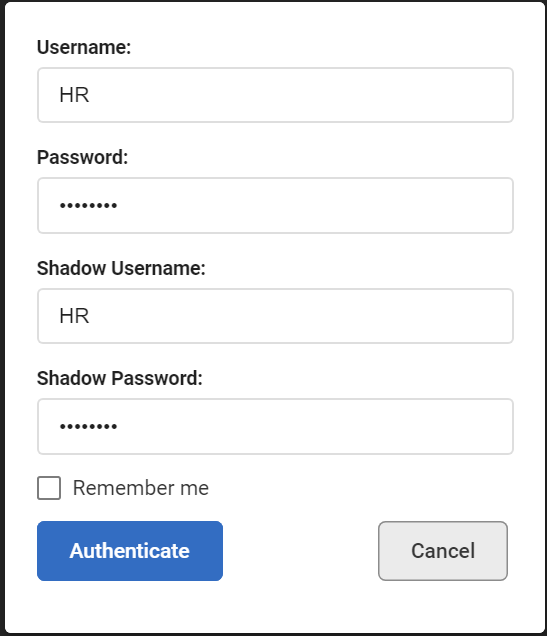
- If you did not specify your username and password for your development and/or shadow database, you will be prompted for credentials. Complete the credentials and click Authenticate. If you click Remember me, the password will be encrypted and stored so you won't be prompted again.
- If your development database is baselined, then you're all set to go. You can start making changes to your development database. When ready, click on Generate migrations to review your changes and select which ones to generate a migration script for. If your development database is not baselined, then you will see a recommendation to set up a baseline before continuing. Learn more about baselining.
This documentation contains proprietary information and is protected by copyright law.
Copyright © 2026 Red Gate Software Limited. All rights reserved


