Azure Flexible Server using Managed Identity credentials
Published 14 November 2024
We recommend using Managed Identity credentials to monitor Azure Flexible Servers if the Base Monitor you're using is hosted on an Azure virtual machine.
Use this page if all of these apply:
- You are going to monitor an Azure Flexible Server and
- The Base Monitor you are going to add that server to is hosted on an Azure virtual machine and
- You do not need to attach additional user-assigned managed identities to your Base Monitor virtual machine.
(If these criteria do not apply, we recommend using service principal credentials instead).
Setting up your permissions in Azure
In order to use managed identity credentials, you will need to enable the system assigned managed identity on your Azure VM if you have not already, and then give the virtual machine the "Monitoring Reader" role on your Azure Flexible Server instance.
The following instructions show how to do that, via both the Azure CLI or the Azure Portal depending on your preference.
Redgate Monitor currently only supports system-assigned managed identity for Azure Flexible Servers. We recommend using service principal credentials if your virtual machine is using user-assigned managed identities.
Steps
Assign a system identity for the Base Monitor host
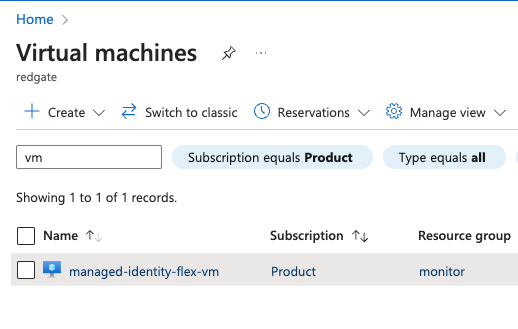
- In the list of virtual machines, find the machine you intend to use as the Base Monitor for your Azure Flexible Server.
- Under the "Identity" sub-section of the "Security" section of your virtual machine, set "Status" to "On" for the system assigned managed identity as below:
- In the list of virtual machines, find the machine you intend to use as the Base Monitor for your Azure Flexible Server.
Assign the Monitoring Reader role
Option 1: Assign the role for an entire resource group
If you wish to Monitor a number of instances within a resource group or subscription using the same virtual machine, you can add the Monitoring Reader role assignment for that resource group or subscription by pressing the "Azure role assignments button" on this page, and then clicking "Add role assignment", selecting "Resource group" or "Subscription" as the scope and "Monitoring Reader" as the role.
You should now be able to set up your permissions in Redgate Monitor.Option 2: Assign the role for a single, specific Flexible Server
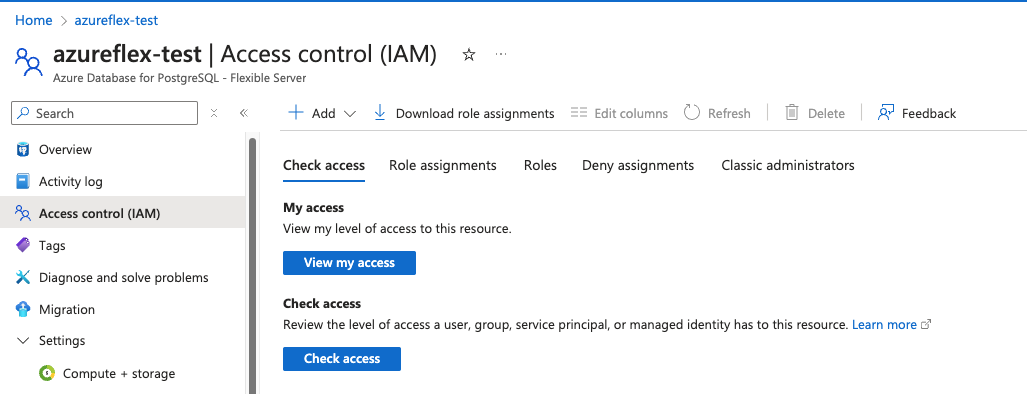
If you wish to narrow your permission scope to a singular Flexible Server instance, then you must find the server you wish to monitor by visiting the list of Azure Flexible Servers and choosing the relevant instance:- Select the "Access control (IAM)" sub section on the overview page for the instance:
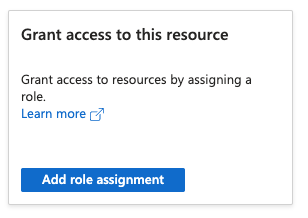
- On the same page, click "Add role assignment" under "Grant access to this resource":
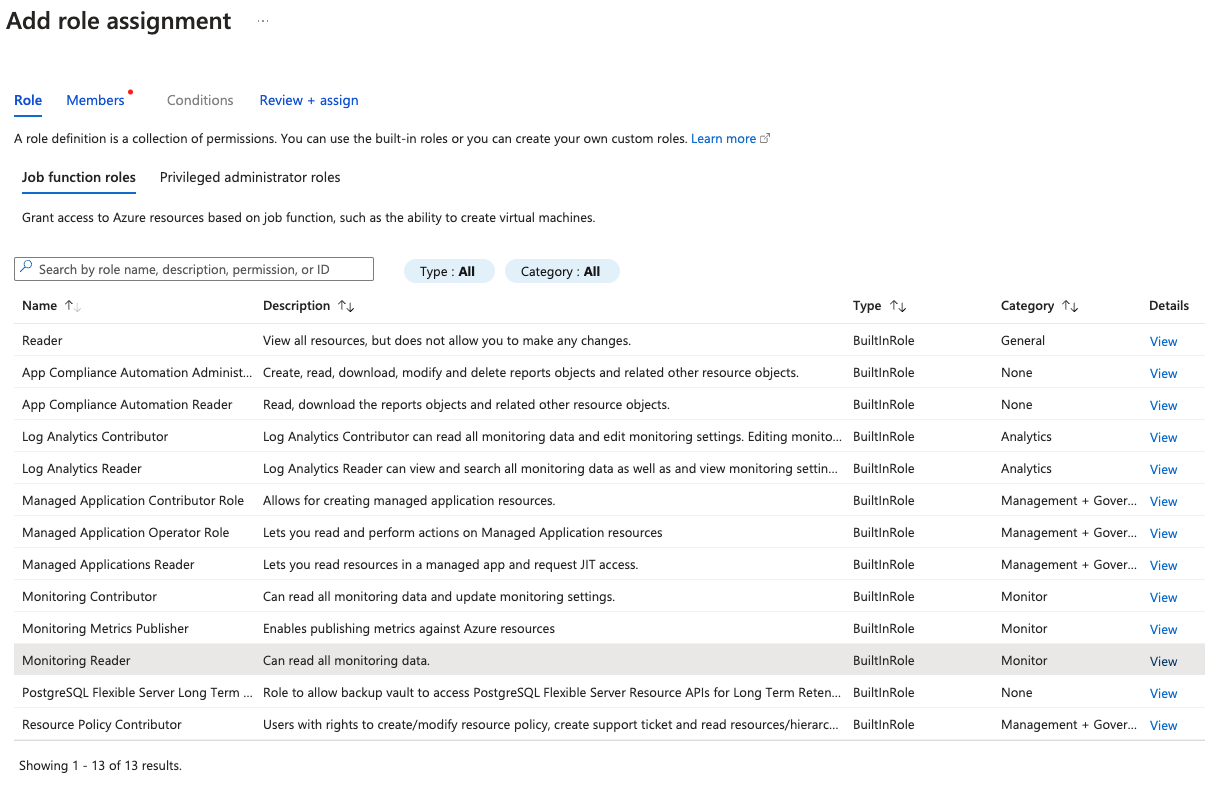
- In the "Role" tab of the "Add role assignment" page, first click the "Monitoring Reader" role. This will allow Monitor to access the necessary metrics via the Azure API:
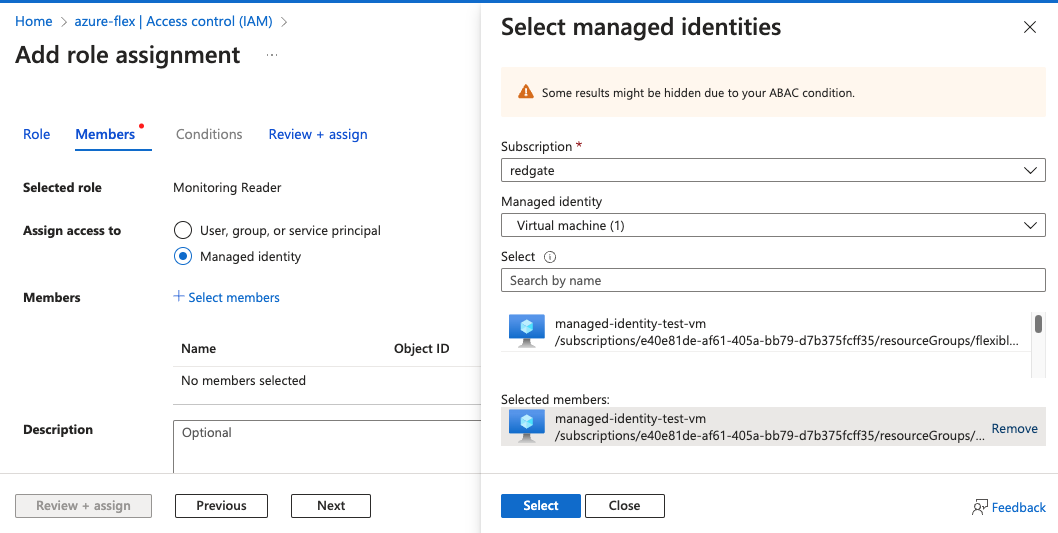
- In the "Members" tab of the "Add role assignment" page, select "Managed identity" for "Assign access to" and then click "Select members", and select the virtual machine from the earlier steps.
- In the "Review + assign" tab of the "Add role assignment page", verify that the scope refers to the Azure Flexible Server instance you intend to add to Redgate Monitor, and the virtual machine is the same as the one used in earlier steps:
- Click the "Review + assign" button again to create the role assignment. You should now be able to use host monitoring for your Azure Flex instance in Monitor.
- Select the "Access control (IAM)" sub section on the overview page for the instance:
Steps:
- In a terminal such as bash or PowerShell, login to Azure with the
az logincommand and choose the appropriate subscription that contains the Azure Flexible Server as a resource.Login to the Azure CLI
az login
- It's assumed that you already have a virtual machine running Redgate Monitor that will be used as the Base Monitor for your Flexible Server instance. If you already have a system-assigned managed identity enabled for the virtual machine you can use the following command to retrieve its object ID, which will be used later:
Retrieve VM object ID
az vm list --query "[?identity.principalId != null].{name:name, vmObjectId:identity.principalId}"

# Example command output:
[
  {
    "name": "redgate-monitor-vm",
    "vmObjectId": "12b356de-1728-498c-9488-58902e913d48"
  }
]
If you have not already added a system-assigned managed identity to the virtual machine running Redgate Monitor, you can do so using the following commands:- First, retrieve the resource ID
Retrieve the VM resource ID
az vm list --query "[].{name:name, resourceId:id}" # Example command output [ { "resourceId": "/subscriptions/e11e87fh-ga1f-005a-bb79-d7b375fcff35/resourceGroups/redgate/providers/Microsoft.Compute/virtualMachines/Monitor", "name": "Monitor" } ] - Then use the resource ID from the previous command to assign the system managed identity, and take a note of the "systemAssignedIdentity" from the response:
Assign the managed identity
# Change the "resourceId" below to the one retrieved from the previous command

az vm identity assign --ids "resourceId"

# Example command output

{
  "systemAssignedIdentity": "12a536dc-1a38-b98c-9488-58902e913d48",
  "userAssignedIdentities": {}
}
- First, retrieve the resource ID
- It also necessary to retrieve the resource ID for the Azure Flexible Server instance, which will act as the scope for our role. You can do that with the following command, which will list the Flexible Server instances and their resource IDs:
Retrieve the resource ID
az postgres flexible-server list --query "[].{name:name,flexResourceId:id}" # Example command output [ { "flexResourceId": "/subscriptions/f71d87ce-fa7f-405b-bb77-d7b375fcff34/resourceGroups/redgate/providers/Microsoft.DBforPostgreSQL/flexibleServers/azureflex", "name": "azureflex" } ] - Using the virtual machine's object ID from step 2, as well as the resource ID for your Azure flexible server instance from step 3, we can assign the built-in "Monitoring Reader" role to your app registration, which will give it access to the metrics of the database instance.
Assign a role
# Replace 'vmObjectId' in the command below with the virtual machine's object ID, and 'flexResourceId' with the resource ID retrieved in previous steps.

az role assignment create --assignee "vmObjectId" --role "Monitoring Reader" --scope "flexResourceId"
Optionally, if you wish to monitor a number of instances on the same resource group or subscription, you can increase the scope by only including the relevant sections. For example:Assign a role with a greater scope
# To give permission to monitor all instances in a resource group:
az role assignment create --assignee "vmObjectId" --role "Monitoring Reader" --scope "/subscriptions/f71d87ce-fa7f-405b-bb77-d7b375fcff34/resourceGroups/redgate"

# To give permission to monitor all instances in a subscription:
az role assignment create --assignee "vmObjectId" --role "Monitoring Reader" --scope "/subscriptions/f71d87ce-fa7f-405b-bb77-d7b375fcff34"
- You should now be able to use host monitoring for your Azure Flex instance in Monitor.
Setting up your permissions in Redgate Monitor
After following the Setting up your permissions in Azure guide above, you should be able to simply select Managed identity as the Azure API authentication method when adding a new Azure Flexible server with host monitoring enabled, or editing the credentials of an existing one:
